Attention: Here be dragons
This is the latest
(unstable) version of this documentation, which may document features
not available in or compatible with released stable versions of Godot.
Checking the stable version of the documentation...
Tu primer shader 3D
You have decided to start writing your own custom Spatial shader. Maybe you saw a cool trick online that was done with shaders, or you have found that the StandardMaterial3D isn't quite meeting your needs. Either way, you have decided to write your own and now you need to figure out where to start.
Este tutorial explicará cómo escribir un Spatial shader y cubrirá más temas que el tutorial CanvasItem.
Los Spatial shaders tienen más funcionalidad incorporada que los shaders CanvasItem. Lo que se espera de los shaders espaciales es que Godot ya ha proporcionado la funcionalidad para los casos de uso común y todo lo que el usuario necesita hacer en el shader es establecer los parámetros adecuados. Esto es especialmente cierto para un flujo de trabajo de PBR (renderización basada en la física).
This is a two-part tutorial. In this first part we will create terrain using vertex displacement from a heightmap in the vertex function. In the second part we will take the concepts from this tutorial and set up custom materials in a fragment shader by writing an ocean water shader.
Nota
Este tutorial asume algunos conocimientos básicos de shader como los tipos (vec2, float, sampler2D), y las funciones. Si te sientes incómodo con estos conceptos es mejor obtener una introducción suave de The Book of Shaders antes de completar este tutorial.
Dónde asignar mi material
En 3D, los objetos se dibujan usando Meshes. Las mallas son un tipo de recurso que almacena la geometría (la forma de su objeto) y los materiales (el color y cómo el objeto reacciona a la luz) en unidades llamadas "superficies". Una Malla puede tener múltiples superficies, o sólo una. Típicamente, importarías una malla de otro programa (por ejemplo, Blender). Pero Godot también tiene unos cuantos PrimitiveMeshes que te permiten añadir geometría básica a una escena sin importar las Mallas.
There are multiple node types that you can use to draw a mesh. The main one is MeshInstance3D, but you can also use GPUParticles3D, MultiMeshes (with a MultiMeshInstance3D), or others.
Typically, a material is associated with a given surface in a mesh, but some nodes, like MeshInstance3D, allow you to override the material for a specific surface, or for all surfaces.
If you set a material on the surface or mesh itself, then all MeshInstance3Ds that share that mesh will share that material. However, if you want to reuse the same mesh across multiple mesh instances, but have different materials for each instance then you should set the material on the MeshInstance3D.
For this tutorial we will set our material on the mesh itself rather than taking advantage of the MeshInstance3D's ability to override materials.
Configurar
Add a new MeshInstance3D node to your scene.
In the inspector tab, set the MeshInstance3D's Mesh property to a new
PlaneMesh resource, by clicking on <empty> and
choosing New PlaneMesh. Then expand the resource by clicking on the image of
a plane that appears.
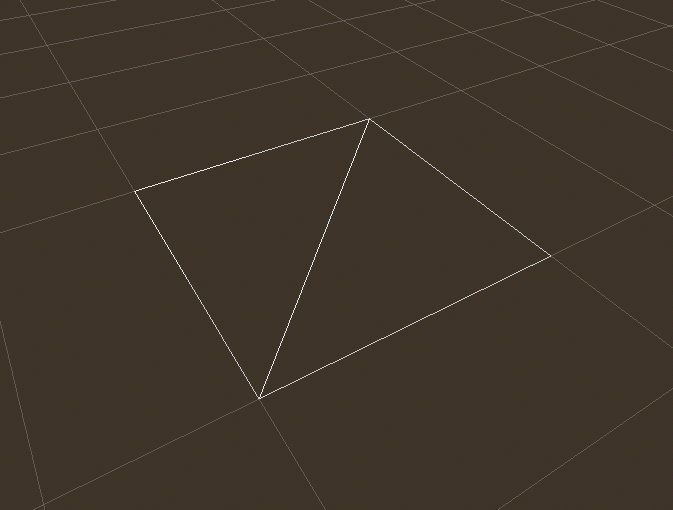
This adds a plane to our scene.
Then, in the viewport, click in the upper left corner on the Perspective button. In the menu that appears, select Display Wireframe.
Esto te permitirá ver los triángulos que componen el plano.
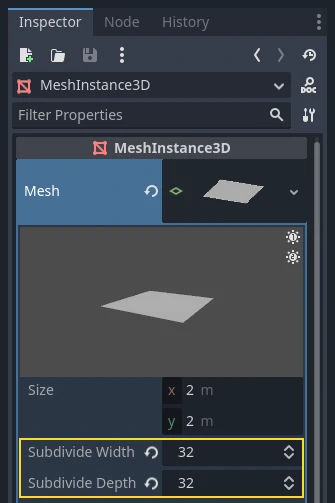
Now set Subdivide Width and Subdivide Depth of the PlaneMesh to 32.
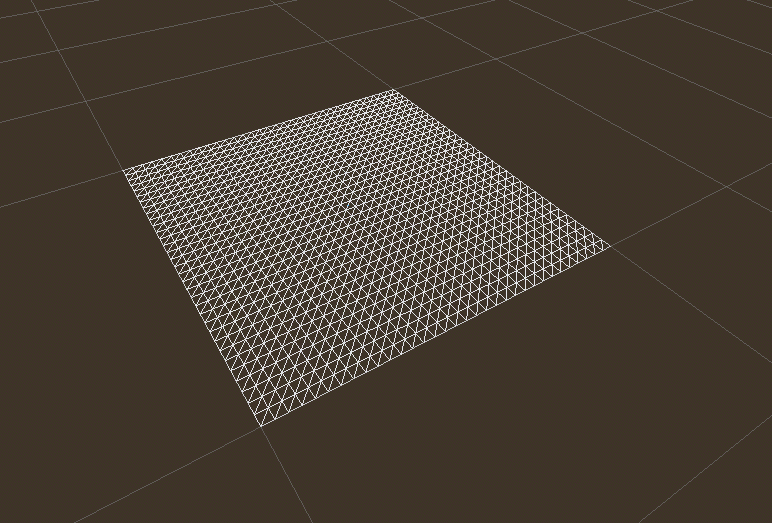
You can see that there are now many more triangles in the MeshInstance3D. This will give us more vertices to work with and thus allow us to add more detail.
PrimitiveMeshes, like PlaneMesh, only have one surface, so instead of an array of materials there is only one. Set the Material to a new ShaderMaterial, then expand the material by clicking on the sphere that appears.
Nota
Materials that inherit from the Material resource, such as StandardMaterial3D and ParticleProcessMaterial, can be converted to a ShaderMaterial and their existing properties will be converted to an accompanying text shader. To do so, right-click on the material in the FileSystem dock and choose Convert to ShaderMaterial. You can also do so by right-clicking on any property holding a reference to the material in the inspector.
Now set the material's Shader to a new Shader by clicking <empty> and
select New Shader.... Leave the default settings, give your shader a name,
and click Create.
Click on the shader in the inspector, and the shader editor should now pop up. You are ready to begin writing your first Spatial shader!
Magia Shader
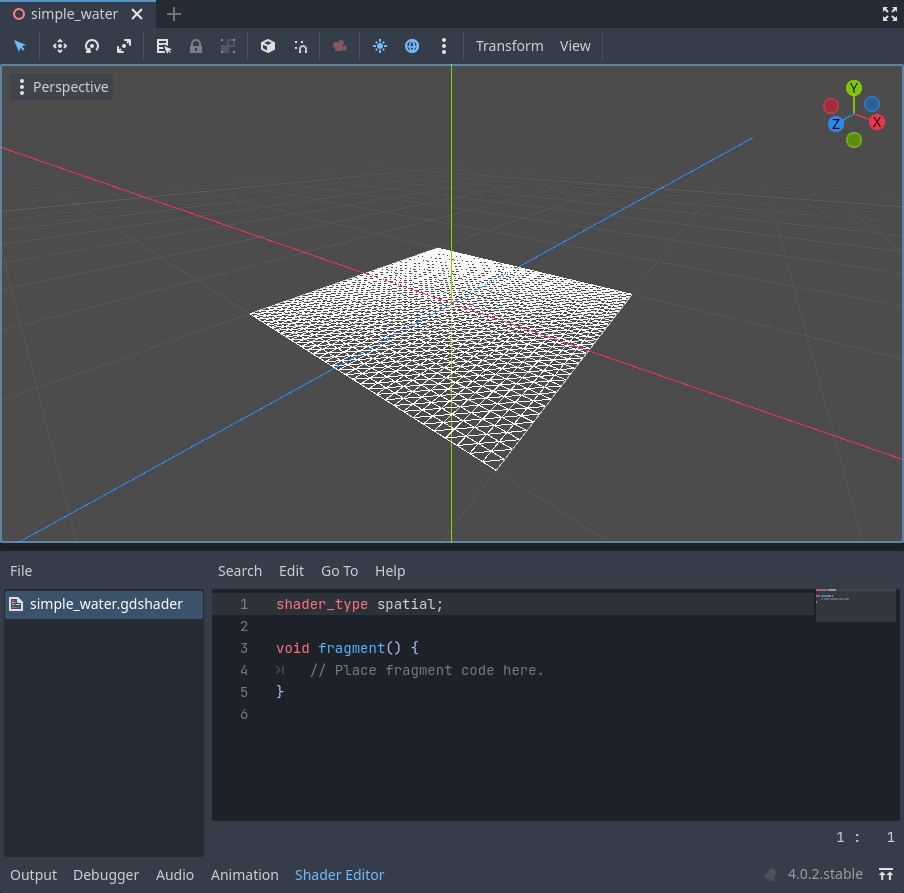
The new shader is already generated with a shader_type variable, the
vertex() function, and the fragment() function. The first thing Godot
shaders need is a declaration of what type of shader they are. In this case the
shader_type is set to spatial because this is a spatial shader.
shader_type spatial;
The vertex() function determines where the vertices of your MeshInstance3D
appear in the final scene. We will be using it to offset the height of each vertex
and make our flat plane appear like a little terrain.
With nothing in the vertex() function, Godot will use its default vertex
shader. We can start to make changes by adding a single line:
void vertex() {
  VERTEX.y += cos(VERTEX.x) * sin(VERTEX.z);
}
Añadiendo esta línea, deberías obtener una imagen como la de abajo.
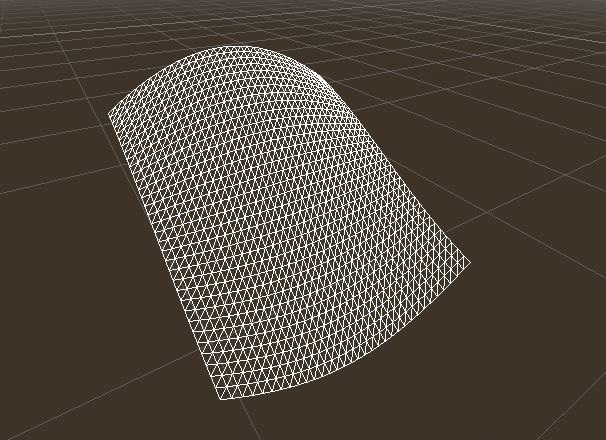
Okay, let's unpack this. The y value of the VERTEX is being increased.
And we are passing the x and z components of the VERTEX as arguments
to cos() and sin(); that gives
us a wave-like appearance across the x and z axes.
What we want to achieve is the look of little hills; after all. cos() and
sin() already look kind of like hills. We do so by scaling the inputs to the
cos() and sin() functions.
void vertex() {
  VERTEX.y += cos(VERTEX.x * 4.0) * sin(VERTEX.z * 4.0);
}
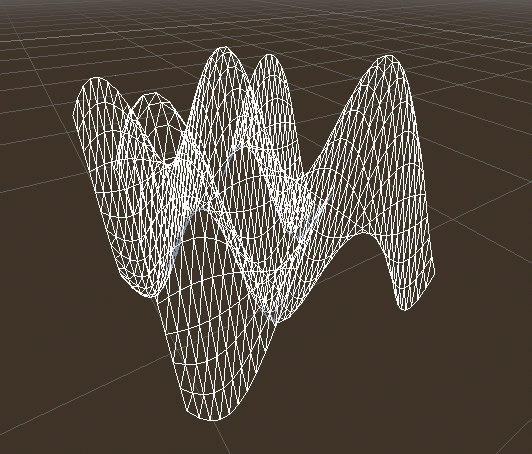
Esto se ve mejor, pero sigue siendo demasiado puntiagudo y repetitivo, hagámoslo un poco más interesante.
Mapa de altura con ruido
Noise(Ruido) es una herramienta muy popular para fingir el aspecto del terreno. Piense en ello como en la función del coseno, donde tiene colinas que se repiten, excepto que, con el ruido, cada colina tiene una altura diferente.
Godot provides the NoiseTexture2D resource for generating a noise texture that can be accessed from a shader.
Para acceder a una textura en un shader agregue el siguiente código cerca de la parte superior de su shader, fuera de la función vertex().
uniform sampler2D noise;
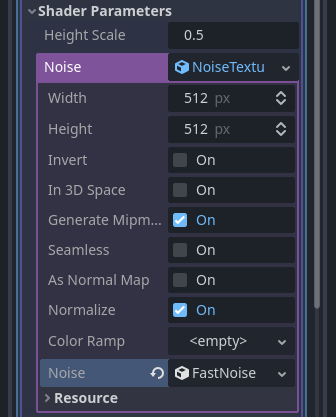
This will allow you to send a noise texture to the shader. Now look in the inspector under your material. You should see a section called Shader Parameters. If you open it up, you'll see a parameter called "Noise".
Set this Noise parameter to a new NoiseTexture2D. Then in your NoiseTexture2D, set its Noise property to a new FastNoiseLite. The FastNoiseLite class is used by the NoiseTexture2D to generate a heightmap.
Una vez que esté todo configurado, debería verse así.
Ahora, accede a la textura de ruido usando la función texture():
void vertex() {
  float height = texture(noise, VERTEX.xz / 2.0 + 0.5).x;
  VERTEX.y += height;
}
texture() takes a texture as the first argument and
a vec2 for the position on the texture as the second argument. We use the
x and z channels of VERTEX to determine where on the texture to look
up.
Since the PlaneMesh coordinates are within the [-1.0, 1.0] range (for a size
of 2.0), while the texture coordinates are within [0.0, 1.0], to remap
the coordinates we divide by the size of the PlaneMesh by 2.0 and add
0.5 .
texture() returns a vec4 of the r, g, b, a channels at the position.
Since the noise texture is grayscale, all of the values are the same, so we can
use any one of the channels as the height. In this case we'll use the r, or
x channel.
Nota
xyzw is the same as rgba in GLSL, so instead of texture().x
above, we could use texture().r. See the OpenGL documentation for more
details.
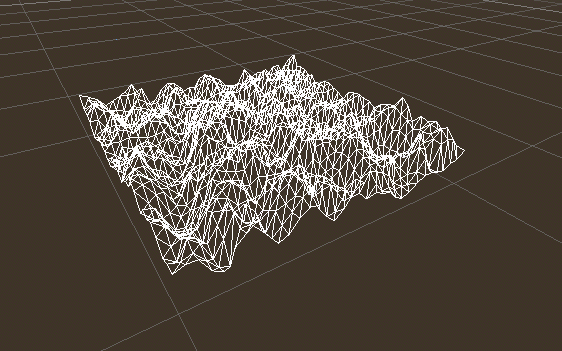
Usando este código puedes ver que la textura crea colinas de aspecto aleatorio.
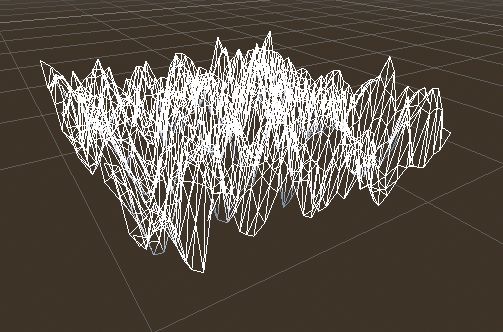
Ahora mismo es demasiado puntiagudo, queremos suavizar un poco las colinas. Para ello, usaremos un uniforme. Ya usaste un uniforme arriba para pasar la textura del ruido, ahora vamos a aprender cómo funcionan.
Uniforms
Uniform variables allow you to pass data
from the game into the shader. They are
very useful for controlling shader effects. Uniforms can be almost any datatype
that can be used in the shader. To use a uniform, you declare it in your
Shader using the keyword uniform.
Hagamos un uniforme que cambie la altura del terreno.
uniform float height_scale = 0.5;
Godot lets you initialize a uniform with a value; here, height_scale is set
to 0.5. You can set uniforms from GDScript by calling the function
set_shader_parameter()
on the material corresponding to the shader. The value passed from GDScript
takes precedence over the value used to initialize it in the shader.
# called from the MeshInstance3D
mesh.material.set_shader_parameter("height_scale", 0.5)
Nota
Changing uniforms in Spatial-based nodes is different from
CanvasItem-based nodes. Here, we set the material inside the PlaneMesh
resource. In other mesh resources you may need to first access the
material by calling surface_get_material(). While in the
MeshInstance3D you would access the material using
get_surface_material() or material_override.
Remember that the string passed into set_shader_parameter() must match the name
of the uniform variable in the shader. You can use the
uniform variable anywhere inside your shader. Here, we will
use it to set the height value instead of arbitrarily multiplying by 0.5.
VERTEX.y += height * height_scale;
Ahora se ve mucho mejor.
Using uniforms, we can even change the value every frame to animate the height of the terrain. Combined with Tweens, this can be especially useful for animations.
Interactuar con la luz
First, turn wireframe off. To do so, open the Perspective menu in the upper-left of the viewport again, and select Display Normal. Additionally in the 3D scene toolbar, turn off preview sunlight.
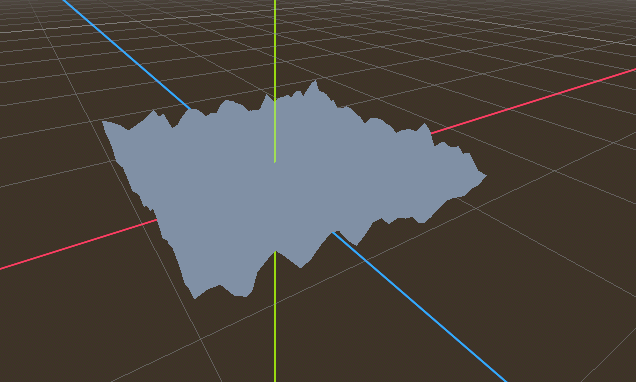
Fíjese en cómo el color de la malla se vuelve plano. Esto se debe a que la iluminación de la misma es plana. ¡Añadamos una luz!
First, we will add an OmniLight3D to the scene, and drag it up so it is above the terrain.
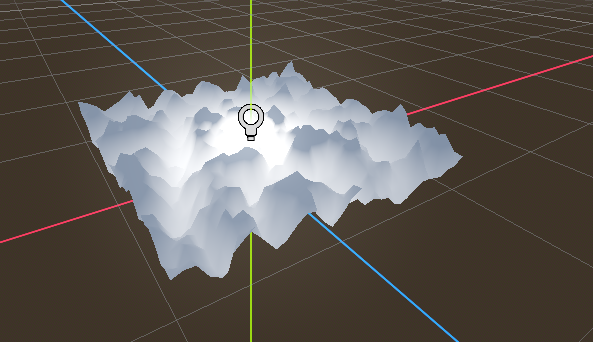
Se puede ver la luz que afecta al terreno, pero se ve rara. El problema es que la luz está afectando al terreno como si fuera plano. Esto se debe a que el shader de luz utiliza las normales de la Mesh para calcular la iluminación.
Los normales se almacenan en la Mesh, pero estamos cambiando la forma de la Malla en el shader, por lo que los normales ya no son correctos. Para arreglar esto, podemos recalcular los normales en el shader o usar una textura normal que corresponda a nuestro ruido. Godot hace ambas cosas fáciles para nosotros.
Puedes calcular la nueva normalidad manualmente en la función de vértice y luego sólo tienes que poner "NORMAL". Con "NORMAL", Godot hará todos los cálculos de iluminación difíciles para nosotros. Cubriremos este método en la próxima parte de este tutorial, por ahora leeremos normales de una textura.
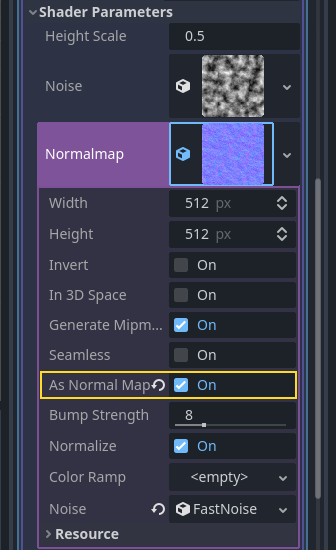
En cambio, confiaremos en el NoiseTexture de nuevo para calcular las normales por nosotros. Lo hacemos pasando una segunda textura de ruido.
uniform sampler2D normalmap;
Set this second uniform texture to another NoiseTexture2D with another FastNoiseLite. But this time, check As Normal Map.
When we have normals that correspond to a specific vertex we set NORMAL, but
if you have a normalmap that comes from a texture, set the normal using
NORMAL_MAP in the fragment() function. This way Godot will handle
wrapping the texture around the mesh automatically.
Lastly, in order to ensure that we are reading from the same places on the noise
texture and the normalmap texture, we are going to pass the VERTEX.xz
position from the vertex() function to the fragment() function. We do
that using a varying.
Above the vertex() define a varying vec2 called tex_position. And
inside the vertex() function assign VERTEX.xz to tex_position.
varying vec2 tex_position;

void vertex() {
  tex_position = VERTEX.xz / 2.0 + 0.5;
  float height = texture(noise, tex_position).x;
  VERTEX.y += height * height_scale;
}
Y ahora podemos acceder a tex_position desde la función fragment().
void fragment() {
  NORMAL_MAP = texture(normalmap, tex_position).xyz;
}
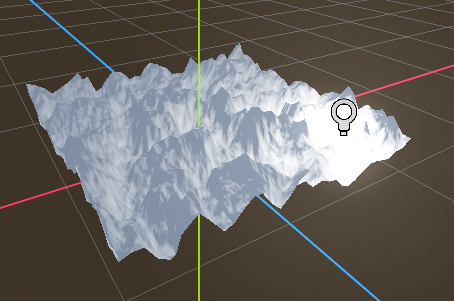
Con los normales en su lugar la luz ahora reacciona a la altura de la malla de forma dinámica.
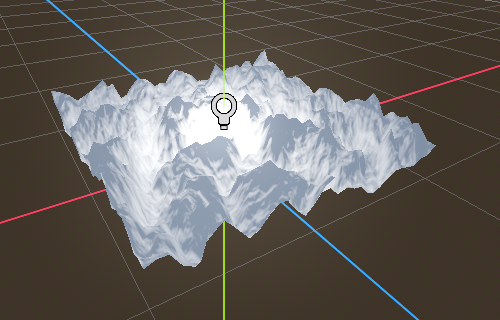
Incluso podemos arrastrar la luz y la iluminación se actualizará automáticamente.
Código completo
Aquí está el código completo de este tutorial. Puedes ver que no es muy largo ya que Godot maneja la mayoría de las cosas difíciles para ti.
shader_type spatial;

uniform float height_scale = 0.5;
uniform sampler2D noise;
uniform sampler2D normalmap;

varying vec2 tex_position;

void vertex() {
  tex_position = VERTEX.xz / 2.0 + 0.5;
  float height = texture(noise, tex_position).x;
  VERTEX.y += height * height_scale;
}

void fragment() {
  NORMAL_MAP = texture(normalmap, tex_position).xyz;
}
Eso es todo para esta parte. Esperemos que ahora entiendas lo básico de los sombreadores de vértices en Godot. En la próxima parte de este tutorial escribiremos una función de fragmento para acompañar esta función de vértice y cubriremos una técnica más avanzada para convertir este terreno en un océano de olas en movimiento.