Attention: Here be dragons
This is the latest
(unstable) version of this documentation, which may document features
not available in or compatible with released stable versions of Godot.
Checking the stable version of the documentation...
Usar Señales
En esta lección, veremos las señales. Son mensajes que emiten los nodos cuando les sucede algo específico, como que se presiona un botón. Otros nodos pueden conectarse a esa señal y llamar a una función cuando ocurra el evento.
Las señales son un mecanismo de delegación incorporado en Godot que permite a un objeto del juego reaccionar a un cambio en otro sin que se referencien entre sí. El uso de señales limita el acoplamiento y mantiene tu código flexible.
Por ejemplo, puedes tener una barra de vida en la pantalla que represente la salud del jugador. Cuando el jugador reciba daño o usa una poción curativa, querrás que la barra refleje el cambio. Para hacerlo, en Godot usarías señales.
Al igual que los métodos (Callable), las señales son un tipo de primera clase desde Godot 4.0. Esto significa que puede pasarlas como argumentos de método directamente sin tener que pasarlas como strings, lo que permite un mejor autocompletado y es menos propenso a errores. Consulta la referencia de la clase Signal para obtener una lista de lo que puede hacer con el tipo Signal directamente.
Ver también
Como se mencionó en la introducción, las señales son la versión de Godot del patrón observador. Puedes aprender más sobre esto en Patrones de Programación de Juegos.
Ahora utilizaremos una señal para hacer que nuestro icono de Godot de la lección anterior (Escuchando la entrada del jugador) se mueva y se detenga pulsando un botón.
Nota
Para este proyecto, seguiremos las convenciones de nomenclatura de Godot.
GDScript: Clases (nodos) usan PascalCase, variables y funciones utilizan snake_case, y las constantes TODO_MAYUSCULAS (Lee Guía de estilo de GDScript).
C#: Las clases, las variables de exportación y los métodos usan PascalCase, los campos privados usan _camelCase, las variables y los parámetros locales usan camelCase (Véase Guía de estilo de C#). Ten cuidado de escribir los nombres de los métodos de manera precisa al conectar señales.
Configuración de la escena
Para agregar un botón a nuestro juego, crearemos una nueva escena que incluirá tanto un Button como la escena sprite_2d.tscn que creamos en la lección Crear tu primer script.
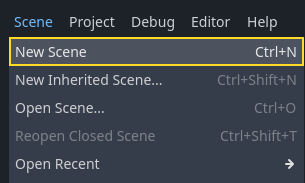
Crea una nueva escena accediendo al menú .
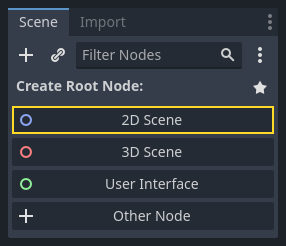
En el panel Escena, haga clic en el botón . Esto agregará un Node2D como nuestra raíz.
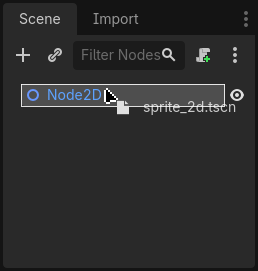
En el panel del Sistema de Archivos, haz clic y arrastra el archivo sprite_2d.tscn que se guardó previamente en el Node2D para crear una instancia.
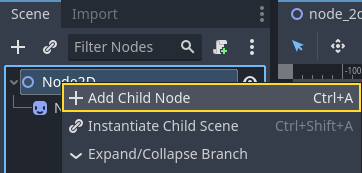
Queremos agregar otro nodo como hermano de Sprite2D. Para ello, haga clic con el botón derecho en Node2D y seleccione .
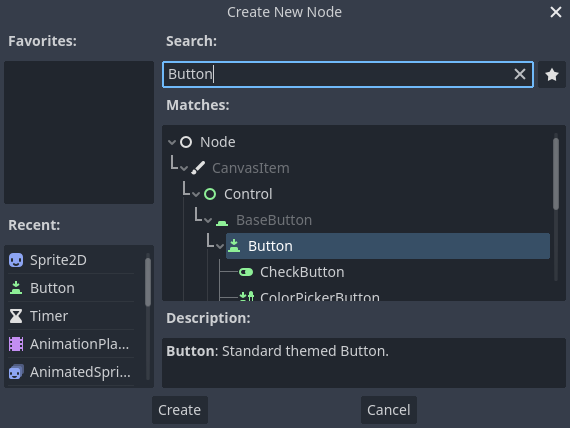
Busca el tipo de nodo Button y agrégalo.
El nodo es pequeño por defecto. Haz clic y arrastre el controlador inferior derecho del botón en el viewport para cambiar su tamaño.
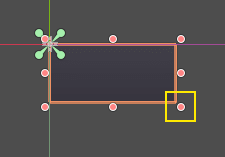
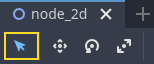
Si no ves los controladores, asegúrate de que la herramienta de selección esté activa en la barra de herramientas.
Haz clic y arrastra el botón para moverlo más cerca del sprite.
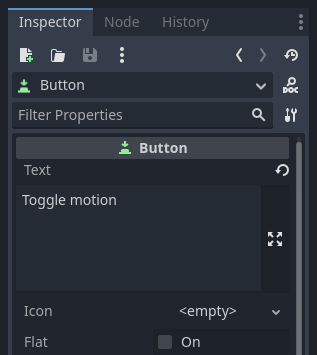
También puedes escribir una etiqueta en el botón editando su propiedad Text en el Inspector. Introduce Toggle motion.
Tu árbol de escenas y el viewport deberían verse así.
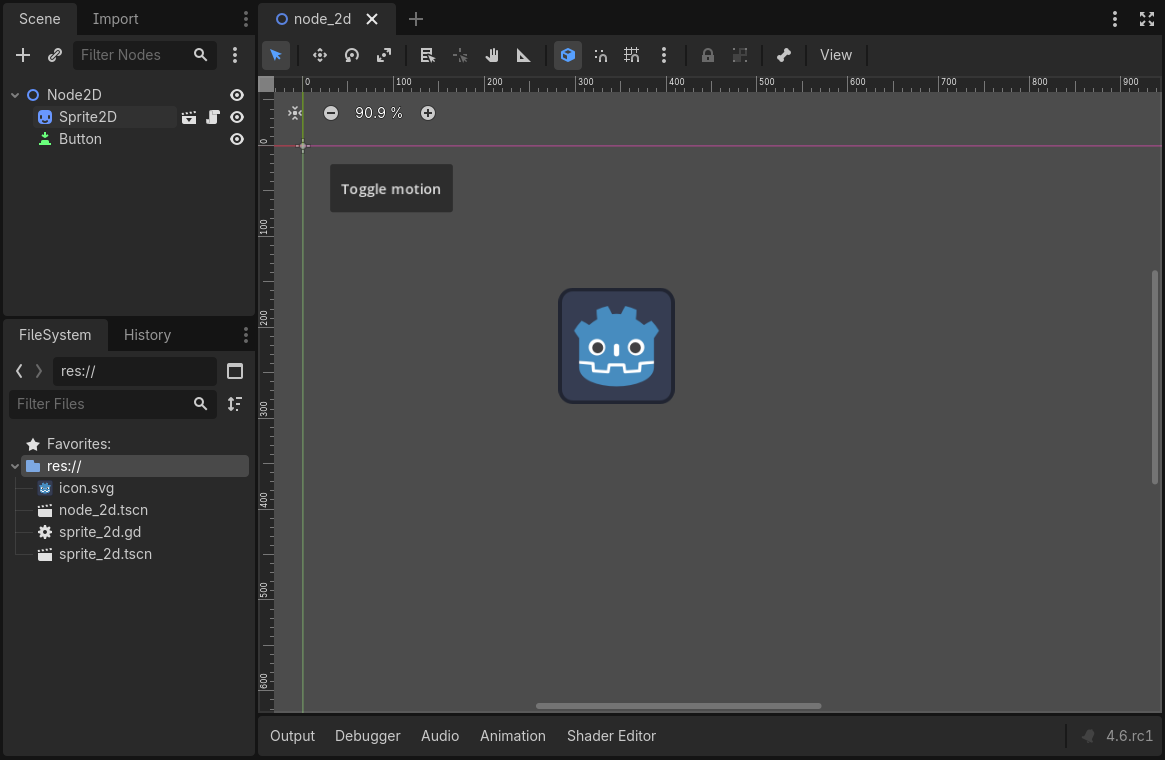
Guarda tu escena recién creada como node_2d.tscn si no lo ha hecho todavía. Tras ello, puedes ejecutarla con F6`(:kbd:`Cmd + R on macOS). Por el momento, el botón estará visible y no sucederá nada si lo pulsas.
Conexión de una señal en el editor
Aquí queremos conectar la señal "pressed" del Button a nuestro Sprite2D, y queremos llamar a una nueva función que activará y desactivará su movimiento. Necesitamos tener un script adjunto al nodo Sprite2D, lo cual hicimos en la lección anterior.
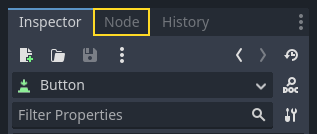
Puedes conectar señales en el panel Signals. Selecciona el nodo Button y, en el lado derecho del editor, haz clic en la pestaña llamada Signals junto a Inspector.
El panel muestra una lista de señales disponibles en el nodo seleccionado.
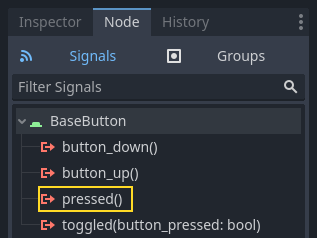
Haz doble clic en la señal "pressed" para abrir la ventana de conexión del nodo.
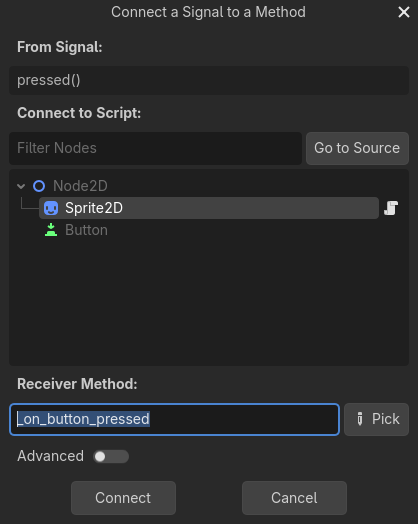
Allí puedes conectar la señal al nodo Sprite2D. El nodo necesita un método receptor, una función que Godot llamará cuando el Button emita la señal. El editor genera uno para ti. Por convención, llamamos a estos métodos de retrollamada o callback "_on_nombre_nodo_nombre_señal". Aquí, será "_on_button_pressed".
Nota
When connecting signals via the editor's Signals dock, you can use two modes. The simple one only allows you to connect to nodes that have a script attached to them and creates a new callback function on them.
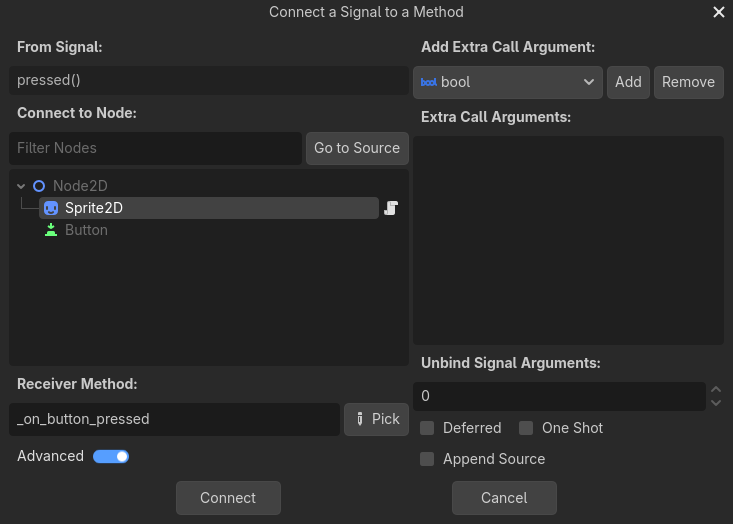
La vista avanzada le permite conectarse a cualquier nodo y a cualquier función integrada, agregar argumentos a la función de devolución de llamada y configurar opciones. Puede alternar el modo en la esquina inferior derecha de la ventana haciendo clic en el botón .
Nota
Si estás utilizando un editor externo (como VS Codium), es posible que no funcione la generación automática de código. En este caso, necesitas conectar la señal mediante código como se explica en la siguiente sección.
Haz clic en el botón para completar la conexión de la señal y acceder al espacio de trabajo Script. Deberías ver el nuevo método con un icono de conexión en el margen izquierdo.
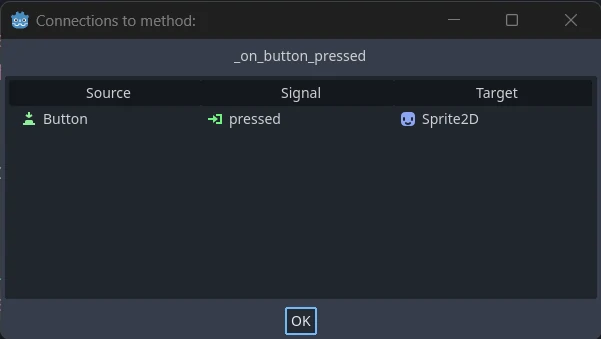
Si hace clic en el icono, aparece una ventana que muestra información sobre la conexión. Esta función solo está disponible cuando se conectan nodos en el editor.
Reemplacemos la línea con la palabra clave pass con código que cambiará el movimiento del nodo.
Nuestro Sprite2D se mueve gracias al código en la función _process(). Godot proporciona un método para activar y desactivar el procesamiento: Node.set_process(). Otro método de la clase Node, is_processing(), retorna true si el procesamiento "idle" está activo. Podemos usar la palabra clave not para invertir el valor.
func _on_button_pressed():
    set_process(not is_processing())
// We also specified this function name in PascalCase in the editor's connection window.
private void OnButtonPressed()
{
    SetProcess(!IsProcessing());
}
Esta función alternará el procesamiento y, sucesivamente, la moción del icono entre activa e inactiva tras apretar el botón.
Antes de probar el juego, debemos simplificar nuestra función _process() para mover el nodo automaticamente y no esperar un aporte del usuario. Remplazalo con el siguiente código, el cual vimos hace dos lecciones:
func _process(delta):
    rotation += angular_speed * delta
    var velocity = Vector2.UP.rotated(rotation) * speed
    position += velocity * delta
public override void _Process(double delta)
{
    Rotation += _angularSpeed * (float)delta;
    var velocity = Vector2.Up.Rotated(Rotation) * _speed;
    Position += velocity * (float)delta;
}
El código completo de``sprite_2d.gd`` debería verse como el siguiente.
extends Sprite2D

var speed = 400
var angular_speed = PI


func _process(delta):
    rotation += angular_speed * delta
    var velocity = Vector2.UP.rotated(rotation) * speed
    position += velocity * delta


func _on_button_pressed():
    set_process(not is_processing())
using Godot;

public partial class MySprite2D : Sprite2D
{
    private float _speed = 400;
    private float _angularSpeed = Mathf.Pi;

    public override void _Process(double delta)
    {
        Rotation += _angularSpeed * (float)delta;
        var velocity = Vector2.Up.Rotated(Rotation) * _speed;
        Position += velocity * (float)delta;
    }

    // We also specified this function name in PascalCase in the editor's connection window.
    private void OnButtonPressed()
    {
        SetProcess(!IsProcessing());
    }
}
Ejecuta la escena actual pulsando F6 (Cmd + R en macOS) y haz clic en el botón para ver cómo se inicia y se detiene el sprite.
Conexión de una señal a través de código
Puedes conectar señales a través de código en vez de usar el editor. Esto es necesario cuando creas nodos o representas escenas usando instancias dentro de un script.
Vamos a usar un nodo diferente aquí. Godot tiene un nodo Timer que es útil para implementar tiempos de espera para habilidades, recargas de armas, y más.
Regresa al espacio de trabajo 2D. Puedes hacer clic en el texto "2D" en la parte superior de la ventana o presionar Ctrl + F1 (Ctrl + Cmd + 1 en macOS).
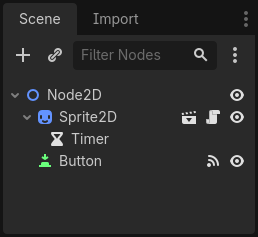
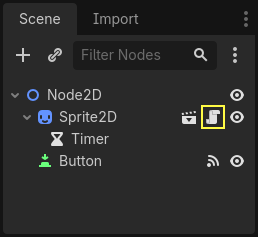
En el panel Escena, haz click con el botón derecho en el nodo Sprite2D y añade un nuevo nodo hijo. Busca Timer y añade el nodo correspondiente. Tu escena debería tener ahora este aspecto.
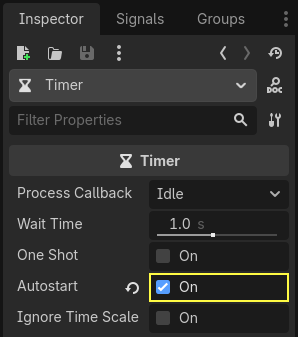
Con el nodo Temporizador seleccionado, vaya a Inspector y habilite la propiedad Autostart.
Haz clic en el icono de script junto al Sprite2D para volver al espacio de trabajo de scripts.
Debemos hacer dos operaciones para conectar los nodos con código:
Obten una referencia al Timer del Sprite2D.
Llama al método
connect()del la señal "timeout" del Timer.
Nota
Para conectar una señal con código, debes llamar al método connect() de la señal que quieras escuchar. En este caso, queremos escuchar la señal "timeout" del Timer.
Queremos conectar la señal cuando la escena es instanciada, y podemos hacerlo usando la función integrada Node._ready(), que el motor llama automáticamente cuando un nodo está completamente instanciado.
Para obtener una referencia al nodo relativo al actual, usamos el método Node.get_node(). Podemos almacenar la referencia en una variable.
func _ready():
    var timer = get_node("Timer")
public override void _Ready()
{
    var timer = GetNode<Timer>("Timer");
}
La función get_node() comprueba los hijos del Sprite2D y obtiene los nodos por su nombre. Por ejemplo, si has renombrado el nodo temporizador a "BlinkingTimer" en el editor, deberías de cambiar la llamada a get_node("BlinkingTimer").
Ahora podemos conectar el Timer al Sprite2D en la función _ready().
func _ready():
    var timer = get_node("Timer")
    timer.timeout.connect(_on_timer_timeout)
public override void _Ready()
{
    var timer = GetNode<Timer>("Timer");
    timer.Timeout += OnTimerTimeout;
}
La linea es interpretada de la siguiente manera: conectamos la señal "timeout" del Timer al nodo al cual el script está adjunto. Cuando el Timer emite "timeout", queremos ejecutar la función "_on_timer_timeout()", la cual tenemos que definir. Vamos a añadirla al final de nuestro script y usarla para alternar la visibilidad de nuestro sprite.
Nota
Por convención, en GDScript nombramos esos métodos callback como "_on_nombre_nodo_nombre_señal" y en C# como "OnNombreNodoNombreSeñal". Aquí sería "_on_timer_timeout" para GDScript y OnTimerTimeout() para C#.
func _on_timer_timeout():
    visible = not visible
private void OnTimerTimeout()
{
    Visible = !Visible;
}
La propiedad visible``es un boolean que controla la visibilidad de nuestro nodo. La línea ``visible = not visible``alterna el valor. Si ``visible es true, se vuelve false, y vice-versa.
Si ejecutas la escena ahora, verá que el sprite se enciende y se apaga, a intervalos de un segundo.
Script completo
Eso es todo para tener nuestro pequeño icono de Godot en movimiento y parpadeando. Aquí está el archivo completo sprite_2d.gd como referencia.
extends Sprite2D

var speed = 400
var angular_speed = PI


func _ready():
    var timer = get_node("Timer")
    timer.timeout.connect(_on_timer_timeout)


func _process(delta):
    rotation += angular_speed * delta
    var velocity = Vector2.UP.rotated(rotation) * speed
    position += velocity * delta


func _on_button_pressed():
    set_process(not is_processing())


func _on_timer_timeout():
    visible = not visible
using Godot;

public partial class MySprite2D : Sprite2D
{
    private float _speed = 400;
    private float _angularSpeed = Mathf.Pi;

    public override void _Ready()
    {
        var timer = GetNode<Timer>("Timer");
        timer.Timeout += OnTimerTimeout;
    }

    public override void _Process(double delta)
    {
        Rotation += _angularSpeed * (float)delta;
        var velocity = Vector2.Up.Rotated(Rotation) * _speed;
        Position += velocity * (float)delta;
    }

    // We also specified this function name in PascalCase in the editor's connection window.
    private void OnButtonPressed()
    {
        SetProcess(!IsProcessing());
    }

    private void OnTimerTimeout()
    {
        Visible = !Visible;
    }
}
Señales personalizadas
Nota
Está sección es una referencia de cómo definir y usar tus propias señales, y no se basa en el proyecto creado en lecciones anteriores.
Puedes definir señales personalizadas en un script. Digamos, por ejemplo, que desea mostrar una pantalla de derrota cuando la vida del jugador alcanza 0. Para hacerlo, podría definir una señal llamada "died" o "health_depleted" cuando su vida llegue a 0.
extends Node2D

signal health_depleted

var health = 10
using Godot;

public partial class MyNode2D : Node2D
{
    [Signal]
    public delegate void HealthDepletedEventHandler();

    private int _health = 10;
}
Nota
Como las señales representan eventos que acaban de ocurrir, generalmente usamos un verbo en pasado como nombre.
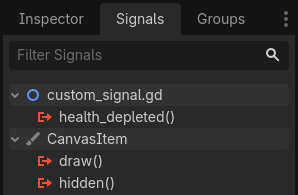
Tus señales funcionan de la misma manera que las integradas: aparecen en la pestaña Signals y puedes conectarte a ellas como a cualquier otra.
Para emitir una señal mediante código, utiliza la función emit() en la señal.
func take_damage(amount):
    health -= amount
    if health <= 0:
        health_depleted.emit()
public void TakeDamage(int amount)
{
    _health -= amount;

    if (_health <= 0)
    {
        EmitSignal(SignalName.HealthDepleted);
    }
}
Una señal puede declarar opcionalmente uno o más argumentos. Especifique los nombres de los argumentos entre paréntesis:
extends Node2D

signal health_changed(old_value, new_value)

var health = 10
using Godot;

public partial class MyNode : Node
{
    [Signal]
    public delegate void HealthChangedEventHandler(int oldValue, int newValue);

    private int _health = 10;
}
Nota
The signal arguments show up in the editor's Signals dock, and Godot can use them to generate callback functions for you. However, you can still emit any number of arguments when you emit signals. So it's up to you to emit the correct values.
Para emitir valores junto con la señal, agrégualos como argumentos extra a la función emit():
func take_damage(amount):
    var old_health = health
    health -= amount
    health_changed.emit(old_health, health)
public void TakeDamage(int amount)
{
    int oldHealth = _health;
    _health -= amount;
    EmitSignal(SignalName.HealthChanged, oldHealth, _health);
}
Resumen
Cualquier nodo en Godot emite señales cuando les sucede algo específico, como cuando se presiona un botón. Otros nodos pueden conectarse a señales individuales y reaccionar a eventos seleccionados.
Las señales tienen muchos usos. Con ellas, puedes reaccionar a un nodo que entra o sale del mundo del juego, a una colisión, a un personaje que entra o sale de un área, a un elemento de la interfaz que cambia de tamaño y mucho más.
Por ejemplo, un Area2D que representa una moneda emite una señal body_entered cada vez que el cuerpo físico del jugador entra en su forma de colisión, permitiéndote saber cuándo el jugador la recogió.
En la siguiente sección, Tu primer juego 2D, crearás un juego 2D completo y pondrás en práctica todo lo que has aprendido hasta ahora.