Attention: Here be dragons
This is the latest
(unstable) version of this documentation, which may document features
not available in or compatible with released stable versions of Godot.
Checking the stable version of the documentation...
ParticleProcessMaterial 2D 用法
處理材質屬性
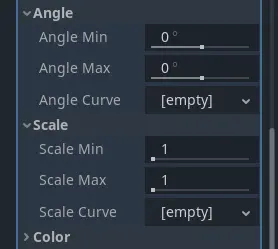
最小值、最大值與曲線屬性
這個材質中的屬性會控制粒子在其生命週期中的行為與變化。許多屬性都包含 Min、Max 和 Curve 數值,讓你能夠細緻調整粒子的表現。這些值的關係如下:每當產生一個粒子時,該屬性會設定為 Min 到 Max 之間的隨機值。如果 Min 與 Max 相同,所有粒子的該屬性都會相同。如果同時設定了 Curve,則該屬性的值會再乘上粒子生命週期當前點上曲線的值。你可以用曲線來讓屬性隨粒子生命週期變化。這樣就能表達出非常複雜的行為。
備註
本頁專門說明如何在 2D 場景中使用 ParticleProcessMaterial。若要了解 3D 場景的使用方式,請參見 處理材質屬性。
生命週期隨機性
Lifetime Randomness``(生命週期隨機性)屬性用來控制每個粒子的壽命隨機程度。值為 ``0 時,所有粒子的壽命都相同,由 Lifetime 屬性決定;值為 1 時,粒子的壽命會完全隨機地分布在 [0.0, Lifetime] 之間。
粒子旗標
生成
角度
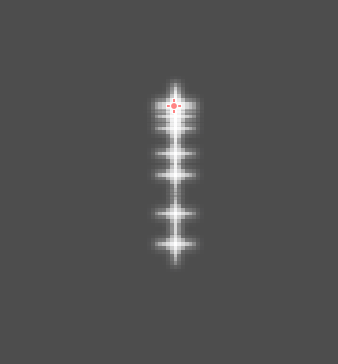
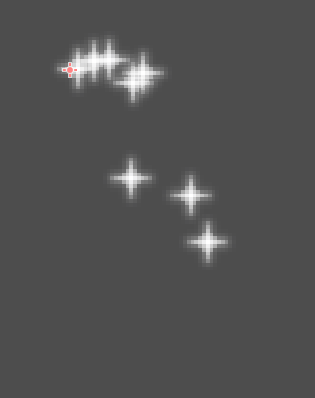
決定粒子的初始角度(單位為度)。此參數特別適合設定隨機值時使用。
速度
方向
這是粒子發射的基礎方向. 預設值是 Vector3(1,0,0) , 它使粒子向右發射. 然而, 在預設的重力設定下, 粒子會直線下降.
為了讓這個屬性作用更明顯, 你需要一個大於0的 初始速度(initial velocity) . 這裡, 我們把初始速度設為40. 你會注意到粒子向右發射, 然後受重力作用下降.
發散
這個參數代表一個角度(以度為單位),會隨機加減到基礎 Direction 上。鋪散角設為 180 時,粒子將會向所有方向發射(+/- 180 度)。要讓鋪散角生效,必須將「初速度」設為大於 0。
扁平度
這個屬性只對3D粒子有用.
初速度
初始速度是粒子發射的速度(單位為像素/秒)。以後可以通過重力或其他加速度來修改速度(後述)。
動畫速度
角速度
角速度是粒子繞其中心旋轉的速度(單位:度/秒)。
環繞速度
環繞速度速度用於使粒子繞它們的中心轉動.
加速度
重力
應用於每個粒子上的重力.
線性加速度
應用於每個粒子的線性加速度.
徑向加速度
如果此加速度為正, 則粒子會向遠離發射中心加速. 如果是負的, 他們會被加速吸進去.
切向加速度
該加速度會使用從粒子到中心點的切向量, 結合徑向加速度可以做出很酷炫的效果.
阻尼
阻尼選項會對顆粒施加摩擦力, 迫使它們停止. 它特別適用於火花或爆炸, 火花或爆炸通常以高線速度開始, 然後在他們隱去時停下來.
顯示
縮放
確定粒子的初始大小.
顏色曲線
顏色
用於改變發射出來的粒子顏色.
色相變化
Variation 值設定每個粒子的初始色相變化。Variation Random 值則控制色相變化的隨機比例。
動畫
備註
只有當 GPUParticles2D 或 CPUParticles2D 節點所使用的 CanvasItemMaterial 已依 相關設定 配置時,粒子的翻頁動畫才會生效。
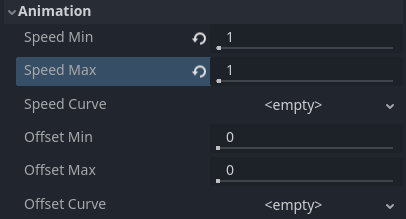
若要將粒子翻頁動畫設為線性播放,請將 Speed Min 與 Speed Max 都設為 1:
設定粒子動畫隨粒子生命週期播放
預設情況下,動畫不會循環。如果動畫播放完畢而粒子的生命週期尚未結束,粒子將會維持在翻頁動畫的最後一格(這一格可能依翻頁貼圖設計而為全透明)。若啟用循環,動畫將重回第一格並繼續播放。
根據你的貼圖集包含的影格數量與粒子的存活時間,動畫可能不會很順暢。粒子存活時間、動畫播放速度與貼圖集影格數的關係如下:
備註
當動畫速度設為 1.0 時,動畫會在粒子生命週期結束前正好播放到最後一格。
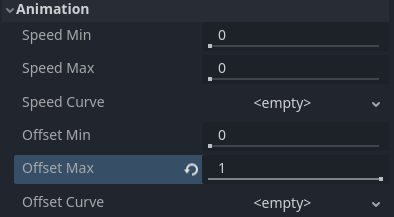
如果你想讓粒子翻頁動畫作為每顆粒子的隨機貼圖來源,請將速度設為 0,並將 Offset Max 設為 1:
設定粒子動畫於發射時隨機偏移
請注意,GPUParticles2D 節點的 Fixed FPS 也會影響動畫播放。為了保證動畫順暢,建議將其設為 0,以便每一幀都進行粒子模擬。如果無法設為 0,請將 Fixed FPS 設為與翻頁動畫實際使用的幀率相同(公式見上方)。
碰撞區域的顯示
ParticlesMaterial 可以讓你設定一個發射遮擋(Emission Mask), 它決定了粒子發射的區域和方向. 這些可以用專案中的紋理來生成.
確保設定了ParticlesMaterial, 選中Particles2D節點. 工具列中應顯示 "Particles(粒子)" 功能表:

打開它, 選擇"載入 Emission Mask(發射遮擋)":

然後選擇你想要用作遮擋的紋理:

會出現一個具有多個設定的對話方塊.
發射遮罩
紋理可以生成三種型別的發射遮擋:
Solid Pixels(實心像素): 粒子將從紋理的任何區域產生, 透明區域除外.
Border Pixels(邊界像素): 粒子將從紋理的外邊緣產生.

Directed Border Pixels(定向邊界像素): 類似於邊界像素, 在遮罩中新增額外的資訊, 使粒子能夠從邊緣發射出去. 請注意, 想要使用它, 需要設定一個
初始速度.
發射色彩
Capture from Pixel 會使粒子在其產生點處繼承遮擋材質的顏色.
當你點擊「確定」後,遮罩會被產生並自動指定到 ParticleProcessMaterial 的「生成」(Spawn)-「位置」(Position)設定中

這個部分所有提到的值, "載入Emission Mask(發射遮擋)"功能表都會自動生成, 所以通常他們放著不管就可以了.
備註
不應該直接新增圖像到 Point Texture 或 Color Texture 中. 應該始終使用"載入Emisson Mask(發射遮擋)"功能表.
Customizing the process material
If you need to change or implement new behaviors in shader code, you can do so by converting the current ParticleProcessMaterial to a ShaderMaterial. Existing properties are preserved by the conversion process. Features that are enabled will also affect what's present in the converted shader code.
To do so, right-click on the material in the FileSystem dock and choose Convert to ShaderMaterial. You can also do so by right-clicking on any property holding a reference to the material in the inspector.