Attention: Here be dragons
This is the latest
(unstable) version of this documentation, which may document features
not available in or compatible with released stable versions of Godot.
Checking the stable version of the documentation...
建立內容
是時候來做一些讓玩家閃躲的敵人了。這些敵人的行為不會很複雜:怪物會隨機在螢幕的邊緣產生,接著隨機選一個方向來直線移動。
我們來建立一個 Mob (怪物) 場景,我們利用這個場景來在遊戲中 實體化 多個獨立的怪物。
設定節點
點擊 [場景] -> [新增場景],然後新增下列節點:
RigidBody2D (設定名稱為
Mob)
Don't forget to set the children so they can't be selected, like you did with
the Player scene. This is done by selecting the parent node (RigidBody2D) in the
Scene tree dock, then using the button at the top of the 2D editor
(Ctrl + G or Cmd + G on macOS).
選取 Mob 節點,並在屬性檢視器的 RigidBody2D 區塊中,將其 Gravity Scale 屬性設定為 0 。這會阻止怪物向下墜落。
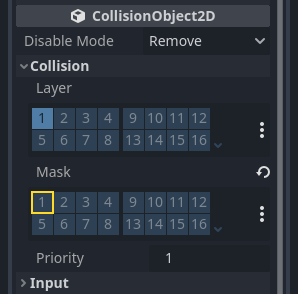
In addition, in the Mob node inspector,
under the CollisionObject2D
section, expand the Collision group and
uncheck the 1 inside the Mask property.
This will ensure the mobs do not collide with each other.
像設定玩家那樣設定 AnimatedSprite2D。這次我們有三個動畫: fly (飛行)、 swim (游泳)和 walk (行走)。每個動畫的圖片各有兩張,都在美術資料夾裡。
必須為每個單獨動畫設定 動畫速度 屬性,將三個動畫的對應動畫速度值都調整為 3 。
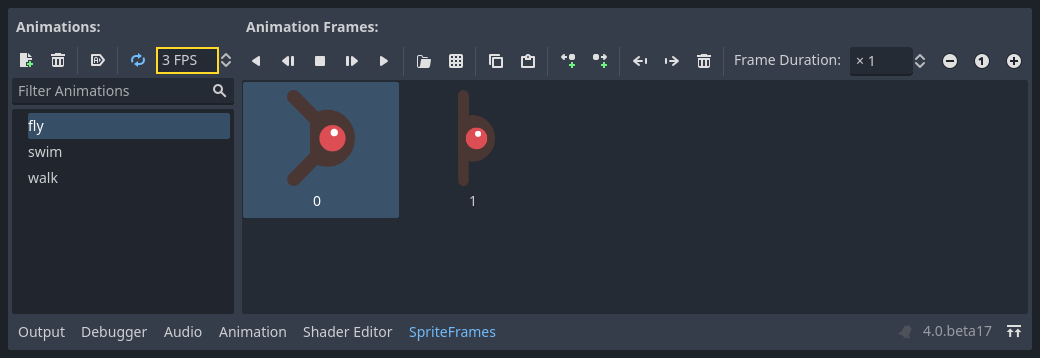
你可以使用 動畫速度 輸入區域右側的“播放動畫”按鈕預覽動畫。
接著我們會隨機選擇其中一個動畫來播放,這樣才不會讓所有怪物看起來都一樣。
就像玩家的圖片一樣,這些怪物的圖片也需要縮小。將 AnimatedSprite 的 Scale (縮放) 屬性設為 (0.75, 0.75) 。
如同 Player 場景一樣,為碰撞新增一個 CapsuleShape2D 。為了讓形狀與圖像對齊,你需要將 Rotation 屬性設定為 90 (在 Inspector 的「Transform」(變形)下方)。
保存場景。
敵人腳本
為 Mob 新增一個腳本,並新增下列成員變數:
extends RigidBody2D
using Godot;

public partial class Mob : RigidBody2D
{
    // Don't forget to rebuild the project.
}
現在來看看腳本剩下的部分。我們在 _ready() 中隨機在三種動畫中選擇一個:
func _ready():
    var mob_types = Array($AnimatedSprite2D.sprite_frames.get_animation_names())
    $AnimatedSprite2D.animation = mob_types.pick_random()
    $AnimatedSprite2D.play()
public override void _Ready()
{
    var animatedSprite2D = GetNode<AnimatedSprite2D>("AnimatedSprite2D");
    string[] mobTypes = animatedSprite2D.SpriteFrames.GetAnimationNames();
    animatedSprite2D.Play(mobTypes[GD.Randi() % mobTypes.Length]);
}
首先,我們從 AnimatedSprite2D 的 sprite_frames 屬性取得動畫名稱的列表。這會回傳一個包含所有三個動畫名稱的陣列: ["walk", "swim", "fly"] 。
在 GDScript 程式碼中,我們使用 Array.pick_random 方法來隨機選擇其中一個動畫名稱。同時,在 C# 程式碼中,我們挑選一個介於 0 和 2 之間的隨機數字,從列表(陣列索引從 0 開始)中選擇其中一個名稱。運算式 GD.Randi() % n 會選擇一個介於 0 和 n-1 之間的隨機整數。
最後,呼叫 play() 以開始播放選定的動畫。
最後我們來讓怪物在離開畫面後刪除自己。連接 VisibilityNotifier2D 節點的 screen_exited() 訊號,並新增這段程式碼:
func _on_visible_on_screen_notifier_2d_screen_exited():
    queue_free()
// We also specified this function name in PascalCase in the editor's connection window.
private void OnVisibleOnScreenNotifier2DScreenExited()
{
    QueueFree();
}
queue_free() 是一個函式,其本質是在影格結束時「釋放」或刪除節點。
這樣就完成了 Mob 場景。
玩家和敵人已經準備就緒,接下來,我們將在一個新的場景中把他們放到一起。我們將使敵人在遊戲台上隨機生成並前進,我們的專案將變成一個能玩的遊戲。