Attention: Here be dragons
This is the latest
(unstable) version of this documentation, which may document features
not available in or compatible with released stable versions of Godot.
Checking the stable version of the documentation...
輸入範例
前言
本教學將帶你學習如何使用 Godot 的 InputEvent 系統來捕捉玩家輸入。你的遊戲可能會用到多種不同的輸入類型——例如鍵盤、手把、滑鼠等等——以及各種將這些輸入轉換為遊戲行動的方法。本文將介紹一些最常見的情境,幫助你作為自己專案的起點。
備註
若想進一步了解 Godot 輸入事件系統的運作方式,請參閱 使用 InputEvent。
事件與輪詢
有時你會希望遊戲對特定輸入事件有反應——像是按下「跳躍」鍵。其他時候,你可能希望只要某個按鍵有被按住(例如移動),就持續發生某些動作。第一種情況可以使用 _input() 方法,當有輸入事件發生時會自動呼叫;第二種情況則可利用 Input 單例來查詢輸入狀態。
範例:
func _input(event):
    if event.is_action_pressed("jump"):
        jump()


func _physics_process(delta):
    if Input.is_action_pressed("move_right"):
        # Move as long as the key/button is pressed.
        position.x += speed * delta
public override void _Input(InputEvent @event)
{
    if (@event.IsActionPressed("jump"))
    {
        Jump();
    }
}

public override void _PhysicsProcess(double delta)
{
    if (Input.IsActionPressed("move_right"))
    {
        // Move as long as the key/button is pressed.
        position.X += speed * (float)delta;
    }
}
這讓你可以更加彈性地混合處理不同類型的輸入方式。
接下來的教學將著重於用 _input() 捕捉單一事件。
輸入事件
輸入事件是繼承自 InputEvent 的物件。根據事件型別,物件會包含該事件專屬的屬性。若要觀察事件本體,請新增一個節點並掛上以下腳本:
extends Node


func _input(event):
    print(event.as_text())
using Godot;

public partial class Node : Godot.Node
{
    public override void _Input(InputEvent @event)
    {
        GD.Print(@event.AsText());
    }
}
當你按下按鍵、移動滑鼠或進行其他輸入時,所有事件都會在輸出視窗中依序顯示。以下是範例輸出:
A
Mouse motion at position ((971, 5)) with velocity ((0, 0))
Right Mouse Button
Mouse motion at position ((870, 243)) with velocity ((0.454937, -0.454937))
Left Mouse Button
Mouse Wheel Up
A
B
Shift
Alt+Shift
Alt
Shift+T
Mouse motion at position ((868, 242)) with velocity ((-2.134768, 2.134768))
如你所見,不同類型的輸入有著完全不同的事件內容。鍵盤事件甚至會直接列印對應的按鍵符號。例如,InputEventMouseButton 就繼承自以下類別:
InputEvent —— 所有輸入事件的基底類別
InputEventWithModifiers —— 增加檢查修飾鍵(如 Shift 或 Alt)是否按下的能力。
InputEventMouse —— 提供滑鼠事件屬性,如
positionInputEventMouseButton —— 包含被按下的按鈕索引值,以及是否為雙擊等資訊。
小訣竅
建議在處理事件時隨時參考官方類別說明,方便查詢各型別事件可用的屬性與方法。
如果你嘗試存取某個輸入型別沒有的屬性(例如在 InputEventKey 上取用 position),會發生錯誤。為避免這種情況,請務必先檢查事件型別:
func _input(event):
    if event is InputEventMouseButton:
        print("mouse button event at ", event.position)
public override void _Input(InputEvent @event)
{
    if (@event is InputEventMouseButton mouseEvent)
    {
        GD.Print("mouse button event at ", mouseEvent.Position);
    }
}
輸入映射表
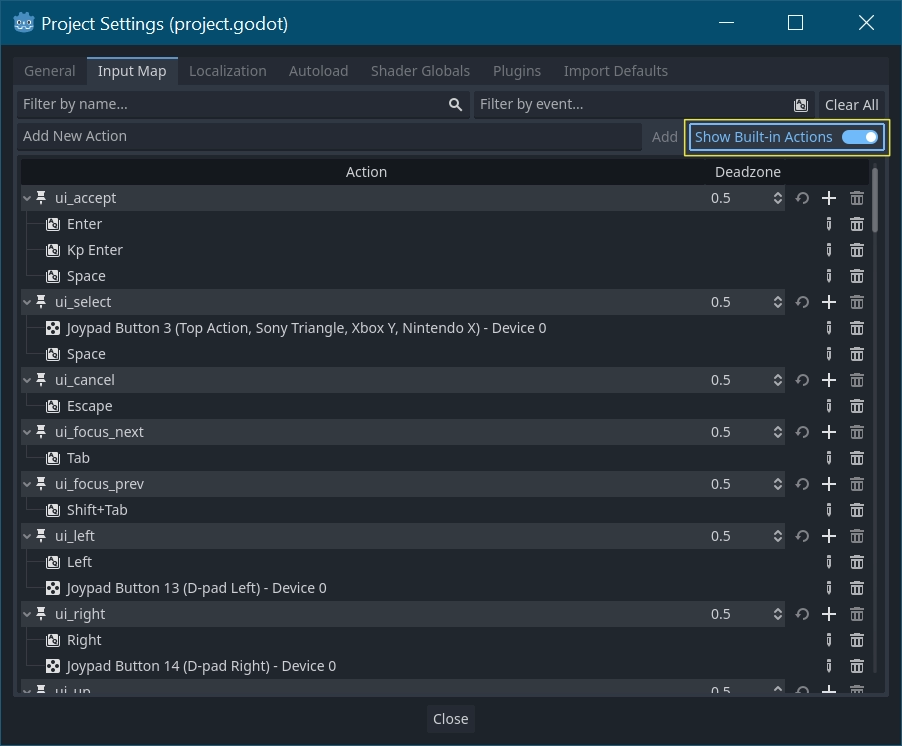
InputMap 是處理多元輸入的最彈性方式。你可以建立具名的輸入「動作」,並將多組輸入事件(如按鍵、滑鼠點擊等)對應到這些動作。要查看和新增自訂動作,請進入「專案」→「專案設定」,點選「InputMap」分頁:
小訣竅
A new Godot project includes a number of default actions already defined. To see them, turn on in the InputMap dialog.
While not strictly required, it's recommended to use the snake_case naming
convention for input action names.
處理動作
定義好動作後,你可以在腳本中用 is_action_pressed() 和 is_action_released() 這兩個方法,傳入動作名稱來判斷動作是否觸發:
func _input(event):
    if event.is_action_pressed("my_action"):
        print("my_action occurred!")
public override void _Input(InputEvent @event)
{
    if (@event.IsActionPressed("my_action"))
    {
        GD.Print("my_action occurred!");
    }
}
鍵盤事件
鍵盤事件會以 InputEventKey 型別捕捉。雖然建議盡量改用輸入動作,但有時你可能需要直接判斷個別按鍵。以下為偵測 T 按鍵的範例:
func _input(event):
    if event is InputEventKey and event.pressed:
        if event.keycode == KEY_T:
            print("T was pressed")
public override void _Input(InputEvent @event)
{
    if (@event is InputEventKey keyEvent && keyEvent.Pressed)
    {
        if (keyEvent.Keycode == Key.T)
        {
            GD.Print("T was pressed");
        }
    }
}
小訣竅
請參考 @GlobalScope_Key 取得按鍵常數列表。
警告
由於 鍵盤鬼影現象(ghosting),如果同時按下太多按鍵,部分按鍵輸入可能不會被正確偵測。根據按鍵在鍵盤上的位置,有些按鍵更容易發生鬼影現象。有些鍵盤具備硬體層級的抗鬼影(anti-ghosting)功能,但低價鍵盤和筆電鍵盤通常沒有這項設計。
因此,建議設計預設鍵位配置時,需考慮到一般鍵盤(無抗鬼影功能)也能正常使用。詳情可參考 這則 Gamedev Stack Exchange 問題。
鍵盤修飾鍵
修飾鍵屬性繼承自 InputEventWithModifiers,你可以用布林值檢查修飾鍵組合。假如你希望單獨按下 T 和按下 Shift + T 會有不同反應,可以這樣寫:
func _input(event):
    if event is InputEventKey and event.pressed:
        if event.keycode == KEY_T:
            if event.shift_pressed:
                print("Shift+T was pressed")
            else:
                print("T was pressed")
public override void _Input(InputEvent @event)
{
    if (@event is InputEventKey keyEvent && keyEvent.Pressed)
    {
        switch (keyEvent.Keycode)
        {
            case Key.T:
                GD.Print(keyEvent.ShiftPressed ? "Shift+T was pressed" : "T was pressed");
                break;
        }
    }
}
小訣竅
請參考 @GlobalScope_Key 取得按鍵常數列表。
滑鼠事件
滑鼠事件繼承自 InputEventMouse,並細分為 InputEventMouseButton 和 InputEventMouseMotion 兩種型別。也就是說,所有滑鼠事件都會帶有 position 屬性。
滑鼠移動
每當滑鼠移動時,都會產生 InputEventMouseMotion 事件。可以透過 relative 屬性取得移動的距離。
以下為使用滑鼠事件拖曳 Sprite2D 節點的範例:
extends Node


var dragging = false
var click_radius = 32 # Size of the sprite.


func _input(event):
    if event is InputEventMouseButton and event.button_index == MOUSE_BUTTON_LEFT:
        if (event.position - $Sprite2D.position).length() < click_radius:
            # Start dragging if the click is on the sprite.
            if not dragging and event.pressed:
                dragging = true
        # Stop dragging if the button is released.
        if dragging and not event.pressed:
            dragging = false

    if event is InputEventMouseMotion and dragging:
        # While dragging, move the sprite with the mouse.
        $Sprite2D.position = event.position
using Godot;

public partial class MyNode2D : Node2D
{
    private bool _dragging = false;
    private int _clickRadius = 32; // Size of the sprite.

    public override void _Input(InputEvent @event)
    {
        Sprite2D sprite = GetNodeOrNull<Sprite2D>("Sprite2D");
        if (sprite == null)
        {
            return; // No suitable node was found.
        }

        if (@event is InputEventMouseButton mouseEvent && mouseEvent.ButtonIndex == MouseButton.Left)
        {
            if ((mouseEvent.Position - sprite.Position).Length() < _clickRadius)
            {
                // Start dragging if the click is on the sprite.
                if (!_dragging && mouseEvent.Pressed)
                {
                    _dragging = true;
                }
            }
            // Stop dragging if the button is released.
            if (_dragging && !mouseEvent.Pressed)
            {
                _dragging = false;
            }
        }
        else
        {
            if (@event is InputEventMouseMotion motionEvent && _dragging)
            {
                // While dragging, move the sprite with the mouse.
                sprite.Position = motionEvent.Position;
            }
        }
    }
}
觸控事件
如果你使用觸控螢幕裝置,會產生觸控事件。InputEventScreenTouch 相當於滑鼠點擊事件,而 InputEventScreenDrag 則與滑鼠移動事件相似。
小訣竅
若想在非觸控螢幕裝置上測試觸控事件,請於專案設定 > Input Devices/Pointing 區段中,啟用「Emulate Touch From Mouse」(滑鼠模擬觸控)。這樣專案就會將滑鼠點選與移動視為觸控事件。