Attention: Here be dragons
This is the latest
(unstable) version of this documentation, which may document features
not available in or compatible with released stable versions of Godot.
Checking the stable version of the documentation...
視覺化著色器外掛
視覺化著色器外掛用於在 GDScript 中建立自訂的 VisualShader 節點。
建立流程與一般的編輯器外掛不同。你不需要建立 plugin.cfg 檔來註冊,只要建立並儲存腳本檔案,並透過 class_name 註冊自訂節點後,即可直接使用。
這篇簡短的教學將說明如何建立一個 Perlin-3D 雜訊節點(原始碼來自 GPU Noise Shaders 外掛)。
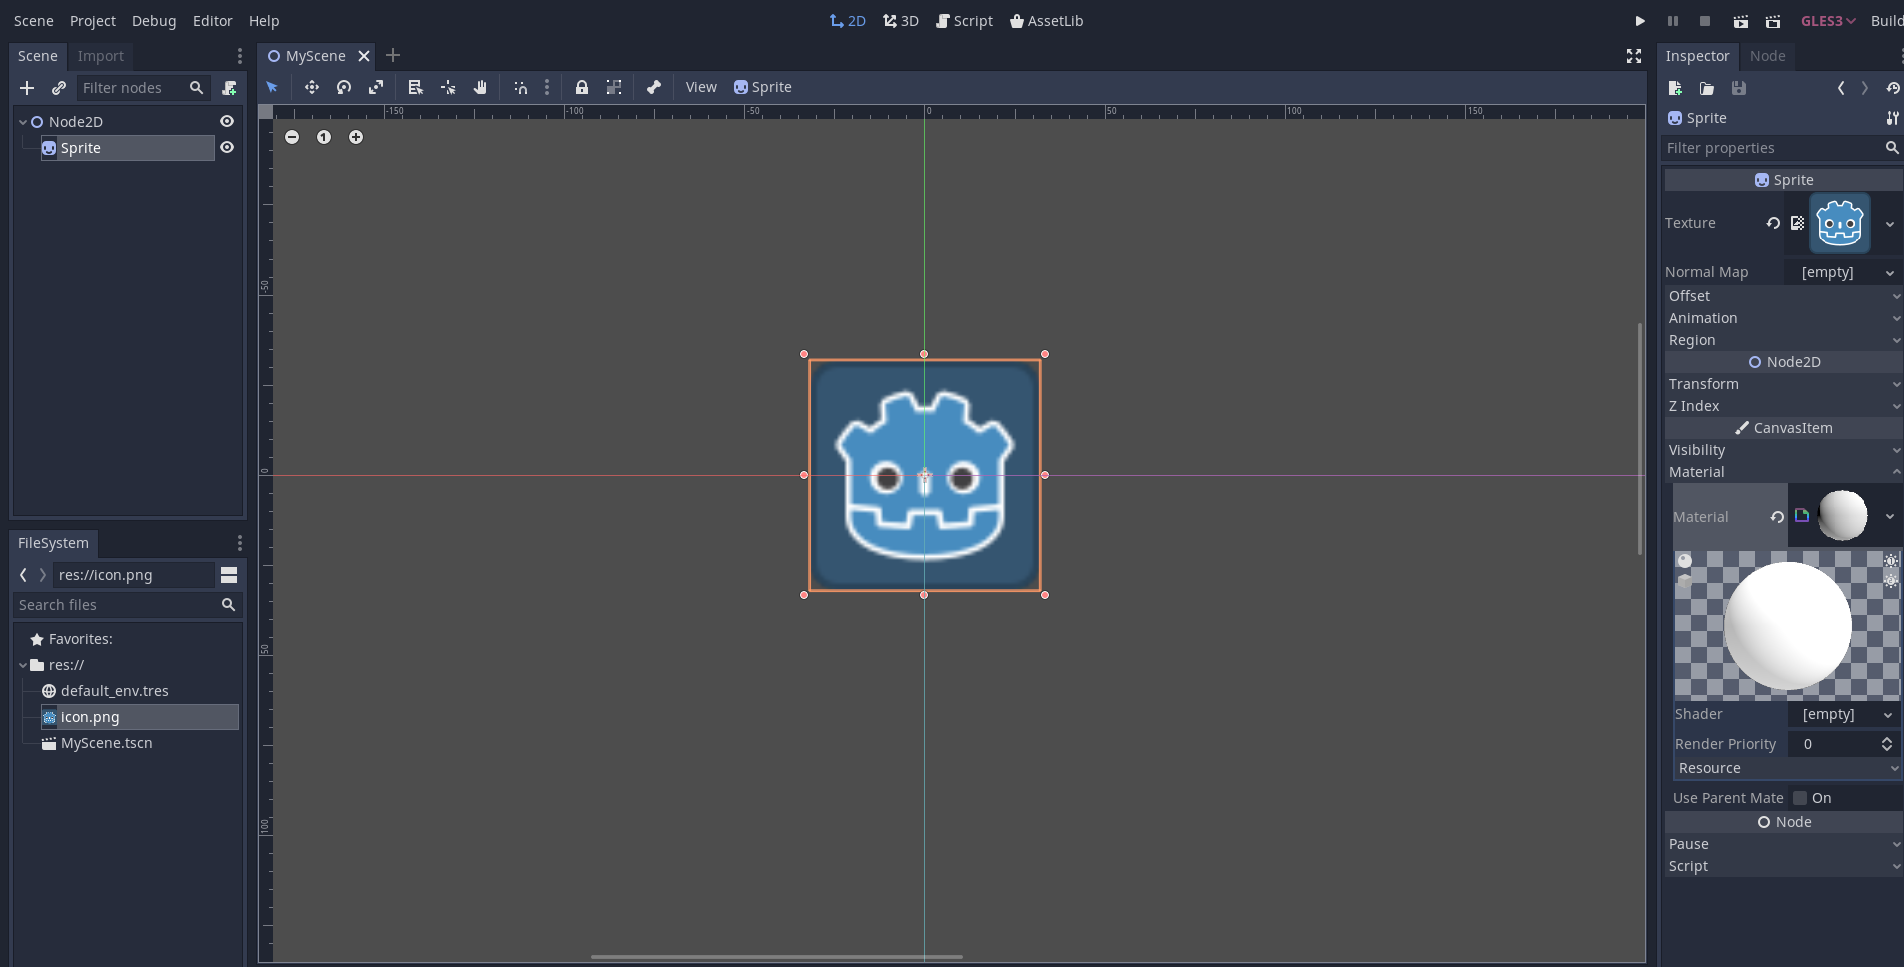
建立一個 Sprite2D,然後將 ShaderMaterial 指定到其材質插槽:
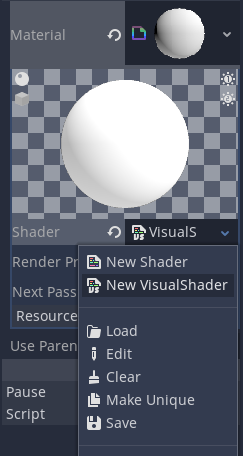
將 VisualShader 指定到該材質的著色器插槽:
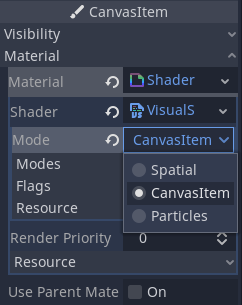
別忘了把其模式設為「CanvasItem」(如果你使用的是 Sprite2D):
建立一個繼承自 VisualShaderNodeCustom 的腳本。這就是初始化外掛所需的全部步驟。
# perlin_noise_3d.gd
@tool
extends VisualShaderNodeCustom
class_name VisualShaderNodePerlinNoise3D


func _get_name():
    # This must be a valid identifier and should follow PascalCase naming conventions.
    # The name must start with a letter, and spaces in the name are *not* allowed.
    return "PerlinNoise3D"


func _get_category():
    # This must be a valid identifier and should follow PascalCase naming conventions.
    # The category must start with a letter, and spaces in the category are *not* allowed.
    return "MyShaderNodes"


func _get_description():
    return "Classic Perlin-Noise-3D function (by Curly-Brace)"


func _init():
    set_input_port_default_value(2, 0.0)


func _get_return_icon_type():
    return VisualShaderNode.PORT_TYPE_SCALAR


func _get_input_port_count():
    return 4


func _get_input_port_name(port):
    match port:
        0:
            return "uv"
        1:
            return "offset"
        2:
            return "scale"
        3:
            return "time"


func _get_input_port_type(port):
    match port:
        0:
            return VisualShaderNode.PORT_TYPE_VECTOR_3D
        1:
            return VisualShaderNode.PORT_TYPE_VECTOR_3D
        2:
            return VisualShaderNode.PORT_TYPE_SCALAR
        3:
            return VisualShaderNode.PORT_TYPE_SCALAR


func _get_output_port_count():
    return 1


func _get_output_port_name(port):
    return "result"


func _get_output_port_type(port):
    return VisualShaderNode.PORT_TYPE_SCALAR


func _get_global_code(mode):
    return """
        vec3 mod289_3(vec3 x) {
            return x - floor(x * (1.0 / 289.0)) * 289.0;
        }

        vec4 mod289_4(vec4 x) {
            return x - floor(x * (1.0 / 289.0)) * 289.0;
        }

        vec4 permute(vec4 x) {
            return mod289_4(((x * 34.0) + 1.0) * x);
        }

        vec4 taylorInvSqrt(vec4 r) {
            return 1.79284291400159 - 0.85373472095314 * r;
        }

        vec3 fade(vec3 t) {
            return t * t * t * (t * (t * 6.0 - 15.0) + 10.0);
        }

        // Classic Perlin noise.
        float cnoise(vec3 P) {
            vec3 Pi0 = floor(P); // Integer part for indexing.
            vec3 Pi1 = Pi0 + vec3(1.0); // Integer part + 1.
            Pi0 = mod289_3(Pi0);
            Pi1 = mod289_3(Pi1);
            vec3 Pf0 = fract(P); // Fractional part for interpolation.
            vec3 Pf1 = Pf0 - vec3(1.0); // Fractional part - 1.0.
            vec4 ix = vec4(Pi0.x, Pi1.x, Pi0.x, Pi1.x);
            vec4 iy = vec4(Pi0.yy, Pi1.yy);
            vec4 iz0 = vec4(Pi0.z);
            vec4 iz1 = vec4(Pi1.z);

            vec4 ixy = permute(permute(ix) + iy);
            vec4 ixy0 = permute(ixy + iz0);
            vec4 ixy1 = permute(ixy + iz1);

            vec4 gx0 = ixy0 * (1.0 / 7.0);
            vec4 gy0 = fract(floor(gx0) * (1.0 / 7.0)) - 0.5;
            gx0 = fract(gx0);
            vec4 gz0 = vec4(0.5) - abs(gx0) - abs(gy0);
            vec4 sz0 = step(gz0, vec4(0.0));
            gx0 -= sz0 * (step(0.0, gx0) - 0.5);
            gy0 -= sz0 * (step(0.0, gy0) - 0.5);

            vec4 gx1 = ixy1 * (1.0 / 7.0);
            vec4 gy1 = fract(floor(gx1) * (1.0 / 7.0)) - 0.5;
            gx1 = fract(gx1);
            vec4 gz1 = vec4(0.5) - abs(gx1) - abs(gy1);
            vec4 sz1 = step(gz1, vec4(0.0));
            gx1 -= sz1 * (step(0.0, gx1) - 0.5);
            gy1 -= sz1 * (step(0.0, gy1) - 0.5);

            vec3 g000 = vec3(gx0.x, gy0.x, gz0.x);
            vec3 g100 = vec3(gx0.y, gy0.y, gz0.y);
            vec3 g010 = vec3(gx0.z, gy0.z, gz0.z);
            vec3 g110 = vec3(gx0.w, gy0.w, gz0.w);
            vec3 g001 = vec3(gx1.x, gy1.x, gz1.x);
            vec3 g101 = vec3(gx1.y, gy1.y, gz1.y);
            vec3 g011 = vec3(gx1.z, gy1.z, gz1.z);
            vec3 g111 = vec3(gx1.w, gy1.w, gz1.w);

            vec4 norm0 = taylorInvSqrt(vec4(dot(g000, g000), dot(g010, g010), dot(g100, g100), dot(g110, g110)));
            g000 *= norm0.x;
            g010 *= norm0.y;
            g100 *= norm0.z;
            g110 *= norm0.w;
            vec4 norm1 = taylorInvSqrt(vec4(dot(g001, g001), dot(g011, g011), dot(g101, g101), dot(g111, g111)));
            g001 *= norm1.x;
            g011 *= norm1.y;
            g101 *= norm1.z;
            g111 *= norm1.w;

            float n000 = dot(g000, Pf0);
            float n100 = dot(g100, vec3(Pf1.x, Pf0.yz));
            float n010 = dot(g010, vec3(Pf0.x, Pf1.y, Pf0.z));
            float n110 = dot(g110, vec3(Pf1.xy, Pf0.z));
            float n001 = dot(g001, vec3(Pf0.xy, Pf1.z));
            float n101 = dot(g101, vec3(Pf1.x, Pf0.y, Pf1.z));
            float n011 = dot(g011, vec3(Pf0.x, Pf1.yz));
            float n111 = dot(g111, Pf1);

            vec3 fade_xyz = fade(Pf0);
            vec4 n_z = mix(vec4(n000, n100, n010, n110), vec4(n001, n101, n011, n111), fade_xyz.z);
            vec2 n_yz = mix(n_z.xy, n_z.zw, fade_xyz.y);
            float n_xyz = mix(n_yz.x, n_yz.y, fade_xyz.x);
            return 2.2 * n_xyz;
        }
    """


func _get_code(input_vars, output_vars, mode, type):
    return output_vars[0] + " = cnoise(vec3((%s.xy + %s.xy) * %s, %s)) * 0.5 + 0.5;" % [input_vars[0], input_vars[1], input_vars[2], input_vars[3]]
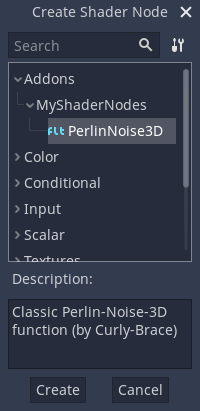
儲存後打開視覺化著色器。你應該能在「外掛」分類下的節點選單中看到你新增的節點類型(若沒有顯示,請試著重新啟動編輯器):
將它放到節點圖上並連接所需的端口:
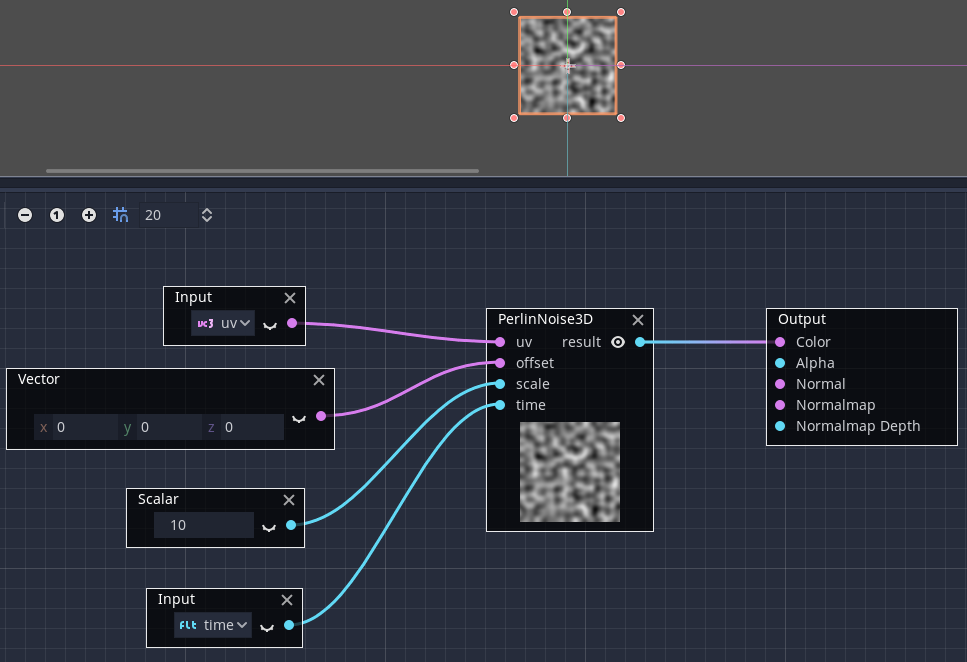
這就是所有步驟,如你所見,建立自訂的 VisualShader 節點非常簡單!