Attention: Here be dragons
This is the latest
(unstable) version of this documentation, which may document features
not available in or compatible with released stable versions of Godot.
Checking the stable version of the documentation...
分數與重玩
在這一部分中,我們會新增計分、播放音樂、重啟遊戲的能力。
我們要用一個變數來記錄目前的分數,使用最簡的介面在螢幕上顯示。我們會用文字標籤來實作。
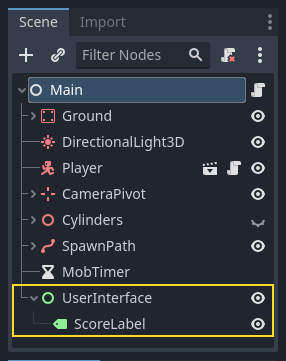
在主場景中,新增一個子節點: Control 到 Main,並將其命名為 UserInterface。請確認您位於 2D 編輯畫面,您可以在此編輯使用者介面(UI)。
新增一個 Label 節點並命名為 ScoreLabel
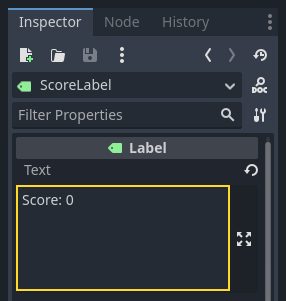
在*屬性檢視器*中將該 Label 的 Text 設為類似“Score: 0”的占位元內容。
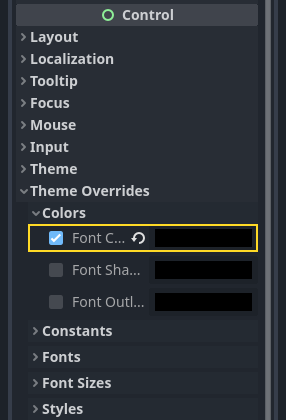
並且,文字預設是白色的,和我們的遊戲背景一樣。我們需要修改它的顏色,才能在運作時看到。
捲動到 主題覆寫(Theme Overrides),展開 顏色(Colors) 並啟用 字體顏色(Font Color) ,以將文字設為黑色(和白色 3D 場景有良好對比)
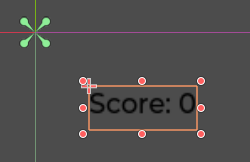
最後按一下視口中的文字,將其拖離左上角。
UserInterface 節點讓我們可以將 UI 組合到場景樹的一個分支上,並且也讓主題資源能夠傳播到它的所有子節點上。我們將會用它來設定遊戲的字形。
建立內容
再次選中 UserInterface 節點。在*屬性檢視器*中為 Theme -> Theme 建立一個新的主題資源。
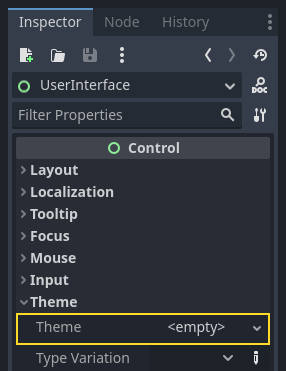
按一下這個資源就會在底部面板中打開主題編輯器。會展示使用你的主題資源時內建 UI 控制項的外觀。

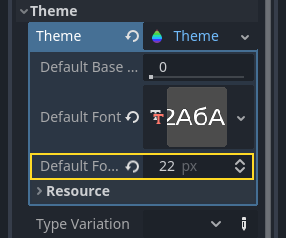
預設情況下,一個佈景主題只有幾個屬性:預設基礎縮放、預設字型 和 預設字型大小。
也參考
你可以為主題資源新增更多屬性,從而設計更複雜的使用者介面,不過這就超出本系列的範疇了。要學習主題的建立和編輯,請參閱 GUI 換膚入門。
「預設字型」需要的是您電腦上擁有的字型檔案。兩種常見的字型檔案格式是 TrueType 字型 (TTF) 和 OpenType 字型 (OTF)。
在*檔案系統*面板中,展開 fonts 目錄,按一下我們包含在專案裡的 Montserrat-Medium.ttf 檔案並將其拖放到*Default Font*(預設字形)上。文字就又會出現在主題預覽中了。
文字有一點小。將*Default Font Size*(預設字形大小)設定為 22 像素即可增大文字的大小。
追蹤得分
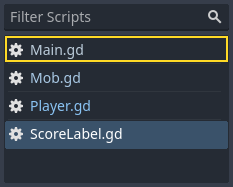
接下來處理分數。將一個新的腳本附加到 ScoreLabel 上,並定義 score 變數。
extends Label

var score = 0
using Godot;

public partial class ScoreLabel : Label
{
    private int _score = 0;
}
每踩扁一隻怪物,這個分數就應該加 1。我們可以使用它們的 squashed 訊號來得知發生的時間。不過,因為我們是用程式碼產生實體的怪物,我們無法在編輯器中將怪物的訊號連接到 ScoreLabel。
不過,我們可以在每次生成一隻怪物時通過程式碼來進行連接。
打開 main.gd 腳本。如果它還開著,你可以在腳本編輯器左欄中點擊它的名字。
另一種方法是在*檔案系統*面板中按兩下 main.gd 檔案。
在 _on_mob_timer_timeout() 函式的最後新增下面這行程式碼:
func _on_mob_timer_timeout():
    #...
    # We connect the mob to the score label to update the score upon squashing one.
    mob.squashed.connect($UserInterface/ScoreLabel._on_mob_squashed.bind())
private void OnMobTimerTimeout()
{
    // ...
    // We connect the mob to the score label to update the score upon squashing one.
    mob.Squashed += GetNode<ScoreLabel>("UserInterface/ScoreLabel").OnMobSquashed;
}
這一行的意思是,當小怪發出 squashed 訊號時,ScoreLabel 節點就會接收到並呼叫 _on_mob_squashed() 函式。
回到 score_label.gd 腳本,定義 _on_mob_squashed() 回呼函式。
這裡我們將進行加分並更新顯示的文字。
func _on_mob_squashed():
    score += 1
    text = "Score: %s" % score
public void OnMobSquashed()
{
    _score += 1;
    Text = $"Score: {_score}";
}
第二行用 score 變數的值替換預留位置 %s。使用此功能時,Godot 會自動將值轉換為字串文字,這在向標籤中輸出文字或者使用 print() 函式時非常方便。
也參考
你可以在 GDScript 格式化字串 了解更多字串格式化的資訊。在 C# 中,建議參考 使用 "$" 的字串插值。
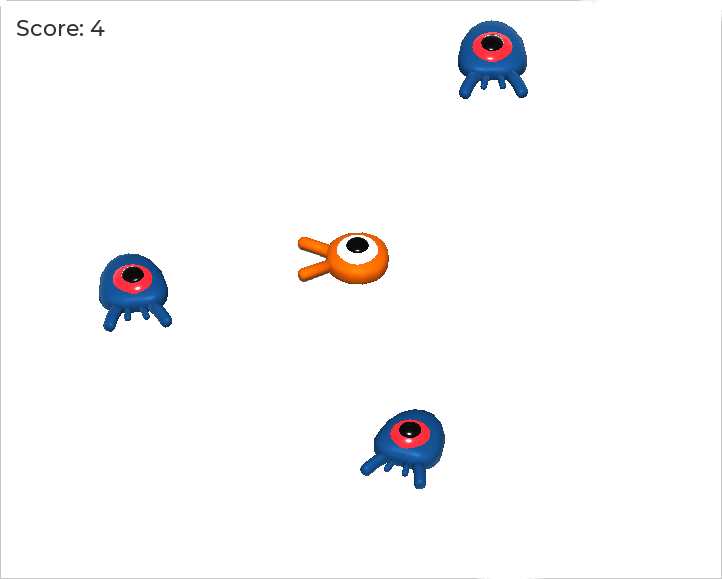
你現在可以玩遊戲,壓死幾個敵人,看看分數的增長。
備註
在一個複雜的遊戲中,你可能想把你的使用者介面與遊戲世界完全分開。在這種情況下,你就不會在標籤上記錄分數了。相反,你可能想把它儲存在一個單獨的、專門的物件中。但當原型設計或你的專案很簡單時,保持你的程式碼簡單就可以了。程式設計總是一種平衡的行為。
執行遊戲
我們現在就要新增死亡後重玩的能力。玩家死亡後,我們會在螢幕上現實一條消息並等待輸入。
回到 main.tscn 場景,選擇 UserInterface 節點,新增一個子節點 ColorRect,並命名為 Retry。這個節點會用單一顏色填滿一個矩形,並將作為覆蓋層來使畫面變暗。
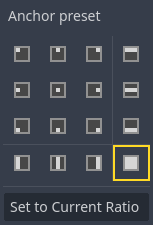
要使其覆蓋整個視口,可以使用工具列中 錨點預設 功能表。

點擊打開,並應用*整個矩形*命令。
什麼都沒發生。好吧,是幾乎什麼都沒有;只有四個綠色的大頭針移動到了選擇框的四個角落。
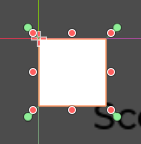
這是因為 UI 節點(圖示都是綠色)使用的是錨點和邊距,它們都相對於它們父節點包圍框。這裡的 UserInterface 節點比較小,所以 Retry 會受限於它。
選中 UserInterface 然後也對其使用*錨點預設 -> 整個矩形*。Retry 節點就應該覆蓋整個視口了。
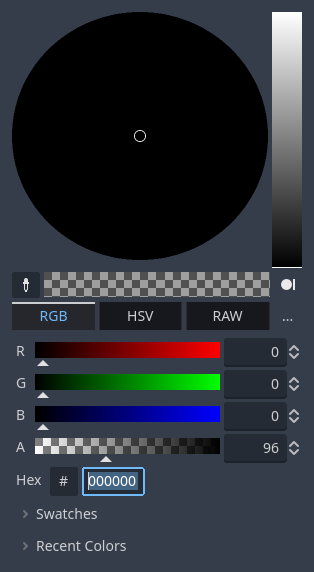
讓我們修改它的顏色,把遊戲區域變暗。選中 Retry,在*屬性檢視器*中將 Color*(顏色)設定為透明的暗色。要實作整個效果,可以在取色器中將 *A 滑動條拖到左邊。它控制的是顏色的 Alpha 通道,也就是不透明度。
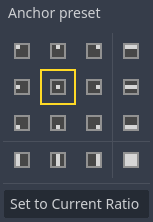
接著,在 Retry 節點下新增一個 Label 子節點,並將它的 Text 屬性設為「按下 Enter 鍵重新嘗試」。為了將它移動並錨定在畫面中央,對它套用 錨點預設 -> 居中。
複寫建置選項
我們現在就可以去編寫程式碼,在玩家死亡時顯示 Retry 節點,重玩時隱藏。
打開 main.gd 腳本。首先,我們想要在遊戲開始時隱藏覆蓋層。將這一行加到 _ready() 函式中。
func _ready():
    $UserInterface/Retry.hide()
public override void _Ready()
{
    GetNode<Control>("UserInterface/Retry").Hide();
}
然後在玩家受到攻擊時,我們就顯示這個覆蓋層。
func _on_player_hit():
    #...
    $UserInterface/Retry.show()
private void OnPlayerHit()
{
    //...
    GetNode<Control>("UserInterface/Retry").Show();
}
最後,當 Retry 節點可見時,我們需要監聽玩家的輸入,按下確認鍵時讓遊戲重啟。可以使用內建的 _unhandled_input() 回呼函式來實作,任何輸入都會觸發這個回呼函式。
如果玩家按下了預設的 ui_accept 輸入動作並且 Retry 是可見狀態,我們就重新載入目前場景。
func _unhandled_input(event):
    if event.is_action_pressed("ui_accept") and $UserInterface/Retry.visible:
        # This restarts the current scene.
        get_tree().reload_current_scene()
public override void _UnhandledInput(InputEvent @event)
{
    if (@event.IsActionPressed("ui_accept") && GetNode<Control>("UserInterface/Retry").Visible)
    {
        // This restarts the current scene.
        GetTree().ReloadCurrentScene();
    }
}
我們可以通過 get_tree() 函式存取全域 SceneTree 物件,然後用它來重新載入並重啟目前場景。
新增腳本
要新增音樂,讓音樂在後臺連續播放,我們就要用到 Godot 的另一項功能:自動載入。
要播放音訊,只需往場景裡新增一個 AudioStreamPlayer 節點,然後為它附加一個音訊檔。啟動場景時,就會自動播放。然而,如果重新載入了場景,比如我們在重玩的時候就這麼幹了,這些音訊節點也會被重設,音樂也就會從頭開始播放。
你可以使用自動載入功能來讓 Godot 在遊戲開始時自動載入節點或場景,不依賴於目前場景。你還可以用它來建立能夠全域存取的物件。
在*場景*功能表中按一下*新建場景*,或者使用目前打開的場景旁邊的 + 圖示來建立一個新場景。
點擊「建立其他節點」按鈕來建立一個 AudioStreamPlayer,並將其重新命名為 MusicPlayer。
我們在 art/ 目錄中包含了一條音樂音軌 House In a Forest Loop.ogg。按一下並把它拖放到*屬性檢視器*中的 Stream*(流)屬性上。同時要打開 *Autoplay,這樣音樂就會在遊戲開始時自動播放了。
將場景儲存為 music_player.tscn。
我們必須將它註冊為自動載入。前往 專案 -> 專案設定… 選單,然後點擊 全域 -> 自動載入 分頁。
在「路徑」欄位中,您需要輸入您的場景路徑。點擊資料夾圖示開啟檔案瀏覽器,然後雙擊 music_player.tscn。接著,點擊右側的「新增」按鈕以註冊節點。
music_player.tscn 現在會載入到您開啟或遊玩的任何場景中。所以如果您現在執行遊戲,音樂會在任何場景中自動播放。
在這一節課結束之前,我們來看一下在底層發生了什麼。運作遊戲時,你的*場景*面板會多出來兩個分頁:遠端*和*本地。
你可以在*遠端*分頁中查看運作中的遊戲的節點樹。你會看到 Main 節點以及場景中所包含的所有東西,最底部是產生實體的小怪。
頂部的是自動載入的 MusicPlayer 以及一個 root 節點,這是你的遊戲的視口。
這一節課就是這樣。在下一部分,我們會新增動畫,讓遊戲更美觀。
這是完整的 main.gd 腳本,僅供參考。
extends Node

@export var mob_scene: PackedScene

func _ready():
    $UserInterface/Retry.hide()


func _on_mob_timer_timeout():
    # Create a new instance of the Mob scene.
    var mob = mob_scene.instantiate()

    # Choose a random location on the SpawnPath.
    # We store the reference to the SpawnLocation node.
    var mob_spawn_location = get_node("SpawnPath/SpawnLocation")
    # And give it a random offset.
    mob_spawn_location.progress_ratio = randf()

    var player_position = $Player.position
    mob.initialize(mob_spawn_location.position, player_position)

    # Spawn the mob by adding it to the Main scene.
    add_child(mob)

    # We connect the mob to the score label to update the score upon squashing one.
    mob.squashed.connect($UserInterface/ScoreLabel._on_mob_squashed.bind())

func _on_player_hit():
    $MobTimer.stop()
    $UserInterface/Retry.show()

func _unhandled_input(event):
    if event.is_action_pressed("ui_accept") and $UserInterface/Retry.visible:
        # This restarts the current scene.
        get_tree().reload_current_scene()
using Godot;

public partial class Main : Node
{
    [Export]
    public PackedScene MobScene { get; set; }

    public override void _Ready()
    {
        GetNode<Control>("UserInterface/Retry").Hide();
    }

    public override void _UnhandledInput(InputEvent @event)
    {
        if (@event.IsActionPressed("ui_accept") && GetNode<Control>("UserInterface/Retry").Visible)
        {
            // This restarts the current scene.
            GetTree().ReloadCurrentScene();
        }
    }

    private void OnMobTimerTimeout()
    {
        // Create a new instance of the Mob scene.
        Mob mob = MobScene.Instantiate<Mob>();

        // Choose a random location on the SpawnPath.
        // We store the reference to the SpawnLocation node.
        var mobSpawnLocation = GetNode<PathFollow3D>("SpawnPath/SpawnLocation");
        // And give it a random offset.
        mobSpawnLocation.ProgressRatio = GD.Randf();

        Vector3 playerPosition = GetNode<Player>("Player").position;
        mob.Initialize(mobSpawnLocation.Position, playerPosition);

        // Spawn the mob by adding it to the Main scene.
        AddChild(mob);

        // We connect the mob to the score label to update the score upon squashing one.
        mob.Squashed += GetNode<ScoreLabel>("UserInterface/ScoreLabel").OnMobSquashed;
    }

    private void OnPlayerHit()
    {
        GetNode<Timer>("MobTimer").Stop();
        GetNode<Control>("UserInterface/Retry").Show();
    }
}