Attention: Here be dragons
This is the latest
(unstable) version of this documentation, which may document features
not available in or compatible with released stable versions of Godot.
Checking the stable version of the documentation...
插值
插值是圖形程式設計中常見的操作,用於在兩個數值之間進行混合或過渡。插值也常用來平滑移動、旋轉等效果。作為遊戲開發者,熟悉插值能拓展你的開發視野。
基本概念是要從 A 過渡到 B。t 值代表介於兩者之間的狀態。
例如,當 t 為 0 時,狀態為 A;當 t 為 1 時,狀態為 B。介於兩者之間的任何數值都是 插值。
在兩個實數(浮點數)之間,插值可以描述為:
interpolation = A * (1 - t) + B * t
通常簡化為:
interpolation = A + (B - A) * t
這種以 固定速度 將一個值轉換為另一個值的插值方式稱為 線性插值 (Linear Interpolation)。當你聽到線性插值時,就是指這個公式。
還有其他類型的插值,這裡不做討論。建議之後參考 Bezier 頁面。
向量插值
向量型別(Vector2 和 Vector3)也可以進行插值,並且提供了方便的函式:Vector2.lerp() 與 Vector3.lerp()。
若是三次插值,也有 Vector2.cubic_interpolate() 和 Vector3.cubic_interpolate() ,它們執行類似 Bezier 的插值。
這是一個使用插值從 A 點移動到 B 點的偽程式碼範例:
var t = 0.0

func _physics_process(delta):
    t += delta * 0.4

    $Sprite2D.position = $A.position.lerp($B.position, t)
private float _t = 0.0f;

public override void _PhysicsProcess(double delta)
{
    _t += (float)delta * 0.4f;

    Marker2D a = GetNode<Marker2D>("A");
    Marker2D b = GetNode<Marker2D>("B");
    Sprite2D sprite = GetNode<Sprite2D>("Sprite2D");

    sprite.Position = a.Position.Lerp(b.Position, _t);
}
會產生以下的運動:
變換插值
也可以對整個變換進行插值(請確保它們有一致的縮放,或至少擁有相同的非均勻縮放)。可以使用 Transform3D.interpolate_with() 這個函式來達成。
這是一個將猴子從位置1移動到位置2的例子:
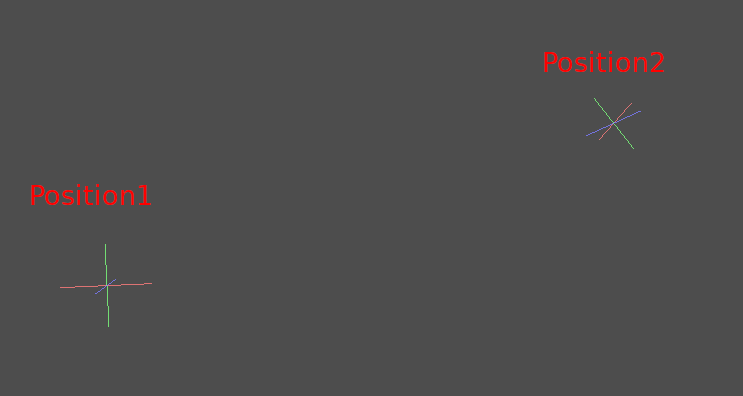
使用以下偽程式碼:
var t = 0.0

func _physics_process(delta):
    t += delta

    $Monkey.transform = $Position1.transform.interpolate_with($Position2.transform, t)
private float _t = 0.0f;

public override void _PhysicsProcess(double delta)
{
    _t += (float)delta;

    Marker3D p1 = GetNode<Marker3D>("Position1");
    Marker3D p2 = GetNode<Marker3D>("Position2");
    CSGMesh3D monkey = GetNode<CSGMesh3D>("Monkey");

    monkey.Transform = p1.Transform.InterpolateWith(p2.Transform, _t);
}
同樣會產生以下動作:
平滑運動
插值也可以用來讓物件平滑地追蹤移動中的目標值,例如位置或旋轉。在每一個畫面更新時,lerp() 會將目前的數值往目標值推進,推進的量是目前與目標之間差距的固定百分比。這樣目前的數值會逐漸靠近目標,並在接近時自動減速。以下是一個圓形使用插值平滑跟隨滑鼠的範例:
const FOLLOW_SPEED = 4.0

func _physics_process(delta):
    var mouse_pos = get_local_mouse_position()

    $Sprite2D.position = $Sprite2D.position.lerp(mouse_pos, delta * FOLLOW_SPEED)
private const float FollowSpeed = 4.0f;

public override void _PhysicsProcess(double delta)
{
    Vector2 mousePos = GetLocalMousePosition();

    Sprite2D sprite = GetNode<Sprite2D>("Sprite2D");

    sprite.Position = sprite.Position.Lerp(mousePos, (float)delta * FollowSpeed);
}
效果如下:
這種方法對於平滑攝影機移動、讓隊友跟隨玩家(確保他們保留在一定距離內),以及其他許多常見的遊戲設計都非常實用。
備註
雖然上述公式有用到 delta,但這種寫法仍然會受到幀率影響,因為 lerp() 的 weight 參數代表的是「剩餘差距的百分比」,而不是「絕對變化量」。在 _physics_process() 裡通常沒問題,因為物理更新預期會保持固定的更新率,因此 delta 會保持一致。
如果你需要一個不受幀率影響的插值平滑(可用於 process()),請改用以下公式:
const FOLLOW_SPEED = 4.0

func _process(delta):
    var mouse_pos = get_local_mouse_position()
    var weight = 1 - exp(-FOLLOW_SPEED * delta)
    $Sprite2D.position = $Sprite2D.position.lerp(mouse_pos, weight)
private const float FollowSpeed = 4.0f;

public override void _Process(double delta)
{
    Vector2 mousePos = GetLocalMousePosition();

    Sprite2D sprite = GetNode<Sprite2D>("Sprite2D");
    float weight = 1f - Mathf.Exp(-FollowSpeed * (float)delta);
    sprite.Position = sprite.Position.Lerp(mousePos, weight);
}
此公式的推導超出本頁範圍。詳細解說請參見:Improved Lerp Smoothing 或觀看 Lerp smoothing is broken。