Attention: Here be dragons
This is the latest
(unstable) version of this documentation, which may document features
not available in or compatible with released stable versions of Godot.
Checking the stable version of the documentation...
2D 粒子系統
簡介
粒子系統可用於模擬複雜的物理效果,例如火花、火焰、魔法粒子、煙霧、霧氣等。
基本概念是以固定間隔發射具有固定壽命的「粒子」。在存活期間,每個粒子的基本行為相同,但每顆粒子因為參數中的「隨機性」而呈現出不同與更自然的效果。簡單來說,建立粒子系統就是設定物理參數,再為每個參數加入隨機性。
粒子節點
Godot 提供兩種 2D 粒子節點:GPUParticles2D 和 CPUParticles2D。GPUParticles2D 較為先進,使用 GPU 處理粒子特效;CPUParticles2D 則由 CPU 處理,功能大致相同,但在大量粒子時效能較差。不過在低階設備或 GPU 效能受限時,CPUParticles2D 可能會有較佳表現。
GPUParticles2D 主要透過 ParticleProcessMaterial (也可使用自訂 Shader)來設定,而 CPUParticles2D 則是直接由節點屬性進行設定(軌跡設定除外)。
未來不打算為 CPUParticles2D 加入新功能,但會接受將 GPUParticles2D 既有功能移植過來的貢獻。因此,除非有明確理由,否則建議使用 GPUParticles2D。
你可以在場景樹中點擊 CPUParticles2D 節點,切換到 2D 工作區,然後在工具列選擇 CPUParticles2D > 轉換為 GPUParticles2D 進行轉換。
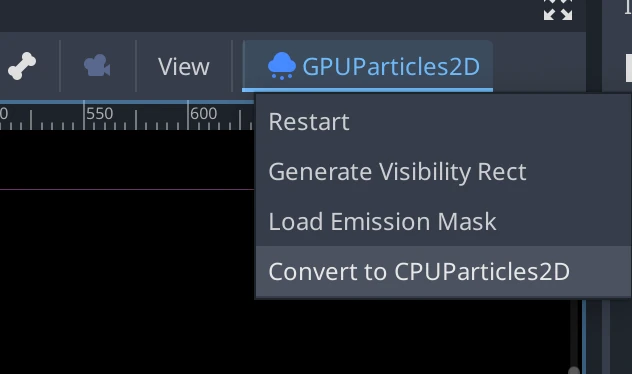
同樣也可以將 GPUParticles2D 節點轉換回 CPUParticles2D,但如果專案使用到僅限 GPU 的功能,轉換後可能會有問題。
本教學接下來將以 GPUParticles2D 節點為例。首先,將 GPUParticles2D 節點加入場景。你會發現只會出現一個白點,而且場景樹上的 GPUParticles2D 節點旁會出現警告圖示,這是因為該節點尚未設定 ParticleProcessMaterial。
ParticleProcessMaterial
要為粒子節點新增運算材質,請在屬性面板中找到 Process Material,點選 Material 右側的方框,並從下拉選單選擇 新建 ParticleProcessMaterial。

現在 GPUParticles2D 節點應該會朝下噴射出白色粒子。

貼圖
粒子系統可以使用單一貼圖或動畫翻頁(flipbook)。翻頁貼圖是一種包含多張動畫影格的圖像,可於粒子發射時依序播放或隨機選取,相當於粒子專用的精靈貼圖集(spritesheet)。
可以透過 Texture 屬性來設定貼圖:

使用動畫翻頁貼圖
粒子翻頁貼圖(flipbook)特別適合重現如煙霧、火焰、爆炸等複雜效果,也可用來讓每一顆粒子顯示不同貼圖,製造隨機變化。你可以在網路上找到現成的粒子翻頁貼圖,或用像 Blender、EmberGen 這類外部工具預先產生。
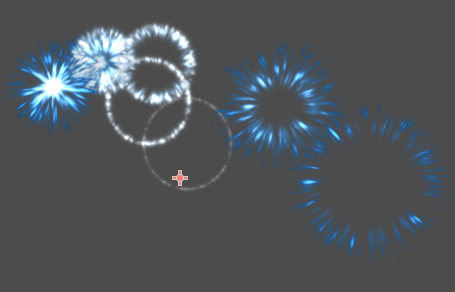
使用翻頁貼圖的粒子系統範例
使用動畫翻頁貼圖時,需要額外設定。以下以 5 欄 7 列的貼圖作為範例(可右鍵另存圖片):
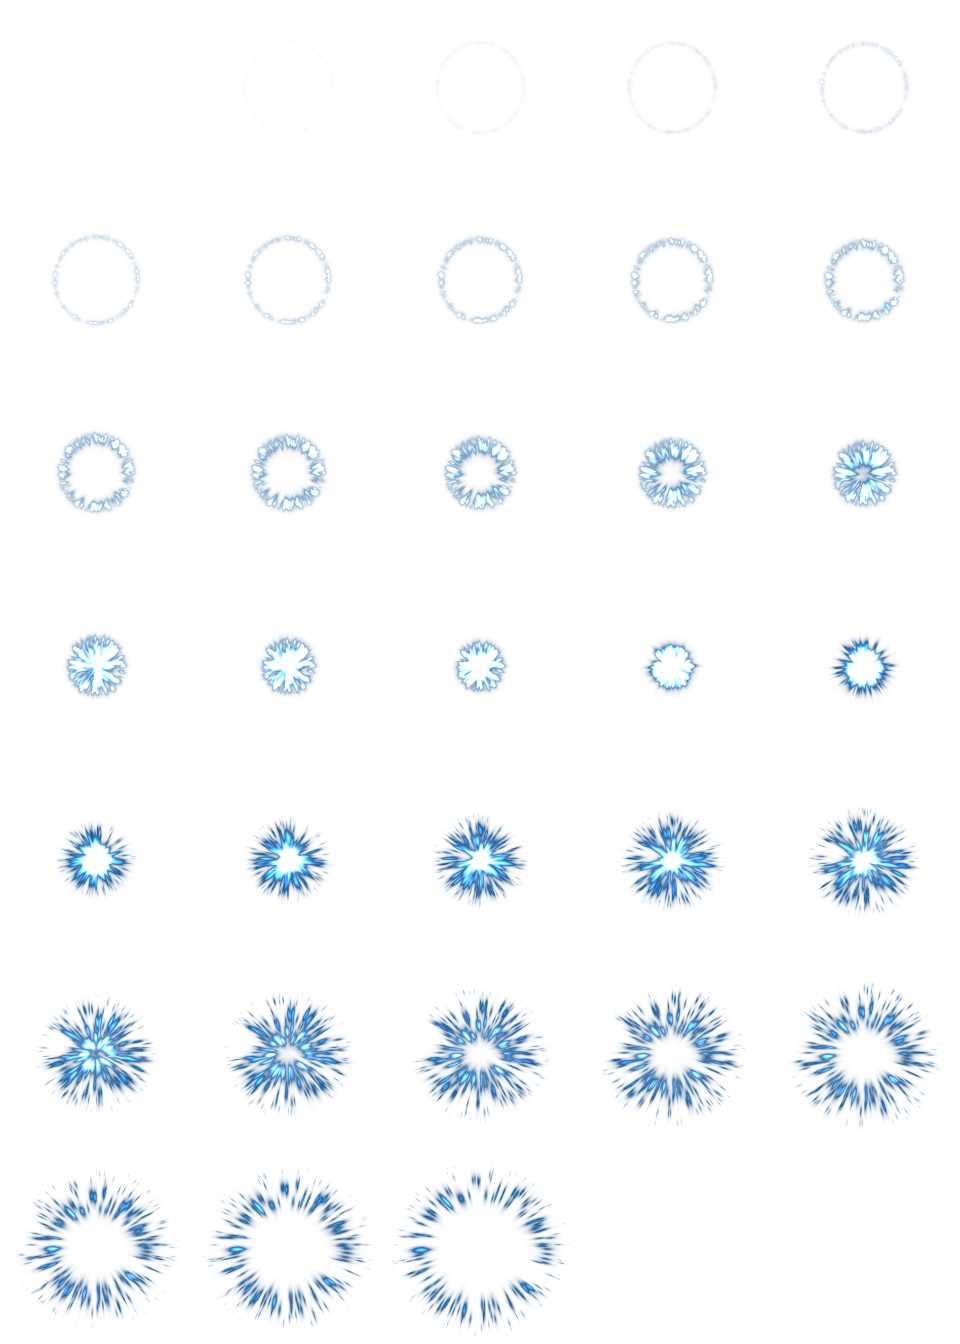
素材來源:JoesAlotofthings(CC BY 4.0)
要使用動畫翻頁貼圖,必須在 GPUParticles2D(或 CPUParticles2D)節點的 Material 欄位新增一個 CanvasItemMaterial:
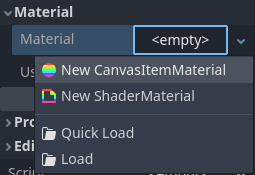
在粒子節點屬性面板最下方建立一個 CanvasItemMaterial
在這個 CanvasItemMaterial 裡,請啟用 Particle Animation,並將 H Frames 與 V Frames 設定為貼圖的欄數與列數:
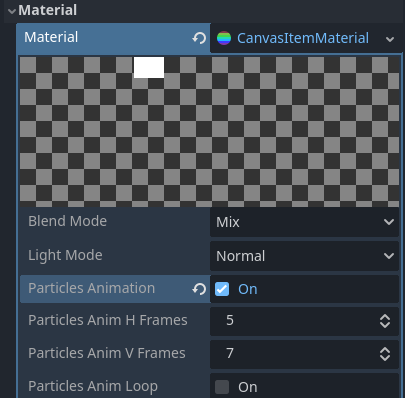
設定 CanvasItemMaterial 以配合範例翻頁貼圖
完成上述設定後,ParticleProcessMaterial(於 GPUParticles2D)或 CPUParticles2D 檢查器的 動畫區段 就會生效。
小訣竅
如果你的翻頁貼圖背景是黑色而非透明,請將混合模式(Blend Mode)設為 Add**(加法),而不是預設的 **Mix,才能正確顯示。你也可以用圖像編輯器(例如 GIMP 的「顏色→顏色轉透明」功能)將黑色背景改為透明。
Time (時間)參數
生命期
每個粒子存活的時間(以秒為單位). 生命週期結束時, 會建立一個新粒子來替換它.
壽命:0.5
壽命:4.0
一次性
啟用後,Particles2D節點將一次性發出所有粒子, 然後再也不發射.
預處理
粒子系統從沒有粒子被發射開始, 然後開始發射. 當載入場景如火炬, 霧等系統時可能會帶來不便, 因為它會在進入場景的那一刻開始發射. 預處理用於讓系統在第一次實際繪製之前處理給定的秒數.
速度縮放
速度比例具有預設值 1 , 用於調整粒子系統的速度. 降低值會使粒子變慢, 而增加值會使粒子更快.
爆炸性
如果有10個壽命為 1 的粒子, 則意味著粒子將每0.1秒發射一次. 爆炸性參數改變了這一點, 並迫使粒子一起發射. 範圍是:
0: 定期發射粒子(預設值).
1: 同時發射所有粒子.
中間的值也是允許的. 此功能對於建立爆炸或突然爆發的粒子非常有用:
隨機性
所有物理參數都可以隨機化. 隨機值範圍從 0 到 1 . 隨機化參數的公式為:
initial_value = param_value + param_value * randomness
固定 FPS
此設定可用於將粒子系統設定為以固定的影格率算繪. 例如, 將值更改為 2 將使粒子以每秒2影格的速度算繪. 請注意, 這不會減慢粒子系統本身的速度.
備註
Godot 4.3 目前尚未支援 2D 粒子的物理插值。可暫時將檢查器底部 節點 > Physics Interpolation > Mode 設為關閉,來避免相關影響。
分數誤差補償(Fract Delta)
將 Fract Delta 設為 true (啟用分數誤差補償)可以讓粒子的顯示效果更加平滑,特別是在隨機性高或高速粒子系統中更明顯。這項功能可讓每顆粒子的運動更精確地對應其壽命,避免出現粒子跳動或突然位移。需注意,開啟此功能可能會略為降低效能,特別是在粒子數量龐大時。
繪製參數
可見矩形
可見性矩形控制粒子在螢幕上的可見性. 如果此矩形位於視口之外, 則引擎將不會在螢幕上算繪粒子.
矩形的 W 和 H 屬性分別控制其寬度和高度. X 和 Y 屬性控制矩形左上角相對於粒子發射器的位置.
可以使用2D視圖上方的工具列自動生成可見性區域. 為此, 請選擇Particles2D節點, 然後按一下 粒子 > 生成視覺化區域 . Godot將模擬Particles2D節點發射粒子幾秒鐘, 並將矩形區域設定為適合粒子的大小.
你可以使用 Generation Time (sec) 選項控制發射持續時間. 最大值為25秒. 如果您需要更多時間讓粒子移動, 您可以暫時更改Particles2D節點上的 preprocess 時間.
本地座標
By default, this option is off. It means that the space that particles are emitted to is global, and not relative to the node. If the node is moved, existing particles are not moved with it:
If enabled, particles will emit to local space, meaning that if the node is moved, already emitted particles are also affected:
繪製順序
這可以控制繪製單個粒子的順序. Index 表示粒子根據它們的發射順序被繪製(預設). Lifetime 表示它們按照剩餘壽命的順序被繪製.
粒子處理材質設定
關於 ParticleProcessMaterial 的設定,請參考 本頁。