Attention: Here be dragons
This is the latest
(unstable) version of this documentation, which may document features
not available in or compatible with released stable versions of Godot.
Checking the stable version of the documentation...
遮挡剔除
在 3D 渲染引擎中,遮挡剔除是移除隐藏几何体的过程。
你会在这个页面中学习到:
遮挡剔除的优缺点有哪些。
怎样在 Godot 中设置遮挡剔除。
解决遮挡剔除的常见问题。
参见
你可以使用遮挡剔除和网格 LOD 演示项目来了解遮挡剔除的实际工作原理。
为什么要使用遮挡剔除
这个示例场景中有数百个房间相邻堆叠,一个动态物体(红色球体)隐藏在明亮房间的墙后面(门的左侧):
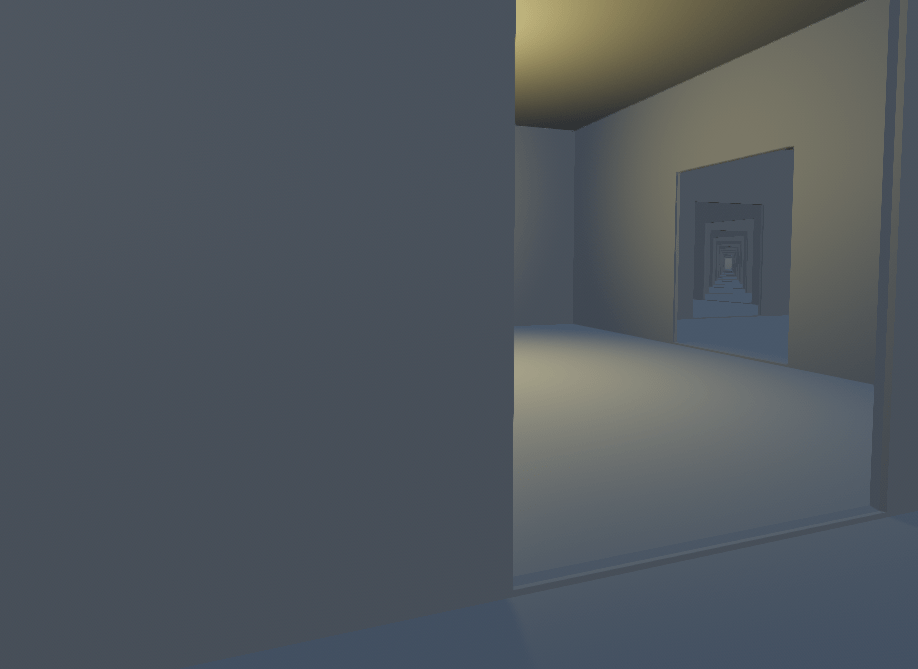
布局对遮挡剔除友好的示例场景
禁用遮挡剔除后,明亮房间后的所有房间和动态物体都需要被渲染:

禁用遮挡剔除的示例场景(线框)
启用遮挡剔除后,只有真正可见的房间需要被渲染。动态物体也被墙遮挡,因此不再需要被渲染:
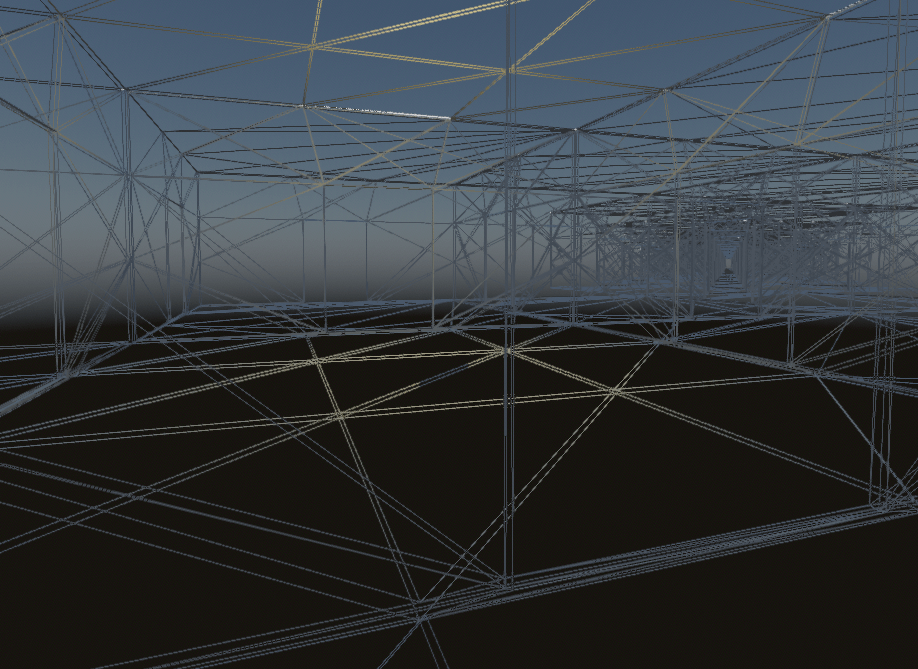
启用遮挡剔除的示例场景(线框)
由于引擎的工作量减少了(需要渲染的顶点更少,绘制调用更少),只要场景中有足够的遮挡剔除机会,性能就会提高。这意味着遮挡剔除在室内场景中最有效,最好是有多个小房间而不是少量大房间。将此与网格的细节级别(LOD)和可见范围(HLOD)结合使用可以进一步提高性能收益。
备注
使用 Forward+ 渲染器时,引擎已经执行了深度预渲染。其本质是在渲染场景的实际材质之前渲染场景的仅深度版本。该技术用于确保每个不透明像素仅着色一次,从而显著降低过度绘制的成本。
使用 Mobile 渲染器时最能观察到性能优势,因为出于性能原因,它没有深度预渲染。因此,遮挡剔除将积极减少该渲染器的着色过度绘制。
尽管如此,即使使用深度预渲染,在复杂 3D 场景中使用遮挡剔除仍有明显优势。然而,在遮挡剔除机会很少的场景中,遮挡剔除可能不值得额外设置和 CPU 开销。
Godot 中遮挡剔除的工作原理
备注
“遮挡物”是指遮挡视线的形状,而“被遮挡物”是指被隐藏的物体。
在 Godot 中,遮挡剔除通过在 CPU 上将场景的遮挡物光栅化到低分辨率缓冲区来实现。这是使用软件光线追踪库 Embree 来完成的。
然后,引擎使用此低分辨率缓冲区来测试被遮挡物的 AABB 与遮挡物形状的关系。被遮挡物的 AABB 必须被遮挡物形状完全遮挡才会被剔除。
因此,较小的物体相对于较大的物体更可能被有效剔除。较大的遮挡物(如墙壁)也通常比较小的遮挡物(如装饰道具)更有效。
设置遮挡剔除
使用遮挡剔除的第一步是启用渲染 > 遮挡剔除 > 使用遮挡剔除项目设置。(确保在项目设置对话框中启用高级开关才能看到它。)
此项目设置会立即应用,因此你无需重启编辑器。
启用项目设置后,你仍然需要创建一些遮挡物。出于性能原因,引擎不会自动将所有可见几何体作为遮挡剔除的基础。相反,引擎需要一个简化的场景表示,其中只烘焙静态物体。
有两种方法在场景中设置遮挡物:
自动烘焙遮挡物(推荐)
备注
当前遮挡物烘焙过程中仅考虑 MeshInstance3D 节点。烘焙遮挡物时,不会考虑 MultiMeshInstance3D、GPUParticles3D、CPUParticles3D 和 CSG 节点。如果你希望将它们视为遮挡物,则必须手动创建与其几何体(大致)匹配的遮挡物形状。
自 Godot 4.4 起,如果在烘焙遮挡物之前将 CSG 节点转换为 MeshInstance3D,则烘焙过程可以纳入这些节点。
此限制不适用于被遮挡物。任何继承自 GeometryInstance3D 的节点类型都可以被遮挡。
启用上述遮挡剔除项目设置后,向包含 3D 关卡的场景中添加 OccluderInstance3D 节点。
选择 OccluderInstance3D 节点,然后单击 3D 编辑器视口顶部的 烘焙遮挡物。烘焙后,OccluderInstance3D 节点将包含一个 Occluder3D 资源,用于存储关卡几何体的简化版本。此遮挡物几何体在 3D 视图中显示为紫色线框线(只要在透视菜单中启用查看小工具)。然后使用该几何体为静态和动态被遮挡物提供遮挡剔除。
烘焙后,你可能会注意到动态对象(例如玩家、敌人等)也被包含在了烘焙网格中。为防止这种情况,请在 OccluderInstance3D 上设置 Bake > Cull Mask 属性,以排除某些视觉层的烘焙。
例如,你可以在剔除遮罩上禁用第 2 层,然后将动态对象的 MeshInstance3D 节点配置为位于视觉层 2(而不是层 1)。为此,请选择相关的 MeshInstance3D 节点,然后在 VisualInstance3D > Layers 属性上,取消勾选层 1,再勾选层 2。配置剔除遮罩和图层后,按照上述过程再次烘焙遮挡物。
手动放置遮挡物
这种方法更适合专门的用例,例如为 MultiMeshInstance3D 设置或 CSG 节点创建遮挡(由于上述限制)。
启用上述遮挡剔除项目设置后,向包含 3D 关卡的场景中添加 OccluderInstance3D 节点。选择 OccluderInstance3D 节点,然后在 Occluder 属性中选择要添加的遮挡物类型:
QuadOccluder3D(一个单平面)
BoxOccluder3D(一个长方体)
SphereOccluder3D(一个球形遮挡物)
PolygonOccluder3D(一个具有任意数量点的 2D 多边形)
此外还有 ArrayOccluder3D,其点无法在编辑器中修改,但可用于通过脚本进行程序生成。
预览遮挡剔除
你可以启用调试绘制模式来预览遮挡剔除实际“看到”的内容。在 3D 编辑器视口的左上角,单击透视按钮(或正交,具体取决于当前相机模式),然后选择显示高级… > 遮挡剔除缓冲。这将显示引擎用于遮挡剔除的低分辨率缓冲区。
在同一菜单中,你还可以启用查看信息和查看帧时间来在右下角查看绘制调用次数和渲染图元(顶点 + 索引)数量,以及右上角渲染的每秒帧数。
如果在显示此信息时在项目设置中切换遮挡剔除,你可以看到遮挡剔除对场景性能的改善程度。请注意,性能优势在很大程度上取决于 3D 编辑器相机的视角,因为遮挡剔除仅在相机前方存在遮挡物时才有效。
要在运行时切换遮挡剔除,请在根视口上设置 use_occlusion_culling,如下所示:
get_tree().root.use_occlusion_culling = true
GetTree().Root.UseOcclusionCulling = true;
在运行时切换遮挡剔除可以用来比较正在运行的项目的性能。
性能注意事项
关卡设计应配合遮挡剔除
这是最重要的指导原则。好的关卡设计并不只是满足游戏性的需求,也应该同时考虑遮挡。
对于室内环境,添加不透明的墙壁以定期“打断”视线,并确保一次不会看到太多场景。
对于大型开放场景,请尽可能使用类似金字塔的结构来设计地形的高低起伏。与任何其他地形形状相比,这种设计提供了最大的剔除机会。
避免在游戏过程中移动 OccluderInstance3D 节点
这包括移动 OccluderInstance3D 节点的父节点,因为这将导致节点本身在全局空间中移动,从而需要重建 BVH。
切换 OccluderInstance3D 的可见性(或其父级之一的可见性)并不那么耗费性能,因为更新只需要发生一次(而不是连续发生)。
例如,如果你有一扇滑动门或旋转门,则可以使 OccluderInstance3D 节点不是门本身的子节点(以便遮挡物永远不会移动),但可以在门开始打开后隐藏 OccluderInstance3D 的可见性。一旦门完全关闭,你就可以重新显示 OccluderInstance3D。
如果你确实必须在游戏过程中移动 OccluderInstance3D 节点,请为其使用原始 Occluder3D 形状,而不是复杂的烘焙形状。
使用尽可能简单的遮挡物形状
如果在复杂 3D 场景中发现性能低下或卡顿,则可能意味着 CPU 因渲染过于详细的遮挡物而过载。请选择 OccluderInstance3D 节点,增加 Bake > Simplification 属性,然后再次烘焙遮挡物。
请记住保持合理的简化值。对于关卡几何体来说,太高的值可能会导致不正确的遮挡剔除,如我的被遮挡物在不应该被剔除时被剔除页面中所示。
如果这仍然没有让 CPU 使用率降到足够低,你可以尝试调整渲染 > 遮挡剔除 > BVH 构建质量项目设置和/或减少渲染 > 遮挡剔除 > 每线程遮挡射线。你需要在项目设置对话框中启用高级开关才能查看这些设置。
故障排除
我的被遮挡物在应该被剔除时却没有被剔除
在遮挡物一侧:
首先,仔细检查 OccluderInstance3D 中的 Bake > Cull Mask 属性是否设置为允许烘焙你想要的网格。MeshInstance3D 节点的可见性层必须存在于剔除遮罩中,网格才能包含在烘焙中。
此外请注意,遮挡物烘焙仅考虑具有不透明材质的网格。使用透明材质的表面不会包含在烘焙中,即使应用于其上的纹理是完全不透明的。
最后,请记住,遮挡物烘焙不会考虑 MultiMeshInstance3D、GPUParticles3D、CPUParticles3D 和 CSG 节点。作为一种解决方案,你可以手动为这些节点添加 OccluderInstance3D 节点。
在被遮挡物一侧:
确保 Extra Cull Margin 设置为尽可能低(通常应为 0.0),并且在对象的 GeometryInstance3D 部分中禁用 Ignore Occlusion Culling。
另外,检查 AABB 的大小(选择节点时由橙色框表示)。此轴对齐边界框必须被遮挡物形状完全遮挡,被遮挡物才会被隐藏。
我的被遮挡物在不应该被剔除时被剔除
造成这种情况的最可能原因是,遮挡物烘焙中包含的对象在烘焙遮挡物后已被移动。例如,当移动关卡几何体或重新排列其布局时,就可能会发生这种情况。要解决此问题,请选择 OccluderInstance3D 节点并再次烘焙遮挡物。
另一种原因是动态对象也被包含在烘焙中,尽管它们不本应该被包含在内。请使用遮挡剔除调试绘制模式查找不应出现的遮挡物形状,然后相应地调整烘焙剔除遮罩。
最后一个可能的原因是在遮挡物烘焙过程中使用了过于激进的网格简化。选择 OccluderInstance3D 节点,减小 Bake > Simplification 属性,然后再次烘焙遮挡物。
作为最后的手段,你可以启用被遮挡物的 Ignore Occlusion Culling 属性。这将抵消该对象的遮挡剔除性能改进,但对于永远不会被剔除的对象(例如第一人称视角模型)来说这样做是有意义的。