Attention: Here be dragons
This is the latest
(unstable) version of this documentation, which may document features
not available in or compatible with released stable versions of Godot.
Checking the stable version of the documentation...
Справочник по GDScript
GDScript — это высокоуровневый, объектно-ориентированный, императивный язык программирования с последовательной типизацией, созданный для Godot. Он использует синтаксис на основе отступов, аналогичный такому языку, как Python. Его цель — оптимизировать и тесно интегрировать с Godot Engine, обеспечивая большую гибкость при создании контента.
GDScript полностью независим от Python и не основан на нем.
История
Примечание
Документация по истории GDScript перемещена в Часто задаваемые вопросы.
Пример GDScript
Некоторым людям проще научиться, взглянув на синтаксис, поэтому вот простой пример того, как выглядит GDScript.
# Everything after "#" is a comment.
# A file is a class!

# (optional) icon to show in the editor dialogs:
@icon("res://path/to/optional/icon.svg")

# (optional) class definition:
class_name MyClass

# Inheritance:
extends BaseClass


# Member variables.
var a = 5
var s = "Hello"
var arr = [1, 2, 3]
var dict = {"key": "value", 2: 3}
var other_dict = {key = "value", other_key = 2}
var typed_var: int
var inferred_type := "String"

# Constants.
const ANSWER = 42
const THE_NAME = "Charly"

# Enums.
enum {UNIT_NEUTRAL, UNIT_ENEMY, UNIT_ALLY}
enum Named {THING_1, THING_2, ANOTHER_THING = -1}

# Built-in vector types.
var v2 = Vector2(1, 2)
var v3 = Vector3(1, 2, 3)


# Function, with a default value for the last parameter.
func some_function(param1, param2, param3 = 123):
    const local_const = 5

    if param1 < local_const:
        print(param1)
    elif param2 > 5:
        print(param2)
    else:
        print("Fail!")

    for i in range(20):
        print(i)

    while param2 != 0:
        param2 -= 1

    match param3:
        3:
            print("param3 is 3!")
        _:
            print("param3 is not 3!")

    var local_var = param1 + 3
    return local_var


# Functions override functions with the same name on the base/super class.
# If you still want to call them, use "super":
func something(p1, p2):
    super(p1, p2)


# It's also possible to call another function in the super class:
func other_something(p1, p2):
    super.something(p1, p2)


# Inner class
class Something:
    var a = 10


# Constructor
func _init():
    print("Constructed!")
    var lv = Something.new()
    print(lv.a)
Если у вас уже был опыт работы со статически типизированными языками, такими как C, C++ или C#, но вы никогда раньше не использовали динамически типизированный язык, рекомендуется прочитать это руководство: GDScript: Введение в динамически типизированные языки.
Идентификаторы
Любая строка, которая ограничивает себя алфавитными символами (от a до z и от A до Z), цифрами (от 0 до 9) и _, квалифицируется как идентификатор. Кроме того, идентификаторы не должны начинаться с цифры. Идентификаторы чувствительны к регистру (foo отличается от FOO).
Идентификаторы также могут содержать большинство символов Unicode, входящих в UAX#31. Это позволяет использовать имена идентификаторов на языках, отличных от английского. Символы Unicode, которые считаются «смешанными» с символами ASCII и эмодзи, не допускаются в идентификаторах.
Ключевые слова
Ниже приведен список ключевых слов, поддерживаемых языком. Поскольку ключевые слова являются зарезервированными словами (токенами), они не могут использоваться в качестве идентификаторов. Операторы (например, in, not, and или or) и имена встроенных типов, перечисленные в следующих разделах, также зарезервированы.
Ключевые слова определены в токенизаторе GDScript, если вы хотите взглянуть под капот.
Ключевое слово |
Описание |
|---|---|
if |
Смотрите if/else/elif. |
еlif |
Смотрите if/else/elif. |
elsе |
Смотрите if/else/elif. |
for |
См. for. |
whilе |
Смотрите while. |
mаtch |
Смотрите match. |
когда |
Используется pattern guards в операторах |
breаk |
Выход из выполнения текущего |
continuе |
Немедленный переход к следующей итерации |
pass |
Используется там, где наличие инструкции требуется синтаксически, но выполнение ее кода нежелательно. Например, в пустых функциях. |
return |
Возвращает значение из функции. |
class |
Определяет внутренний (inner) класс. См. Inner classes. |
clаss_name |
Определяет скрипт как глобально доступный класс с указанным именем. См. раздел Registering named classes. |
extеnds |
Объявляет какой класс расширяет текущий класс. |
is |
Проверяет, расширяет ли переменная данный класс, или принадлежит ли она данному встроенному типу. |
in |
Проверяет, принадлежит ли значение string (строке), array (массиву), range (диапазону), dictionary (словарю) или node (узлу). При использовании с |
as |
Приводит значение к данному типу, если это возможно. |
sеlf |
Относится к текущему экземпляру класса. См. self. |
super |
Определяет область действия родительского метода. См. Inheritance. |
signаl |
Определяет сигнал. См. Signals. |
funс |
Определяет функцию. См. Functions. |
statiс |
Определяет статическую функцию или статическую переменную-член. |
сonst |
Определяет константу. См. Constants. |
enum |
Определяет перечисление. См. Enums. |
var |
Определяет переменную. См. Variables. |
brеakpoint |
Помощник редактора для точек останова (breakpoint) отладчика. В отличие от точек останова (breakpoint), создаваемых щелчком мыши в поле, |
prеload |
Предварительно загружает класс или переменную. См. Классы как ресурсы. |
await |
Ожидает сигнала или завершения сопрограммы. См. Awaiting signals or coroutines. |
yield |
Ранее использовалось для сопрограмм. Сохранено как ключевое слово для перехода. |
assеrt |
Задает условие, регистрирует ошибку при сбое. Игнорируется в не отладочных сборках. См. Ключевое слово Assert. |
void |
Используется для обозначения того, что функция не возвращает никакого значения. |
PI |
Постоянная PI. |
TAU |
Постоянная TAU. |
INF |
Константа бесконечности. Используется для сравнений и как результат вычислений. |
NAN |
Константа NAN (не число). Используется как невозможный результат вычислений. |
Операторы
Ниже приведён список поддерживаемых операторов и их приоритет. Все бинарные операторы являются лево-ассоциативными, включая оператор **. Это означает, что 2 ** 2 ** 3 равен (2 ** 2) ** 3. Используйте скобки, чтобы явно указать нужный приоритет, например, 2 ** (2 ** 3). Тернарный оператор if/else является право-ассоциативным.
Оператор |
Описание |
|---|---|
|
Группировка (наивысший приоритет) Скобки на самом деле не являются оператором, но позволяют явно указать приоритет операции. |
|
Индексация (обращение по индексу) |
|
Ссылка на атрибут |
|
Вызов функции |
|
|
x is Nodex is not Node |
Проверка типов См. также функцию is_instance_of(). |
|
Возведение в степень Умножает |
|
Битовое НЕ |
+x-x |
Идентичность / Отрицание |
x * yx / yx % y |
Умножение / Деление / Остаток от деления Оператор Примечание: Эти операторы ведут себя так же, как и в C++, что может оказаться неожиданным для пользователей, перешедших с Python, JavaScript и т. д. См. подробное примечание после таблицы. |
x + yx - y |
Сложение (или конкатенация) / Вычитание |
x << yx >> y |
Битовый сдвиг |
|
Побитовое И (AND) |
|
Побитовое исключающее ИЛИ (XOR) |
|
Побитовое ИЛИ (OR) |
x == yx != yx < yx > yx <= yx >= y |
Сравнение Подробное примечание см. после таблицы. |
x in yx not in y |
Проверка включения
|
not x!x |
Булевое НЕ и его псевдоним unrecommended |
x and yx && y |
Булевое И и его псевдоним unrecommended |
x or yx || y |
Булевое ИЛИ (OR ) и его псевдоним unrecommended |
|
Тернарный оператор Если/Иначе (if/else) |
|
|
x = yx += yx -= yx *= yx /= yx **= yx %= yx &= yx |= yx ^= yx <<= yx >>= y |
Присваивание (низший приоритет) Внутри выражения нельзя использовать оператор присваивания. |
Примечание
Поведение некоторых операторов может отличаться от ожидаемого:
Если оба операнда оператора
/— int, то выполняется целочисленное деление вместо дробного. Например,5 / 2 == 2, а не2.5. Если это нежелательно, используйте хотя бы один литерал float (x / 2.0), приведение типа (float(x) / y) или умножение на1.0(x * 1.0 / y).Оператор
%доступен только для целых чисел, для чисел с плавающей точкой используйте функцию fmod().Для отрицательных значений операторы
%иfmod()используют truncation вместо округления в сторону отрицательной бесконечности. Это означает, что остаток имеет знак. Если вам нужен остаток в математическом смысле, используйте функции posmod() и fposmod().Операторы
==и!=иногда позволяют сравнивать значения разных типов (например,1 == 1.0является истинным), но в других случаях это может привести к ошибке выполнения. Если вы не уверены в типах операндов, вы можете безопасно использовать функцию is_same() (но учтите, что она более строга к типам и ссылкам). Для сравнения чисел с плавающей точкой используйте функции is_equal_approx() и is_zero_approx().
Литералы
Пример(ы) |
Описание |
|
Нулевое значение |
|
Булевы значения |
|
Целое число в десятичной системе счисления |
|
Основание 16 (шестнадцатеричное) целое число |
|
Целое число в двоичной системе счисления |
|
Число с плавающей точкой (вещественное число) |
|
Обычные строки |
|
Строки в тройных кавычках |
|
Необработанные строки |
|
Необработанные строки в тройных кавычках |
|
|
|
Две конструкции похожие на литералы, но не являющиеся ими:
Пример |
Описание |
|
Сокращение для |
|
Сокращение для |
Целые числа и числа с плавающей точкой можно разделять символами _ для удобства чтения. Допустимы следующие способы записи чисел:
12_345_678  # Equal to 12345678.
3.141_592_7  # Equal to 3.1415927.
0x8080_0000_ffff  # Equal to 0x80800000ffff.
0b11_00_11_00  # Equal to 0b11001100.
Обычные строковые литералы могут содержать следующие экранированные последовательности:
Escape-последовательность |
Означает |
|
Новая строка (перевод строки) |
|
Символ горизонтальной табуляции |
|
Возврат каретки |
|
Оповещение (звуковой сигнал/звонок) |
|
Возврат |
|
Разрыв страницы |
|
Символ вертикальной табуляции |
|
Двойная кавычка |
|
Одиночная кавычка |
|
Обратная косая черта |
|
Кодовая точка Unicode UTF-16 |
|
Кодовая точка Unicode UTF-32 |
Есть два способа представить экранированный символ Unicode с кодом выше 0xFFFF:
как суррогатная пара UTF-16
\uXXXX\uXXXX.как единую кодовую точку UTF-32
\UXXXXXX.
Кроме того, использование \ с последующим символом новой строки внутри строки позволит вам продолжить ее на следующей строке, не вставляя символ новой строки в саму строку.
Строка, заключенная в кавычки одного типа (например, "), может содержать кавычки другого типа (например, ') без экранирования. Строки в тройных кавычках позволяют избежать экранирования до двух последовательных кавычек одного типа (если только они не примыкают к краям строки).
Необработанные строковые литералы всегда кодируют строку в том виде, в котором она представлена в исходном коде. Это особенно полезно для регулярных выражений. Необработанный строковый литерал не обрабатывает экранированные последовательности, однако распознаёт \\ и \" (\') и заменяет их собой. Таким образом, строка может содержать кавычку, совпадающую с открывающей, но только если перед ней стоит обратная косая черта.
print("\tchar=\"\\t\"")  # Prints `    char="\t"`.
print(r"\tchar=\"\\t\"") # Prints `\tchar=\"\\t\"`.
Примечание
Некоторые строки невозможно представить с помощью необработанных строковых литералов: в конце строки не может быть нечётного количества обратных косых черт или неэкранированной открывающей кавычки внутри строки. Однако на практике это не имеет значения, поскольку можно использовать другой тип кавычек или конкатенацию с обычным строковым литералом.
GDScript также поддерживает форматированные строки.
Аннотации
Annotations are special tokens in GDScript that act as modifiers to an entire script, a declaration, a statement, or a location in the source code. Annotations may affect how the script is treated by the Godot editor and the GDScript compiler.
Каждая аннотация начинается с символа @ и имеет имя. Подробное описание и пример каждой аннотации можно найти в GDScript class reference.
Например, вы можете использовать его для экспорта значения в редактор:
@export_range(1, 100, 1, "or_greater")
var ranged_var: int = 50
Дополнительную информацию об экспорте свойств см. в статье GDScript exports.
Любое константное выражение, совместимое с требуемым типом аргумента, может быть передано как значение аргумента аннотации:
const MAX_SPEED = 120.0

@export_range(0.0, 0.5 * MAX_SPEED)
var initial_speed: float = 0.25 * MAX_SPEED
Аннотации можно указывать по одной в каждой строке или все в одной строке. Они влияют на следующий оператор, не являющийся аннотацией. Аргументы аннотаций могут быть заключены в скобки и разделены запятыми.
Оба варианта одинаковы:
@annotation_a
@annotation_b
var variable

@annotation_a @annotation_b var variable
Пометка @onready
При использовании узлов часто возникает желание сохранить ссылки на части сцены в переменной. Поскольку конфигурирование сцен гарантировано только при входе в активное дерево сцен, дочерние узлы могут быть получены только при вызове функции Node._ready().
var my_label


func _ready():
    my_label = get_node("MyLabel")
Это может быть довольно громоздко, особенно когда узлов и внешних ссылок много. Для этого в GDScript есть аннотация @onready, которая откладывает инициализацию переменной-члена до вызова _ready(). С её помощью можно заменить приведённый выше код одной строкой:
@onready var my_label = get_node("MyLabel")
Предупреждение
Применение @onready и любой аннотации @export к одной и той же переменной не работает так, как можно было бы ожидать. Аннотация @onready приведёт к установке значения по умолчанию после вступления в силу @export и переопределит его:
@export var a = "init_value_a"
@onready @export var b = "init_value_b"

func _init():
    prints(a, b) # init_value_a <null>

func _notification(what):
    if what == NOTIFICATION_SCENE_INSTANTIATED:
        prints(a, b) # exported_value_a exported_value_b

func _ready():
    prints(a, b) # exported_value_a init_value_b
В результате генерируется предупреждение ONREADY_WITH_EXPORT, которое по умолчанию рассматривается как ошибка. Мы не рекомендуем отключать или игнорировать его.
Кодовые регионы
Области кода — это особые типы комментариев, которые редактор скриптов распознаёт как сворачиваемые области. Это означает, что после написания комментариев к областям кода вы можете сворачивать и разворачивать их, нажимая на стрелку, появляющуюся слева от комментария. Эта стрелка отображается в фиолетовом квадрате, что позволяет отличить её от стандартного сворачивания кода.
Синтаксис следующий:
# Important: There must be *no* space between the `#` and `region` or `endregion`.

# Region without a description:
#region
...
#endregion

# Region with a description:
#region Some description that is displayed even when collapsed
...
#endregion
Совет
Чтобы быстро создать область кода, выделите несколько строк в редакторе скриптов, щёлкните правой кнопкой мыши по выделенному фрагменту и выберите Create Code Region. Описание области будет автоматически выбрано для редактирования.
Возможно вкладывать области кода в другие области кода.
Вот конкретный пример использования областей кода:
# This comment is outside the code region. It will be visible when collapsed.
#region Terrain generation
# This comment is inside the code region. It won't be visible when collapsed.
func generate_lakes():
    pass

func generate_hills():
    pass
#endregion

#region Terrain population
func place_vegetation():
    pass

func place_roads():
    pass
#endregion
Это может быть полезно для организации больших фрагментов кода в более удобные для понимания разделы. Однако помните, что внешние редакторы, как правило, не поддерживают эту функцию, поэтому убедитесь, что ваш код легко читается, даже если вы не используете свёртывание фрагментов кода.
Примечание
Отдельные функции и секции с отступами (например, if и for) можно всегда свернуть в редакторе скриптов. Это означает, что следует избегать использования области кода для размещения одной функции или секции с отступом, так как это не принесёт особой пользы. Области кода лучше всего работают, когда они используются для группировки нескольких элементов.
Продолжение строки
Строку кода в GDScript можно продолжить на следующей строке, используя обратную косую черту (\). Добавьте её в конец строки, и код на следующей строке будет вести себя так, как будто там находится обратная косая черта. Вот пример:
var a = 1 + \
2
Строку можно продолжить несколько раз, например:
var a = 1 + \
4 + \
10 + \
4
Встроенные типы
Встроенные типы размещаются в стеке. Они передаются как значения. Это означает, что копия создается при каждом назначении или при передаче их в качестве аргументов функциям. Исключениями являются Object, Array, Dictionary и упакованные массивы (например, PackedByteArray), которые передаются по ссылке и поэтому являются общими. Все массивы, Dictionary и некоторые объекты (Node, Resource) имеют метод duplicate(), позволяющий создать копию.
Базовые встроенные типы
Переменная в GDScript может быть определена несколькими встроенными типами.
null
null - это пустой тип данных, который не содержит никакой информации и не может принимать другие значения.
Только типы, наследующие от Object, могут иметь значение null (поэтому Object называется типом, допускающим значение "nullable"). Типы Variant должны всегда иметь допустимое значение и, следовательно, не могут иметь значение null.
bool
Сокращенно от "boolean", оно может содержать только true или false.
int
Сокращение от "integer" (целое число), хранит целые числа (положительные и отрицательные). Хранится как 64-битное значение, эквивалентное int64_t в C++.
float
Хранит вещественные числа, включая десятичные, в формате с плавающей запятой. Хранится как 64-битное значение, эквивалентное double в C++. Примечание: в настоящее время такие структуры данных, как Vector2, Vector3 и PackedFloat32Array, хранят 32-битные значения float одинарной точности.
String
Последовательность символов в формате Unicode.
StringName
Неизменяемая строка, допускающая только один экземпляр каждого имени. Они создаются медленнее и могут привести к ожиданию блокировок при многопоточной обработке. Зато они очень быстро сравниваются, что делает их хорошими кандидатами на роль ключей словаря.
NodePath
Предварительно проанализированный путь к узлу или свойству узла. Его можно легко присвоить строке и получить из неё. Они полезны для взаимодействия с деревом для получения узла или для изменения свойств, например, с помощью Tweens.
Векторные встроенные типы
Vector2
2D-векторный тип, содержащий поля x и y. Также может быть доступен как массив.
Vector2i
Как Vector2, но с целыми компонентами. Удобен при описании элементов на 2D сетке.
Rect2
2D Прямоугольник, содержащий два поля векторов: position и size. Альтернативно содержит поле end, которое представляет собой position + size.
Vector3
3D векторный тип, содержащий поля x, y и z. Может быть получен как массив.
Vector3i
То же, что и Vector3, но компоненты — целые числа. Может использоваться для индексации элементов в трёхмерной сетке.
Transform2D
Матрица 3x2, используемая для 2D-преобразований.
Plane
Тип трехмерной плоскости в нормализованной форме, которая содержит векторное поле normal и скалярное расстояние d.
Quaternion
Quaternion - это тип данных, используемый для представления трехмерного вращения. Полезно для интерполяции вращений.
AABB
Выровненная по оси ограничительная рамка (или трехмерная коробка) содержит 2 поля типа Vector: position и size. Также содержит поле end, которое является position+size.
Basis
Матрица 3x3, используемая для трехмерного вращения и масштабирования. Он содержит 3 векторных поля (x, y и z), а также доступен в виде массива трехмерных векторов.
Transform3D
3D-преобразование содержит поле Basis basis и поле Vector3 origin.
Встроенные типы движка
Color
Color - тип данных цвета, содержит поля r, g, b, и a. Он также доступен как h, s, и v для оттенка(hue)/насыщенности(saturation)/значения(value).
RID
Resource ID (RID). Серверы используют общие RID для создания ссылок на непрозрачные объекты.
Object
Базовый класс для всего, что не является встроенным типом.
Встроенные типы контейнеров
Array
Общая последовательность любых типов объектов, включая другие массивы или словари (см. ниже). Массив может изменяться динамически. Массивы индексируются, начиная с индекса 0. Начиная с Godot 2.1, индексы могут быть отрицательными, как и в Python, считая с конца.
var arr = []
arr = [1, 2, 3]
var b = arr[1] # This is 2.
var c = arr[arr.size() - 1] # This is 3.
var d = arr[-1] # Same as the previous line, but shorter.
arr[0] = "Hi!" # Replacing value 1 with "Hi!".
arr.append(4) # Array is now ["Hi!", 2, 3, 4].
Типизированные массивы
Godot also features support for typed arrays. On write operations, Godot checks that
element values match the specified type, so the array cannot contain invalid values.
The GDScript static analyzer takes typed arrays into account, however array methods like
front() and back() still have the Variant return type.
Типизированные массивы имеют синтаксис Array[Type], где Type может быть любым типом Variant, собственным или пользовательским классом, а также перечислением. Вложенные типы массивов (например, Array[Array[int]]) не поддерживаются.
var a: Array[int]
var b: Array[Node]
var c: Array[MyClass]
var d: Array[MyEnum]
var e: Array[Variant]
Array и Array[Variant] — это одно и то же.
Примечание
Массивы передаются по ссылке, поэтому тип элемента массива также является атрибутом структуры в памяти, на которую ссылается переменная во время выполнения. Статический тип переменной ограничивает структуры, на которые она может ссылаться. Следовательно, вы не можете присвоить массиву другой тип элемента, даже если этот тип является подтипом требуемого типа.
Если вы хотите преобразовать типизированный массив, вы можете создать новый массив и использовать метод Array.assign():
var a: Array[Node2D] = [Node2D.new()]

# (OK) You can add the value to the array because `Node2D` extends `Node`.
var b: Array[Node] = [a[0]]

# (Error) You cannot assign an `Array[Node2D]` to an `Array[Node]` variable.
b = a

# (OK) But you can use the `assign()` method instead. Unlike the `=` operator,
# the `assign()` method copies the contents of the array, not the reference.
b.assign(a)
Единственное исключение было сделано для типа Array (Array[Variant]) для удобства пользователя и совместимости со старым кодом. Однако операции с нетипизированными массивами считаются небезопасными.
Упакованные массивы
PackedArrays (Упакованные массивы), как правило, быстрее перебираются и изменяются по сравнению с типизированными массивами того же типа (например, PackedInt64Array по сравнению с Array[int]) и потребляют меньше памяти. В худшем случае ожидается, что они будут такими же быстрыми, как нетипизированные массивы. Напротив, неупакованные массивы (типизированные или нет) имеют дополнительные удобные методы, такие как Array.map, которых нет у упакованных массивов. Подробнее о доступных методах см. в справочнике class reference. Типизированные массивы, как правило, быстрее перебираются и изменяются, чем нетипизированные.
Хотя все Arrays (массивы) могут вызывать фрагментацию памяти, когда становятся достаточно большими, если использование памяти и производительность (скорость итерации и модификации) являются важными факторами, а тип хранимых данных совместим с одним из типов Packed массивов, то их использование может привести к улучшениям. Однако, если у вас нет таких проблем (например, размер вашего массива не достигает десятков тысяч элементов), вероятно, более полезно использовать обычные или типизированные массивы, поскольку они предоставляют удобные методы, которые могут упростить написание и поддержку кода (и потенциально ускорить, если ваши данные часто требуют таких операций). Если данные, которые вы будете хранить, имеют известный тип (включая ваши собственные определенные классы), предпочтительнее использовать типизированный массив, так как он может обеспечить лучшую производительность при итерации и модификации по сравнению с нетипизированным массивом.
PackedByteArray: Массив байтов (целые числа от 0 до 255).
PackedInt32Array: Массив 32-битных целых чисел.
PackedInt64Array: Массив 64-битных целых чисел.
PackedFloat32Array: Массив 32-битных чисел с плавающей точкой.
PackedFloat64Array: Массив 64-битных чисел с плавающей точкой.
PackedStringArray: Массив строк.
PackedVector2Array: Массив значений Vector2.
PackedVector3Array: Массив значений Vector3.
PackedVector4Array: Массив значений Vector4.
PackedColorArray: Массив значений Color.
Dictionary
Ассоциативный контейнер, содержащий значения, на которые ссылаются уникальные ключи.
var d = {4: 5, "A key": "A value", 28: [1, 2, 3]}
d["Hi!"] = 0
d = {
    22: "value",
    "some_key": 2,
    "other_key": [2, 3, 4],
    "more_key": "Hello"
}
Также поддерживается синтаксис таблиц в стиле Lua. В Lua используется = вместо :, а ключи строк не заключаются в кавычки (что немного сокращает объём записи). Однако ключи, записанные в такой форме, не могут начинаться с цифры (как и любой идентификатор GDScript) и должны быть строковыми литералами.
var d = {
    test22 = "value",
    some_key = 2,
    other_key = [2, 3, 4],
    more_key = "Hello"
}
Чтобы добавить ключ в существующий словарь, получите к нему доступ как к существующему ключу и назначьте ему:
var d = {} # Create an empty Dictionary.
d.waiting = 14 # Add String "waiting" as a key and assign the value 14 to it.
d[4] = "hello" # Add integer 4 as a key and assign the String "hello" as its value.
d["Godot"] = 3.01 # Add String "Godot" as a key and assign the value 3.01 to it.

var test = 4
# Prints "hello" by indexing the dictionary with a dynamic key.
# This is not the same as `d.test`. The bracket syntax equivalent to
# `d.test` is `d["test"]`.
print(d[test])
Примечание
Синтаксис скобок может быть использован для доступа к свойствам любого объекта Object, а не только для словарей. Имейте в виду, что это вызовет ошибку скрипта при попытке индексировать несуществующее свойство. Чтобы этого избежать, вместо этого используйте методы Object.get() и Object.set().
Типизированные словари
В Godot 4.4 добавлена поддержка типизированных словарей. При операциях записи Godot проверяет, что ключи и значения элементов соответствуют указанному типу, поэтому словарь не может содержать недопустимых ключей или значений. Статический анализатор GDScript учитывает типизированные словари. Однако методы словарей, возвращающие значения, по-прежнему имеют тип возвращаемых данных Variant.
Типизированные словари имеют синтаксис Dictionary[KeyType, ValueType], где KeyType и ValueType могут быть любым типом Variant, собственным или пользовательским классом или перечислением. Обязательно должны быть указаны как ключ, так и значение, но можно использовать Variant, чтобы сделать любой из них нетипизированным. Вложенные типизированные коллекции (например, Dictionary[String, Dictionary[String, int]]) не поддерживаются.
var a: Dictionary[String, int]
var b: Dictionary[String, Node]
var c: Dictionary[Vector2i, MyClass]
var d: Dictionary[MyEnum, float]
# String keys, values can be any type.
var e: Dictionary[String, Variant]
# Keys can be any type, boolean values.
var f: Dictionary[Variant, bool]
Dictionary и Dictionary[Variant, Variant] — это одно и то же.
Signal
Сигнал — это сообщение, которое объект может передать тем, кто хочет его услышать. Сигнал может использоваться для передачи источника.
Сигналы лучше использовать, получая их от реальных объектов, например $Button.button_up.
Callable
Содержит объект и функцию, что полезно для передачи функций в качестве значений (например, при подключении к сигналам).
Получение метода как члена возвращает вызываемый объект. var x = $Sprite2D.rotate установит значение x для вызываемого объекта с $Sprite2D в качестве объекта и rotate в качестве метода.
Вызвать его можно с помощью метода call: x.call(PI).
Переменные
Переменные могут существовать как члены класса или быть локальными для функций. Они создаются с помощью ключевого слова var и при желании, есть возможность присвоить значение при инициализации.
var a # Data type is 'null' by default.
var b = 5
var c = 3.8
var d = b + c # Variables are always initialized in direct order (see below).
Опционально: Переменные могут иметь спецификацию типа. Когда тип указан, переменная всегда должна иметь один и тот же тип, а попытка присвоить несовместимое значение вызовет ошибку.
Типы указываются при объявлении переменной символом : (двоеточие) после имени переменной, за которым следует тип.
var my_vector2: Vector2
var my_node: Node = Sprite2D.new()
Если переменная инициализируется внутри объявления, тип может быть выведен, поэтому можно опустить имя типа:
var my_vector2 := Vector2() # 'my_vector2' is of type 'Vector2'.
var my_node := Sprite2D.new() # 'my_node' is of type 'Sprite2D'.
Предсказание типа возможно только в том случае, если заданное значение имеет определенный тип, в противном случае возникает ошибка.
Поддерживаемые типы:
Встроенные типы (Array, Vector2, int, String и т.д.).
Классы движка (Node, Resource, Reference, etc.).
Константы, если они содержат скрипт ресурса (
MyScriptесли вы объявилиconst MyScript = preload("res://my_script.gd")).Другие классы в том же скрипте, учитывающие область видимости (
InnerClass.NestedClassесли вы объявилисlass NestedClassвнутрисlass InnerClassв той же области видимости).Классы объявленные в скрипте с ключевым словом
class_name.Автозагрузки зарегистрированы как одиночные.
Примечание
Хотя Variant является допустимой спецификацией типа, это не фактический тип. Это означает лишь отсутствие заданного типа и эквивалентно полному отсутствию статического типа. Следовательно, вывод для Variant по умолчанию не допускается, поскольку это, вероятно, ошибка.
Вы можете отключить эту проверку или сделать её только предупреждением, изменив её в настройках проекта. Подробности см. в разделе Система предупреждений GDScript.
Порядок инициализации
Переменные-члены инициализируются в следующем порядке:
В зависимости от статического типа переменной, переменная либо равна
null(нетипизированные переменные и объекты), либо имеет значение типа по умолчанию (0дляint,falseдляboolи т. д.).Указанные значения присваиваются в порядке следования переменных в скрипте, сверху вниз.
(Только для классов, производных от
Node) Если к переменной применена аннотация@onready, ее инициализация откладывается до пятого шага.
Если определен, вызывается метод
_init().При создании экземпляров сцен и ресурсов назначаются экспортированные значения.
(Только для производных от
Nodeклассов) Инициализируются переменные@onready.(Только для классов, производных от
Node) Если определен, вызывается метод_ready().
Предупреждение
В качестве инициализатора переменной можно указать сложное выражение, включая вызовы функций. Убедитесь, что переменные инициализируются в правильном порядке, иначе ваши значения могут быть перезаписаны. Например:
var a: int = proxy("a", 1)
var b: int = proxy("b", 2)
var _data: Dictionary = {}

func proxy(key: String, value: int):
    _data[key] = value
    print(_data)
    return value

func _init() -> void:
    print(_data)
Будет напечатано:
{ "a": 1 }
{ "a": 1, "b": 2 }
{  }
Чтобы исправить это, переместите определение переменной _data выше определения a или удалите пустое назначение словаря (= {}).
Статические перменные
Переменная-член класса может быть объявлена статической:
static var a
Статические переменные принадлежат классу, а не его экземплярам. Это означает, что статические переменные разделяют значения между несколькими экземплярами, в отличие от обычных переменных-членов.
Изнутри класса можно получить доступ к статическим переменным из любой функции, как статической, так и нестатической. Извне класса доступ к статическим переменным можно получить, используя класс или экземпляр (второй вариант не рекомендуется из-за его меньшей читабельности).
Примечание
Аннотации @export и @onready не работают со статическими переменными. Локальные переменные не могут быть статическими.
В следующем примере определяется класс Person со статической переменной max_id. Мы увеличиваем max_id в функции _init(). Это упрощает отслеживание количества экземпляров Person в нашей игре.
# person.gd
class_name Person

static var max_id = 0

var id
var name

func _init(p_name):
    max_id += 1
    id = max_id
    name = p_name
В этом коде мы создаем два экземпляра нашего класса Person и проверяем, что класс и каждый экземпляр имеют одинаковое значение max_id, поскольку переменная статическая и доступна каждому экземпляру.
# test.gd
extends Node

func _ready():
    var person1 = Person.new("John Doe")
    var person2 = Person.new("Jane Doe")

    print(person1.id) # 1
    print(person2.id) # 2

    print(Person.max_id)  # 2
    print(person1.max_id) # 2
    print(person2.max_id) # 2
Статические переменные могут иметь подсказки типа, сеттеры и геттеры:
static var balance: int = 0

static var debt: int:
    get:
        return -balance
    set(value):
        balance = -value
Доступ к статической переменной базового класса также можно получить через дочерний класс:
class A:
    static var x = 1

class B extends A:
    pass

func _ready():
    prints(A.x, B.x) # 1 1
    A.x = 2
    prints(A.x, B.x) # 2 2
    B.x = 3
    prints(A.x, B.x) # 3 3
Примечание
При ссылке на статическую переменную из скрипта инструмента другой скрипт, содержащий эту статическую переменную, должен также быть скриптом инструмента. Подробнее см. в разделе Running code in the editor.
Аннотация @static_unload
Поскольку классы GDScript являются ресурсами, наличие статических переменных в скрипте предотвращает его выгрузку, даже если больше нет экземпляров этого класса и других ссылок на него. Это может быть важно, если статические переменные хранят большие объёмы данных или ссылки на другие ресурсы проекта, например, сцены. Если статические переменные не хранят важные данные и могут быть сброшены, следует очистить эти данные вручную или использовать аннотацию @static_unload.
Предупреждение
В настоящее время из-за ошибки скрипты никогда не освобождаются, даже если используется аннотация @static_unload.
Обратите внимание, что @static_unload применяется ко всему скрипту (включая внутренние классы) и должен быть помещен в начало скрипта, перед class_name и extends:
@static_unload
class_name MyNode
extends Node
См. также Static functions и Static constructor.
Приведение переменных
Значения, присваиваемые типизированным переменным, должны иметь совместимый тип. Если необходимо заставить значение быть определенного типа, в частности, для типов объектов, можно использовать оператор приведения as.
Приведение типов объектов приводит к одному и тому же объекту, если значение имеет один и тот же тип или подтип приведенного типа.
var my_node2D: Node2D
my_node2D = $Sprite2D as Node2D # Works since Sprite2D is a subtype of Node2D.
Если значение не является подтипом, операция приведения приведет к получению значения null.
var my_node2D: Node2D
my_node2D = $Button as Node2D # Results in 'null' since a Button is not a subtype of Node2D.
Для встроенных типов они будут принудительно преобразованы, если это возможно, в противном случае движок выдаст ошибку.
var my_int: int
my_int = "123" as int # The string can be converted to int.
my_int = Vector2() as int # A Vector2 can't be converted to int, this will cause an error.
Приведение типов также полезно для обеспечения лучшей типобезопасности переменных при взаимодействии с деревом сцены:
# Will infer the variable to be of type Sprite2D.
var my_sprite := $Character as Sprite2D

# Will fail if $AnimPlayer is not an AnimationPlayer, even if it has the method 'play()'.
($AnimPlayer as AnimationPlayer).play("walk")
Константы
Константы — это значения, которые не меняются в ходе игры. Они должны быть известны на этапе компиляции. Используя ключевое слово const, вам разрешается присвоить постоянное значение переменной. Повтор этого трюка с уже объявленной константой вызовет ошибку.
Мы рекомендуем использовать константы там, где подразумевается неизменность их значений.
const A = 5
const B = Vector2(20, 20)
const C = 10 + 20 # Constant expression.
const D = Vector2(20, 30).x # Constant expression: 20.
const E = [1, 2, 3, 4][0] # Constant expression: 1.
const F = sin(20) # 'sin()' can be used in constant expressions.
const G = x + 20 # Invalid; this is not a constant expression!
const H = A + 20 # Constant expression: 25 (`A` is a constant).
Хотя тип констант выводится из присвоенного значения, также можно добавить явное указание типа:
const A: int = 5
const B: Vector2 = Vector2()
Присвоение значения несовместимого типа приведет к ошибке.
Вы также можете создавать константы внутри функции, что полезно для именования локальных магических значений.
Перечисления
Перечисления это фактически сокращения для констант, и они очень полезны если вы хотите присвоить конкретные числовые значения некоторым константам.
enum {TILE_BRICK, TILE_FLOOR, TILE_SPIKE, TILE_TELEPORT}

# Is the same as:
const TILE_BRICK = 0
const TILE_FLOOR = 1
const TILE_SPIKE = 2
const TILE_TELEPORT = 3
If you pass a name to the enum, it will put all the keys inside a constant Dictionary of that name. This means all constant methods of a dictionary can also be used with a named enum. This only works for GDScript enums, not for enums from built-in classes.
Важно
Ключи в именованном перечислении не регистрируются как глобальные константы. Доступ к ним следует осуществлять с префиксом имени перечисления (Name.KEY).
enum State {STATE_IDLE, STATE_JUMP = 5, STATE_SHOOT}

# Is the same as:
const State = {STATE_IDLE = 0, STATE_JUMP = 5, STATE_SHOOT = 6}
# Access values with State.STATE_IDLE, etc.

func _ready():
    # Access values with Name.KEY, prints '5'
    print(State.STATE_JUMP)
    # Use dictionary methods:
    # prints '["STATE_IDLE", "STATE_JUMP", "STATE_SHOOT"]'
    print(State.keys())
    # prints '{ "STATE_IDLE": 0, "STATE_JUMP": 5, "STATE_SHOOT": 6 }'
    print(State)
    # prints '[0, 5, 6]'
    print(State.values())
Если ключу перечисления не присвоено значение, ему будет присвоено предыдущее значение плюс единица или 0, если это первый элемент перечисления. Допускается несколько ключей с одинаковым значением.
Функции
Функции всегда принадлежат классу. Приоритет области действия для поиска переменных: локальная область → член класса → глобальная область. Переменная self всегда доступна и предоставляется как опция для доступа к членам класса (см. self), но не всегда требуется (и не должна отправляться в качестве первого аргумента функции, в отличие от Python).
func my_function(a, b):
    print(a)
    print(b)
    return a + b  # Return is optional; without it 'null' is returned.
Функция может возвращать return значения. Если вы ничего не возвращаете, то она является null.
By default, all function parameters are required. You can make one or more parameters at the end optional by assigning a default value to them:
# Since the last two parameters are optional, all these calls are valid:
# - my_function(1)
# - my_function(1, 20)
# - my_function(1, 20, 100)
func my_function(a_required, b_optional = 10, c_optional = 42):
    print(a_required)
    print(b_optional)
    print(c_optional)
Если функция содержит только одну строку кода, ее можно записать в одну строку:
func square(a): return a * a

func hello_world(): print("Hello World")

func empty_function(): pass
Функции также могут иметь спецификацию типов для аргументов и возвращаемого значения. Типы аргументов можно добавлять аналогично переменным:
func my_function(a: int, b: String):
    pass
Если аргумент функции имеет значение по умолчанию, можно вывести тип:
func my_function(int_arg := 42, String_arg := "string"):
    pass
Тип возврата функции может быть указан после списка аргументов с помощью символа стрелки (->):
func my_int_function() -> int:
    return 0
Функции, имеющие тип возврата должны возвращать правильное значение. Тип void означает, что функция ничего не возвращает. Пустые функции могут возвращаться раньше с ключевым словом return, но они не могут возвращать значения.
func void_function() -> void:
    return # Can't return a value.
Примечание
Не пустые (Non-void) функции должны всегда возвращать значение, поэтому если в вашем коде есть ветвистые выражения (такие как конструкция if/else), все возможные пути должны иметь ответвление. Например, если return внутри блока if, но не после него, то редактор выдаст ошибку, потому что если условие не будет выполнено, то функция не будет иметь действительного значения для возврата.
Ссылочные функции
Функции являются значениями первого класса с точки зрения объекта Callable. Ссылка на функцию по имени без её вызова автоматически сгенерирует соответствующий вызываемый объект. Это можно использовать для передачи функций в качестве аргументов.
func map(arr: Array, function: Callable) -> Array:
    var result = []
    for item in arr:
        result.push_back(function.call(item))
    return result

func add1(value: int) -> int:
    return value + 1;

func _ready() -> void:
    var my_array = [1, 2, 3]
    var plus_one = map(my_array, add1)
    print(plus_one) # Prints `[2, 3, 4]`.
Примечание
Вызываемые функции должны вызываться методом call(). Оператор () нельзя использовать напрямую. Это поведение реализовано для предотвращения проблем с производительностью при прямых вызовах функций.
Лямбда-функции
Лямбда-функции позволяют объявлять функции, не принадлежащие классу. Вместо этого создаётся объект Callable, который напрямую присваивается переменной. Это может быть полезно для создания вызываемых функций, которые можно передавать без засорения области действия класса.
var lambda = func (x):
    print(x)
Для вызова созданной лямбды можно использовать метод call():
lambda.call(42) # Prints `42`.
Лямбда-функциям можно присваивать имена для целей отладки (имя отображается в Отладчике):
var lambda = func my_lambda(x):
    print(x)
Вы можете указать подсказки типов для лямбда-функций так же, как и для обычных:
var lambda := func (x: int) -> void:
    print(x)
Обратите внимание, что если вы хотите вернуть значение из лямбда-функции, требуется явное return (вы не можете пропустить return):
var lambda = func (x): return x ** 2
print(lambda.call(2)) # Prints `4`.
Лямбда-функции фиксируют локальную среду:
var x = 42
var lambda = func ():
    print(x) # Prints `42`.
lambda.call()
Предупреждение
Локальные переменные захватываются по значению один раз при создании лямбда-выражения. Поэтому они не будут обновлены в лямбда-выражении при переназначении во внешней функции:
var x = 42
var lambda = func (): print(x)
lambda.call() # Prints `42`.
x = "Hello"
lambda.call() # Prints `42`.
Кроме того, лямбда-выражение не может переприсвоить внешнюю локальную переменную. После выхода из лямбда-выражения переменная останется неизменной, поскольку захват лямбда-выражения неявно её затеняет:
var x = 42
var lambda = func ():
    print(x) # Prints `42`.
    x = "Hello" # Produces the `CONFUSABLE_CAPTURE_REASSIGNMENT` warning.
    print(x) # Prints `Hello`.
lambda.call()
print(x) # Prints `42`.
Однако если вы используете типы данных, передаваемые по ссылке (массивы, словари и объекты), то изменения содержимого будут общими до тех пор, пока вы не переназначите переменную:
var a = []
var lambda = func ():
    a.append(1)
    print(a) # Prints `[1]`.
    a = [2] # Produces the `CONFUSABLE_CAPTURE_REASSIGNMENT` warning.
    print(a) # Prints `[2]`.
lambda.call()
print(a) # Prints `[1]`.
Статические функции
Функция может быть объявлена статической. Статическая функция не имеет доступа к переменным-членам экземпляра или к self. Статическая функция имеет доступ к статическим переменным. Статические функции также полезны для создания библиотек вспомогательных функций:
static func sum2(a, b):
    return a + b
Лямбда-функции не могут быть объявлены статическими.
См. также Static variables и Static constructor.
Вариативные функции
Вариативная функция — это функция, которая может принимать переменное количество аргументов. Начиная с Godot 4.5, GDScript поддерживает вариативные функции. Для объявления вариативной функции необходимо использовать параметр rest, который собирает все избыточные аргументы в массив.
func my_func(a, b = 0, ...args):
    prints(a, b, args)

func _ready():
    my_func(1)             # 1 0 []
    my_func(1, 2)          # 1 2 []
    my_func(1, 2, 3)       # 1 2 [3]
    my_func(1, 2, 3, 4)    # 1 2 [3, 4]
    my_func(1, 2, 3, 4, 5) # 1 2 [3, 4, 5]
Функция может иметь не более одного остаточного параметра, который должен быть последним в списке параметров. Остаточный параметр не может иметь значение по умолчанию. Статические и лямбда-функции также могут быть вариативными.
Статическая типизация работает и для вариативных функций. Однако типизированные массивы в настоящее время не поддерживаются в качестве статического типа остаточного параметра:
# You cannot specify `...values: Array[int]`.
func sum(...values: Array) -> int:
    var result := 0
    for value in values:
        assert(value is int)
        result += value
    return result
Примечание
Хотя функции можно объявлять как вариативные с помощью параметра rest, распаковка параметров при вызове функции с использованием spread syntax, существующего в некоторых языках (JavaScript, PHP), в настоящее время не поддерживается в GDScript. Однако вы можете использовать callv() для вызова функции с массивом аргументов:
func test_func(...args):
    #log_data(...args) # This won't work.
    log_data.callv(args) # This will work.

func log_data(...values):
    # You should use `callv()` if you want to pass `values` as the argument list,
    # rather than passing the array as the first argument.
    prints.callv(values)
    # You can use array concatenation to prepend/append the argument list.
    write_data.callv(["user://log.txt"] + values)

func write_data(path, ...values):
    # ...
Абстрактные функции
Операторы и контроль потока
Операторы являются стандартными и могут быть присваиваниями, вызовами функций, структурами управления потоком и т.д. (см. ниже). Разделитель ; является абсолютно необязательным.
Выражения
Выражения представляют собой последовательности операторов и их операндов, расположенных в упорядоченном порядке. Выражение само по себе также может быть оператором, хотя в качестве операторов целесообразно использовать только вызовы, поскольку другие выражения не имеют побочных эффектов.
Выражения возвращают значения, которые могут быть присвоены допустимым целевым значениям. Операндами некоторых операторов могут быть другие выражения. Присваивание не является выражением и, следовательно, не возвращает никакого значения.
Вот несколько примеров выражений:
2 + 2 # Binary operation.
-5 # Unary operation.
"okay" if x > 4 else "not okay" # Ternary operation.
x # Identifier representing variable or constant.
x.a # Attribute access.
x[4] # Subscript access.
x > 2 or x < 5 # Comparisons and logic operators.
x == y + 2 # Equality test.
do_something() # Function call.
[1, 2, 3] # Array definition.
{A = 1, B = 2} # Dictionary definition.
preload("res://icon.svg") # Preload builtin function.
self # Reference to current instance.
Идентификаторы, атрибуты и индексы являются допустимыми целями присваивания. Другие выражения не могут находиться в левой части присваивания.
sеlf
self может использоваться для ссылки на текущий экземпляр и часто эквивалентно прямой ссылке на символы, доступные в текущем скрипте. Однако self также позволяет получить доступ к свойствам, методам и другим именам, которые определяются динамически (т.е. должны существовать в подтипах текущего класса или предоставляются с помощью _set() и/или _get()).
extends Node

func _ready():
    # Compile time error, as `my_var` is not defined in the current class or its ancestors.
    print(my_var)
    # Checked at runtime, thus may work for dynamic properties or descendant classes.
    print(self.my_var)

    # Compile time error, as `my_func()` is not defined in the current class or its ancestors.
    my_func()
    # Checked at runtime, thus may work for descendant classes.
    self.my_func()
Предупреждение
Имейте в виду, что доступ к членам дочерних классов в базовом классе часто считается плохой практикой, поскольку это размывает область ответственности любого фрагмента кода, затрудняя понимание взаимосвязей между частями игры. Кроме того, можно просто забыть, что родительский класс имел определённые ожидания относительно своих потомков.
if/elsе/elif
Простые условия создаются с помощью такого синтаксиса if/else/elif. Скобки вокруг условий допускаются, но не требуются. Учитывая характер отступа на основе табуляции, можно использовать elif вместо else/if для сохранения уровня отступа.
if (expression):
    statement(s)
elif (expression):
    statement(s)
else:
    statement(s)
Короткие утверждения можно записать на той же строке, что и условие:
if 1 + 1 == 2: return 2 + 2
else:
    var x = 3 + 3
    return x
Иногда может потребоваться присвоить другое начальное значение на основе логического выражения. В этом случае пригодятся тернарные выражения if:
var x = (value) if (expression) else (value)
y += 3 if y < 10 else -1
Тернарные выражения типа "if" могут быть вложенными для обработки более двух случаев. При вложении тернарных выражений типа "if" рекомендуется разбивать всё выражение на несколько строк для сохранения читабельности:
var count = 0

var fruit = (
        "apple" if count == 2
        else "pear" if count == 1
        else "banana" if count == 0
        else "orange"
)
print(fruit)  # banana

# Alternative syntax with backslashes instead of parentheses (for multi-line expressions).
# Less lines required, but harder to refactor.
var fruit_alt = \
        "apple" if count == 2 \
        else "pear" if count == 1 \
        else "banana" if count == 0 \
        else "orange"
print(fruit_alt)  # banana
Вы также можете проверить, содержится ли значение в чём-либо. Для этого можно использовать оператор if в сочетании с оператором in:
# Check if a letter is in a string.
var text = "abc"
if 'b' in text: print("The string contains b")

# Check if a variable is contained within a node.
if "varName" in get_parent(): print("varName is defined in parent!")
whilе
Простые циклы создаются с помощью синтаксиса while. Циклы можно прервать с помощью break или продолжить с помощью continue (что позволяет перейти к следующей итерации цикла без выполнения дальнейшего кода в текущей итерации):
while (expression):
    statement(s)
for
Чтобы итерировать заданный диапазон, например, массив или таблицу, используется цикл for. При итерации над массивом элемент текущего массива хранится в переменной цикла. При итерации по словарю в переменной цикла хранится индекс.
for x in [5, 7, 11]:
    statement # Loop iterates 3 times with 'x' as 5, then 7 and finally 11.

var names = ["John", "Marta", "Samantha", "Jimmy"]
for name: String in names: # Typed loop variable.
    print(name) # Prints name's content.

var dict = {"a": 0, "b": 1, "c": 2}
for i in dict:
    print(dict[i]) # Prints 0, then 1, then 2.

for i in range(3):
    statement # Similar to [0, 1, 2] but does not allocate an array.

for i in range(1, 3):
    statement # Similar to [1, 2] but does not allocate an array.

for i in range(2, 8, 2):
    statement # Similar to [2, 4, 6] but does not allocate an array.

for i in range(8, 2, -2):
    statement # Similar to [8, 6, 4] but does not allocate an array.

for c in "Hello":
    print(c) # Iterate through all characters in a String, print every letter on new line.

for i in 3:
    statement # Similar to range(3).

for i in 2.2:
    statement # Similar to range(ceil(2.2)).
Если вы хотите присвоить значения массиву во время его итерации, лучше всего использовать for i in array.size().
for i in array.size():
    array[i] = "Hello World"
Переменная цикла является локальной для цикла for, и присвоение ей значения не изменит значение массива. Объектами, переданными по ссылке (например, узлами), по-прежнему можно манипулировать, вызывая методы для переменной цикла.
for string in string_array:
    string = "Hello World" # This has no effect

for node in node_array:
    node.add_to_group("Cool_Group") # This has an effect
mаtch
Оператор match используется для ветвления. Это эквивалентно оператору switch, встречающемуся на многих других языках, но match предлагает некоторые дополнительные возможности.
Предупреждение
match является более строгим по типу, чем оператор ==. Например, 1 не будет соответствовать 1.0. Единственным исключением является сопоставление String и StringName: например, String hello считается равным StringName &hello.
Базовый синтаксис
match <test value>:
    <pattern(s)>:
        <block>
    <pattern(s)> when <pattern guard>:
        <block>
    <...>
Экскурс для людей, знакомых с оператором switch
Замените
switchнаmatch.Уберите
case.Уберите все
breakи.Смените
defaultна единичное подчеркивание.
Поток управления
Сопоставление шаблонов выполняется сверху вниз. Если шаблон совпадает, выполняется первый соответствующий блок. После этого выполнение продолжается ниже оператора match.
Примечание
Особое поведение continue в match, поддерживаемое в версии 3.x, было удалено в Godot 4.0.
Доступны следующие типы шаблонов:
- Literal pattern (Буквальный шаблон)
Соответствует literal:
match x:
    1:
        print("We are number one!")
    2:
        print("Two are better than one!")
    "test":
        print("Oh snap! It's a string!")
- Модель выражения
Соответствует константному выражению, идентификатору или доступу к атрибуту (
A.B):match typeof(x): TYPE_FLOAT: print("float") TYPE_STRING: print("text") TYPE_ARRAY: print("array")
- Шаблон подстановки
Этот шаблон подходит для любого поиска. Это пишется как единичное подчёркивание.
Его можно использовать как эквивалент
defaultв оператореswitchв других языках:match x: 1: print("It's one!") 2: print("It's one times two!") _: print("It's not 1 or 2. I don't care to be honest.")
- Шаблон привязки
Шаблон связывания вводит новую переменную. Как и шаблон подстановочных знаков, он соответствует всему и присваивает этому значению имя. Это особенно полезно в шаблонах массивов и словарей:
match x:
    1:
        print("It's one!")
    2:
        print("It's one times two!")
    var new_var:
        print("It's not 1 or 2, it's ", new_var)
- Шаблон массива
Соответствует массиву. Каждый отдельный элемент шаблона массива сам по себе является шаблоном, поэтому вы можете их вкладывать.
Сначала проверяется длина массива, она должна быть того же размера, что и шаблон, в противном случае шаблон не совпадет.
Открытый массив: Массив может быть больше, чем массив, создавая последнюю подшаблонку
...Каждый подшаблон должен быть разделен запятыми.
match x:
    []:
        print("Empty array")
    [1, 3, "test", null]:
        print("Very specific array")
    [var start, _, "test"]:
        print("First element is ", start, ", and the last is \"test\"")
    [42, ..]:
        print("Open ended array")
- Шаблон словаря
Работает так же, как шаблон массива. Каждый ключ должен быть постоянным шаблоном.
Сначала проверяется размер словаря, он должен быть того же размера, что и шаблон, в противном случае шаблон не совпадет.
Открытый словарь: Словарь может быть больше шаблона, если сделать последний подшаблоном -
...Каждый подшаблон должен быть разделен запятыми.
Если вы не указываете значение, то проверяется только наличие ключа.
Шаблон значения отделяется от шаблона ключа символом
:.match x: {}: print("Empty dict") {"name": "Dennis"}: print("The name is Dennis") {"name": "Dennis", "age": var age}: print("Dennis is ", age, " years old.") {"name", "age"}: print("Has a name and an age, but it's not Dennis :(") {"key": "godotisawesome", ..}: print("I only checked for one entry and ignored the rest")
- Несколько шаблонов
Также можно указать несколько разных шаблонов, разделенных запятой. Эти шаблоны не должны иметь никаких привязок в них.
match x:
    1, 2, 3:
        print("It's 1 - 3")
    "Sword", "Splash potion", "Fist":
        print("Yep, you've taken damage")
Pattern guards (Защита шаблона)
Pattern guard (Защита шаблона) — это необязательное условие, которое следует за списком шаблонов и позволяет выполнить дополнительные проверки перед выбором ветви match. В отличие от шаблона, защита шаблона может быть произвольным выражением.
В каждом match может быть выполнена только одна ветвь. После выбора ветви остальные не проверяются. Если вы хотите использовать один и тот же шаблон для нескольких ветвей или предотвратить выбор ветви со слишком общим шаблоном, вы можете указать защиту шаблона после списка шаблонов с помощью ключевого слова when:
match point:
    [0, 0]:
        print("Origin")
    [_, 0]:
        print("Point on X-axis")
    [0, _]:
        print("Point on Y-axis")
    [var x, var y] when y == x:
        print("Point on line y = x")
    [var x, var y] when y == -x:
        print("Point on line y = -x")
    [var x, var y]:
        print("Point (%s, %s)" % [x, y])
Если для текущей ветви нет соответствующего шаблона, то защита шаблона не оценивается, а проверяются шаблоны следующей ветви.
Если найден соответствующий шаблон, оценивается защитный шаблон.
Если это правда, то тело ветви выполняется и
matchзавершается.Если false (ложно), то проверяются шаблоны следующей ветви.
Классы
По умолчанию все файлы скриптов представляют собой безымянные классы. В этом случае вы сможете ссылаться на них, только используя путь к файлу, используя как относительный, так и абсолютный путь. Например, если вы назовете файл скрипта character.gd:
# Inherit from 'character.gd'.

extends "res://path/to/character.gd"

# Load character.gd and create a new node instance from it.

var Character = load("res://path/to/character.gd")
var character_node = Character.new()
Регистрация именованных классов
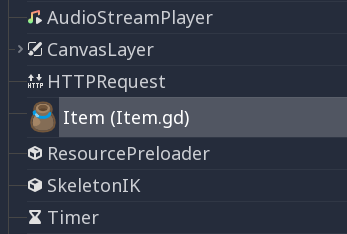
Вы можете дать своему классу имя, чтобы зарегистрировать его как новый тип в редакторе Godot. Для этого используется ключевое слово class_name. При желании можно использовать аннотацию @icon с путём к изображению, чтобы использовать его в качестве значка. После этого ваш класс появится в редакторе с новым значком:
# item.gd

@icon("res://interface/icons/item.png")
class_name Item
extends Node
Совет
Изображения SVG, используемые в качестве пользовательских значков узлов, должны иметь включённые import options Editor > Scale With Editor Scale и Editor > Convert Icons With Editor Theme. Это позволит значкам следовать настройкам масштаба и темы редактора, если они разработаны в той же цветовой палитре, что и собственные значки Godot.
Вот пример файла класса:
# Saved as a file named 'character.gd'.

class_name Character


var health = 5


func print_health():
    print(health)


func print_this_script_three_times():
    print(get_script())
    print(ResourceLoader.load("res://character.gd"))
    print(Character)
Если вы также хотите использовать extends, вы можете разместить их на одной строке:
class_name MyNode extends Node
Именованные классы регистрируются глобально, что означает, что они становятся доступны для использования в других скриптах без необходимости их load или preload:
var player

func _ready():
    player = Character.new()
Примечание
Godot инициализирует нестатические переменные каждый раз при создании экземпляра, включая массивы и словари. Это соответствует принципам потокобезопасности, поскольку скрипты могут инициализироваться в отдельных потоках без ведома пользователя.
Предупреждение
Редактор Godot скроет эти пользовательские классы с именами, начинающимися с префикса "Editor", в диалоговых окнах 'Create New Node' или 'Create New Scene'. Эти классы доступны для создания экземпляров во время выполнения по их именам, но автоматически скрываются окнами редактора вместе со встроенными узлами редактора, используемыми редактором Godot.
Абстрактные классы и методы
Начиная с Godot 4.5, вы можете определять абстрактные классы и методы с помощью аннотации @abstract.
Абстрактный класс — это класс, экземпляр которого невозможно создать напрямую. Вместо этого он предназначен для наследования другими классами. Попытка создать экземпляр абстрактного класса приведёт к ошибке.
Абстрактный метод — это метод, не имеющий реализации. Поэтому после заголовка функции ожидается символ новой строки или точка с запятой. Это определяет соглашение, которому должны соответствовать наследуемые классы, поскольку сигнатура метода должна быть совместима при переопределении.
Наследующие классы должны либо предоставлять реализации всех абстрактных методов, либо наследующий класс должен быть помечен как абстрактный. Если у класса есть хотя бы один абстрактный метод (собственный или нереализованный унаследованный), то он также должен быть помечен как абстрактный. Однако обратное неверно: абстрактный класс может не иметь абстрактных методов.
Совет
Если вы хотите объявить метод необязательным для переопределения, вам следует использовать неабстрактный метод и предоставить реализацию по умолчанию.
Например, у вас может быть абстрактный класс Shape, определяющий абстрактный метод draw(). Затем вы можете создать подклассы, такие как Circle и Square, которые реализуют метод draw() по-своему. Это позволяет определить общий интерфейс для всех фигур без необходимости реализовывать все детали в самом абстрактном классе:
@abstract class Shape:
    @abstract func draw()

# This is a concrete (non-abstract) subclass of Shape.
# You **must** implement all abstract methods in concrete classes.
class Circle extends Shape:
    func draw():
        print("Drawing a circle.")

class Square extends Shape:
    func draw():
        print("Drawing a square.")
Как внутренние классы, так и классы, созданные с помощью class_name, могут быть абстрактными. В этом примере создаются два абстрактных класса, один из которых является подклассом другого абстрактного класса:
@abstract
class_name AbstractClass
extends Node

@abstract class AbstractInnerClass:
    func _ready():
        pass

# This is an example of a concrete subclass of `AbstractInnerClass`.
# This class can be instantiated using `AbstractClass.ConcreteInnerClass.new()`
# in other scripts, even though it's part of an abstract `class_name` script.
class ConcreteInnerClass extends AbstractInnerClass:
    func _ready():
        print("Concrete class ready.")
Предупреждение
Поскольку абстрактный класс невозможно создать, прикрепить его к узлу невозможно. При попытке сделать это движок выдаст ошибку при запуске сцены:
Cannot set object script. Script '<path to script>' should not be abstract.
Неименованные классы также могут быть определены как абстрактные, аннотация @abstract должна предшествовать extends:
@abstract
extends Node
Наследование
Класс (хранимый как файл) может наследоваться от:
Глобального класса.
Другого файла класса.
Внутреннего класса внутри другого файла класса.
Множественное наследование невозможно.
Наследование использует ключевое слово extends:
# Inherit/extend a globally available class.
extends SomeClass

# Inherit/extend a named class file.
extends "somefile.gd"

# Inherit/extend an inner class in another file.
extends "somefile.gd".SomeInnerClass
Примечание
Если наследование явно не определено, класс по умолчанию будет наследовать RefCounted.
Чтобы проверить, наследует ли данный экземпляр заданному классу, можно использовать ключевое слово is:
# Cache the enemy class.
const Enemy = preload("enemy.gd")

# [...]

# Use 'is' to check inheritance.
if entity is Enemy:
    entity.apply_damage()
Чтобы вызвать функцию в суперклассе (т. е. extend-классе в вашем текущем классе), используйте ключевое слово super:
super(args)
Это особенно полезно, поскольку функции в расширяемых классах заменяют функции с теми же именами в их суперклассах. Если вы всё равно хотите вызывать их, можно использовать super:
func some_func(x):
    super(x) # Calls the same function on the super class.
Если вам необходимо вызвать другую функцию из суперкласса, вы можете указать имя функции с помощью оператора атрибута:
func overriding():
    return 0 # This overrides the method in the base class.

func dont_override():
    return super.overriding() # This calls the method as defined in the base class.
Предупреждение
Одним из распространенных заблуждений является попытка переопределить не-виртуальные методы движка, такие как get_class(), queue_free() и т. д. Это не поддерживается по техническим причинам.
В Godot 3 вы можете скрывать методы движка в GDScript, и это будет работать, если вы вызовете этот метод в GDScript. Однако движок не выполнит ваш код, если метод вызывается внутри движка при каком-либо событии.
В Godot 4 даже затенение может работать не всегда, поскольку GDScript оптимизирует вызовы собственных методов. Поэтому мы добавили предупреждение NATIVE_METHOD_OVERRIDE, которое по умолчанию рассматривается как ошибка. Мы настоятельно не рекомендуем отключать или игнорировать это предупреждение.
Обратите внимание, что это не относится к виртуальным методам, таким как _ready(), _process() и другим (отмеченным в документации квалификатором virtual, а их имена начинаются с подчёркивания). Эти методы предназначены специально для настройки поведения движка и могут быть переопределены в GDScript. Сигналы и уведомления также могут быть полезны для этих целей.
Конструктор класса
Конструктор класса, вызываемый при создании экземпляра класса, называется _init. Если вы хотите вызвать конструктор базового класса, вы также можете использовать синтаксис super. Обратите внимание, что у каждого класса есть неявный конструктор, который всегда вызывается (определяя значения по умолчанию для переменных класса). super используется для вызова явного конструктора:
func _init(arg):
   super("some_default", arg) # Call the custom base constructor.
Лучше пояснить это на примерах. Рассмотрим такой сценарий:
# state.gd (inherited class).
var entity = null
var message = null


func _init(e = null):
    entity = e


func enter(m):
    message = m


# idle.gd (inheriting class).
extends "state.gd"


func _init(e = null, m = null):
    super(e)
    # Do something with 'e'.
    message = m
Здесь есть несколько вещей, которые необходимо держать в голове:
Если унаследованный класс (
state.gd) определяет конструктор_init, который принимает аргументы (eв данном случае), то наследующий класс (idle.gd) должен также определить_initи передать соответствующие параметры в_initизstate.gd.idle.gdможет иметь другое количество аргументов, чем базовый классstate.gd.В приведенном выше примере
e, переданное конструкторуstate.gd, — это то же самоеe, переданноеidle.gd.Если конструктор
_initклассаidle.gdпринимает 0 аргументов, ему всё равно необходимо передать какое-то значение базовому классуstate.gd, даже если он ничего не делает. Это подводит нас к тому, что базовому конструктору можно передавать не только переменные, но и выражения, например:
# idle.gd

func _init():
    super(5)
Статический конструктор
Статический конструктор — это статическая функция _static_init, которая вызывается автоматически при загрузке класса после инициализации статических переменных:
static var my_static_var = 1

static func _static_init():
    my_static_var = 2
Статический конструктор не может принимать аргументы и не должен возвращать никаких значений.
Внутренние классы
Файл класса может хранить внутренние классы. Внутренние классы определяются с помощью ключевого слова class. Создать экземпляр можно с помощью функции ClassName.new().
# Inside a class file.

# An inner class in this class file.
class SomeInnerClass:
    var a = 5


    func print_value_of_a():
        print(a)


# This is the constructor of the class file's main class.
func _init():
    var c = SomeInnerClass.new()
    c.print_value_of_a()
Классы как ресурсы
Классы, хранящиеся в файлах, обрабатываются как GDScripts. Для доступа к ним в других классах их необходимо загрузить с диска. Это делается с помощью функций load или preload (см. ниже). Создание экземпляра загруженного ресурса класса осуществляется вызовом функции new для объекта класса:
# Load the class resource when calling load().
var MyClass = load("myclass.gd")

# Preload the class only once at compile time.
const MyClass = preload("myclass.gd")


func _init():
    var a = MyClass.new()
    a.some_function()
Экспорт
Примечание
Документация об экспорте перемещена в Экспортируемые свойства GDScript.
Свойства (сеттеры (setters) и геттеры (getters))
Иногда требуется, чтобы переменная-член класса выполняла не только функцию хранения данных, но и выполняла проверку или вычисления при изменении своего значения. Также может потребоваться каким-либо образом инкапсулировать доступ к ней.
Для этого GDScript предоставляет специальный синтаксис для определения свойств с помощью ключевых слов set и get после объявления переменной. Затем вы можете определить блок кода, который будет выполняться при обращении к переменной или её назначении.
Пример:
var milliseconds: int = 0
var seconds: int:
    get:
        return milliseconds / 1000
    set(value):
        milliseconds = value * 1000
Примечание
В отличие от setget в предыдущих версиях Godot, методы set и get вызываются всегда (за исключением случаев, указанных ниже), даже при обращении к ним внутри одного класса (с префиксом self. или без него). Это обеспечивает единообразие поведения. Если вам нужен прямой доступ к значению, используйте другую переменную для прямого доступа и укажите это имя в коде свойства.
Альтернативный синтаксис
Также существует еще одна нотация для использования существующих функций класса, если вы хотите отделить код от объявления переменной или вам нужно повторно использовать код для нескольких свойств (но вы не можете отличить, для какого свойства вызывается setter/getter):
var my_prop:
    get = get_my_prop, set = set_my_prop
Это также можно сделать в той же строке:
var my_prop: get = get_my_prop, set = set_my_prop
Сеттер и геттер должны использовать одинаковую нотацию, смешивание стилей для одной и той же переменной не допускается.
Примечание
Для встроенных сеттеров и геттеров нельзя указывать подсказки типа. Это сделано специально для сокращения шаблонного кода. Если переменная типизирована, то аргумент сеттера автоматически имеет тот же тип, и возвращаемое значение геттера должно ему соответствовать. Раздельные функции сеттера и геттера могут иметь подсказки типа, и тип должен соответствовать типу переменной или быть более широким.
Когда сеттер/геттер не вызывается
При инициализации переменной значение инициализатора будет записано непосредственно в переменную, в том числе, если к переменной применена аннотация @onready.
Использование имени переменной для ее установки внутри ее собственного сеттера или для ее получения внутри ее собственного геттера позволит напрямую обратиться к базовому члену, поэтому это не приведет к созданию бесконечной рекурсии и избавит вас от явного объявления другой переменной:
signal changed(new_value)
var warns_when_changed = "some value":
    get:
        return warns_when_changed
    set(value):
        changed.emit(value)
        warns_when_changed = value
Это также относится к альтернативному синтаксису:
var my_prop: set = set_my_prop

func set_my_prop(value):
    my_prop = value # No infinite recursion.
Предупреждение
Исключение не распространяется на другие функции, вызываемые в сеттере/геттере. Например, следующий код приведёт к бесконечной рекурсии:
var my_prop:
    set(value):
        set_my_prop(value)

func set_my_prop(value):
    my_prop = value # Infinite recursion, since `set_my_prop()` is not the setter.
Режим Инструмента
По умолчанию скрипты не запускаются в редакторе, и можно изменять только экспортированные свойства. В некоторых случаях желательно, чтобы они запускались в редакторе (при условии, что они не выполняют игровой код или вручную не допускают этого). Для этого существует аннотация @tool, которую необходимо разместить в начале файла:
@tool
extends Button

func _ready():
    print("Hello")
Предупреждение
Будьте осторожны при освобождении узлов с помощью queue_free() или free() в скрипт инструмента (особенно самого владельца скрипта). Так как скрипт инструмента запускает свой код в редакторе, неправильное их использование может привести к крашу редактора.
Управление памятью
Godot реализует подсчёт ссылок для освобождения определённых экземпляров, которые больше не используются, вместо использования сборщика мусора или необходимости исключительно ручного управления. Любой экземпляр класса RefCounted (или любого класса, его наследующего, например, Resource) будет автоматически освобождён после прекращения использования. Экземпляр любого класса, не относящегося к RefCounted (например, Node или базовому типу Object), останется в памяти до тех пор, пока не будет удалён с помощью free() (или queue_free() для Узлов).
Примечание
Если Node удаляется с помощью free() или queue_free(), все его дочерние элементы также будут рекурсивно удалены.
Чтобы избежать циклических ссылок, которые невозможно освободить, предусмотрена функция WeakRef для создания слабых ссылок, которые позволяют получить доступ к объекту, не препятствуя освобождению RefCounted. Вот пример:
extends Node

var my_file_ref

func _ready():
    var f = FileAccess.open("user://example_file.json", FileAccess.READ)
    my_file_ref = weakref(f)
    # the FileAccess class inherits RefCounted, so it will be freed when not in use

    # the WeakRef will not prevent f from being freed when other_node is finished
    other_node.use_file(f)

func _this_is_called_later():
    var my_file = my_file_ref.get_ref()
    if my_file:
        my_file.close()
Или же, если ссылки не используются, is_instance_valid(instance) может быть использован для проверки того, был ли освобожден объект.
Сигналы
Сигналы это способ отправки уведомлений от объекта, на которые могут реагировать другие объекты. Чтобы создать собственные сигналы для класса, используйте ключевое слово signal.
extends Node


# A signal named health_depleted.
signal health_depleted
Примечание
Сигналы это Callback механизм. Они также выполняют роль наблюдателя, распространенный шаблон программирования. Для лучшего понимания информации, читайте про шаблон наблюдатель в словаре Шаблонов Игрового Программирования.
Вы можете подключить эти сигналы к методам так же, как вы подключаете встроенные сигналы узлов, например Button или RigidBody3D.
В примере ниже мы подключаем сигнал health_depleted от узла Character к узлу Game. Когда узел Character посылает сигнал, вызывается метод _on_character_health_depleted игрового узла:
# game.gd

func _ready():
    var character_node = get_node('Character')
    character_node.health_depleted.connect(_on_character_health_depleted)


func _on_character_health_depleted():
    get_tree().reload_current_scene()
Вы можете отправлять вместе с сигналом столько аргументов, сколько хотите.
Вот пример, где это может быть полезным. Допустим, мы хотим, чтобы полоса здоровья на экране реагировала на изменения здоровья анимацией, но мы хотим, чтобы пользовательский интерфейс был отделен от игрока в нашем дереве сцен.
В нашем скрипте character.gd мы определяем сигнал health_changed и передаем его с помощью Signal.emit(), а из узла Game, расположенного выше в дереве сцены, мы подключаем его к Lifebar с помощью метода Signal.connect():
# character.gd

...
signal health_changed


func take_damage(amount):
    var old_health = health
    health -= amount

    # We emit the health_changed signal every time the
    # character takes damage.
    health_changed.emit(old_health, health)
...
# lifebar.gd

# Here, we define a function to use as a callback when the
# character's health_changed signal is emitted.

...
func _on_Character_health_changed(old_value, new_value):
    if old_value > new_value:
        progress_bar.modulate = Color.RED
    else:
        progress_bar.modulate = Color.GREEN

    # Imagine that `animate` is a user-defined function that animates the
    # bar filling up or emptying itself.
    progress_bar.animate(old_value, new_value)
...
В узле Game мы берём узлы Character и Lifebar, затем соединяем символ, отправляющий сигнал, с получателем, в нашем случае с узлом Lifebar.
# game.gd

func _ready():
    var character_node = get_node('Character')
    var lifebar_node = get_node('UserInterface/Lifebar')

    character_node.health_changed.connect(lifebar_node._on_Character_health_changed)
Это позволяет Lifebar реагировать на изменения здоровья без соединения с узлом Character.
Вы можете написать необязательные имена аргументов в скобках после определения сигнала:
# Defining a signal that forwards two arguments.
signal health_changed(old_value, new_value)
These arguments show up in the editor's Signals dock, and Godot can use them to generate callback functions for you. However, you can still emit any number of arguments when you emit signals; it's up to you to emit the correct values.
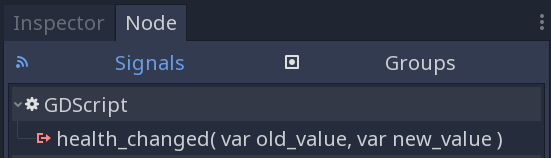
Вы также можете создавать копии вызываемых объектов GDScript, которые принимают дополнительные аргументы, используя Callable.bind(). Это позволяет добавлять дополнительную информацию к соединению, если сам по себе отправленный сигнал не предоставляет доступ ко всем необходимым данным.
При испускании сигнала метод обратного вызова получает связанные значения в дополнение к тем, которые предоставлены сигналом.
Основываясь на примере выше, предположим, что мы хотим отобразить на экране журнал урона, полученного каждым персонажем, например, Игрок 1 получил 22 ед. урона. Сигнал health_changed не содержит имени персонажа, получившего урон. Поэтому при подключении сигнала к игровой консоли мы можем добавить имя персонажа с помощью метода bind:
# game.gd

func _ready():
    var character_node = get_node('Character')
    var battle_log_node = get_node('UserInterface/BattleLog')

    character_node.health_changed.connect(battle_log_node._on_Character_health_changed.bind(character_node.name))
Наш узел BattleLog получает каждый привязанный элемент как дополнительный аргумент:
# battle_log.gd

func _on_Character_health_changed(old_value, new_value, character_name):
    if not new_value <= old_value:
        return

    var damage = old_value - new_value
    label.text += character_name + " took " + str(damage) + " damage."
Ожидание сигналов или сопрограмм
Ключевое слово await можно использовать для создания сопрограмм, которые ожидают сигнала перед продолжением выполнения. Использование ключевого слова await с сигналом или вызовом функции, которая также является сопрограммой, немедленно вернёт управление вызывающему коду. После срабатывания сигнала (или завершения вызванной сопрограммы) её выполнение возобновится с точки остановки.
Например, чтобы остановить выполнение до тех пор, пока пользователь не нажмет кнопку, можно сделать что-то вроде этого:
func wait_confirmation():
    print("Prompting user")
    await $Button.button_up # Waits for the button_up signal from Button node.
    print("User confirmed")
    return true
В этом случае wait_confirmation становится сопрограммой, что означает, что вызывающему также необходимо ее дождаться:
func request_confirmation():
    print("Will ask the user")
    var confirmed = await wait_confirmation()
    if confirmed:
        print("User confirmed")
    else:
        print("User cancelled")
Обратите внимание, что запрос возвращаемого значения сопрограммы без await вызовет ошибку:
func wrong():
    var confirmed = wait_confirmation() # Will give an error.
Однако, если вы не зависите от результата, вы можете просто вызвать его асинхронно, что не остановит выполнение и не сделает текущую функцию сопрограммой:
func okay():
    wait_confirmation()
    print("This will be printed immediately, before the user press the button.")
Если вы используете await с выражением, которое не является ни сигналом, ни сопрограммой, значение будет возвращено немедленно, и функция не вернет управление вызывающему объекту:
func no_wait():
    var x = await get_five()
    print("This doesn't make this function a coroutine.")

func get_five():
    return 5
Это также означает, что возврат сигнала из функции, которая не является сопрограммой, заставит вызывающую функцию ожидать этот сигнал:
func get_signal():
    return $Button.button_up

func wait_button():
    await get_signal()
    print("Button was pressed")
Примечание
В отличие от yield в предыдущих версиях Godot, получить объект состояния функции невозможно. Это сделано для обеспечения типобезопасности. При такой типобезопасности функция не может заявить, что возвращает int, хотя на самом деле возвращает объект состояния функции во время выполнения.
You can store the arguments passed to the signal's parameters. If there is only one parameter, the awaited value will have the same type as the argument:
func toggled():
    var signal_args = await $Button.toggled
    assert(typeof(signal_args) == TYPE_BOOL)
If there is more than one parameter, the awaited value will be of type Array:
func request_completed():
    var signal_args = await $HTTPRequest.request_completed
    assert(typeof(signal_args) == TYPE_ARRAY)
Otherwise, the awaited value will be null:
func button_up():
    var signal_args = await $Button.button_up
    assert(signal_args == null)
Ключевое слово Assert
Ключевое слово assert можно использовать для проверки условий в отладочных сборках. В неотладочных сборках такие утверждения игнорируются. Это означает, что передаваемое как аргумент выражение не будет обрабатываться в проекте, экспортированном в режиме релиза. Поэтому утверждения не должны содержать выражения, имеющие побочные эффекты. В противном случае поведение скрипта в отладочной и релизной сборке будет различаться.
# Check that 'i' is 0. If 'i' is not 0, an assertion error will occur.
assert(i == 0)
Когда запускаешь проект через редактор, первый будет остановлен, если произойдёт ошибка утверждения.
При желании вы можете передать пользовательское сообщение об ошибке, которое будет отображаться в случае, если утверждение не выполняется:
assert(enemy_power < 256, "Enemy is too powerful!")
Комментарии
Все, что находится после символа
#до конца строки игнорируется и считается комментарием.# This is a comment.Совет
В редакторе скриптов Godot в комментариях выделяются специальные ключевые слова, чтобы привлечь внимание пользователя к определенным комментариям:
Критический (Critical) (отображается красным):
ТРЕВОГА (ALERT),ВНИМАНИЕ (ATTENTION),ОСТОРОЖНО (CAUTION),КРИТИЧЕСКИЙ (CRITICAL),ОПАСНОСТЬ (DANGER),БЕЗОПАСНОСТЬ (SECURITY)Предупреждение (Warning) (отображается желтым цветом):
BUG (ОШИБКА),DEPRECATED (УСТАРЕЛО),FIXME (Исправь меня),HACK,TASK (ЗАДАЧА),TBD (Будет определено),TODO (ЧТО СДЕЛАТЬ),WARNING (ПРЕДУПРЕЖДЕНИЕ)Уведомление (Notice) (отображается зеленым цветом):
ИНФОРМАЦИЯ (INFO),ПРИМЕЧАНИЕ (NOTE),УВЕДОМЛЕНИЕ (NOTICE),ТЕСТ (TEST),ТЕСТИРОВАНИЕ (TESTING)Эти ключевые слова чувствительны к регистру, поэтому для того, чтобы они были распознаны, их необходимо писать заглавными буквами:
Список выделенных ключевых слов и их цвета можно изменить в разделе Text Editor > Theme > Comment Markers в настройках редактора.
Используйте два символа решётки (
##) вместо одного (#) для добавления комментария документации, который будет отображаться в документации скрипта и в описании экспортированной переменной в инспекторе. Комментарии документации должны размещаться непосредственно над документируемым элементом (например, переменной-членом) или в начале файла. Также доступны специальные параметры форматирования. Подробнее см. Комментарии к документации GDScript.