Attention: Here be dragons
This is the latest
(unstable) version of this documentation, which may document features
not available in or compatible with released stable versions of Godot.
Checking the stable version of the documentation...
Прототипирование уровней с помощью CSG
CSG означает Constructive Solid Geometry (Конструктивная Твердая Геометрия), и является инструментом для объединения основных форм или пользовательских мехов для создания более сложных форм. В программном обеспечении 3D-моделирования, CSG в основном известен как "Boolean Operators".
Уровень прототипирования является одним из основных применений CSG в Godot. Эта техника позволяет пользователям создавать наиболее распространенные формы, сочетая примитивы. Внутренние среды могут быть созданы с помощью инвертированных примитивов.
Примечание
Узлы CSG в Godot в основном предназначены для прототипирования. Нет встроенной поддержки для UV-картографирования или редактирования 3D- полигонов (хотя экструдированные 2D полигоны могут использоваться с узлом CSGPolygon3D).
Если вы ищете простой в использовании инструмент для проектирования уровня для проекта, вы можете использовать FuncGodot или Cyclops Level Builder вместо этого.
См. также
Вы можете проверить, как использовать узлы CSG для построения различных фигур (например, лестниц или дорог) с помощью Constructive Solid Geometry demo project.
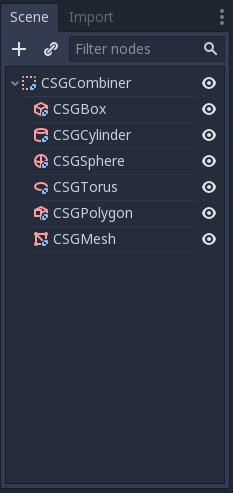
Знакомство с узлами CSG
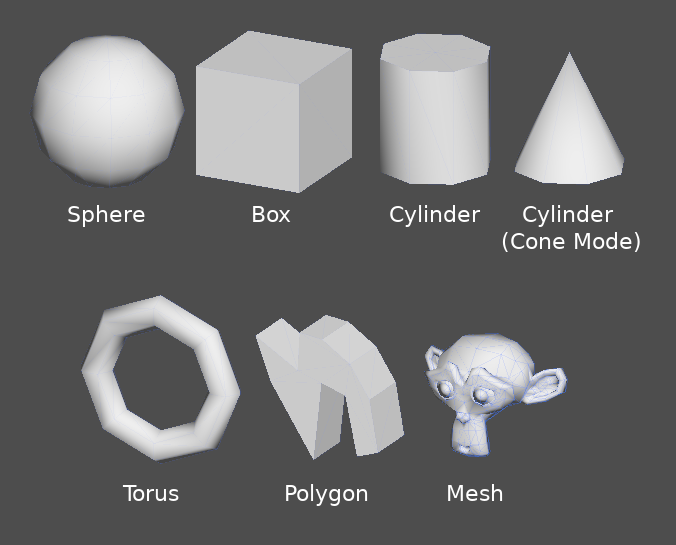
Как и другие функции Godot, CSG поддерживается в виде узлов. Это узлы CSG:
CSGCylinder3D (также поддерживает конус)
Особенности инструментов CSG
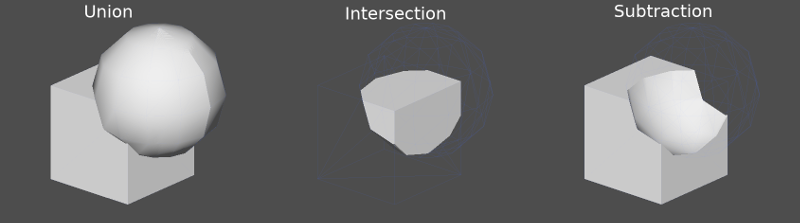
Каждый узел CSG поддерживает 3 вида булевых операций:
Union (объединение): Геометрия обоих примитивов объединяется, пересекающаяся геометрия удаляется.
Intersection (пересечение): остаётся только пересекающаяся геометрия, остальное удаляется.
Subtraction (вычитание): Вторая фигура вычитается из первой, оставляя вмятину своей формы.

CSGPolygоn
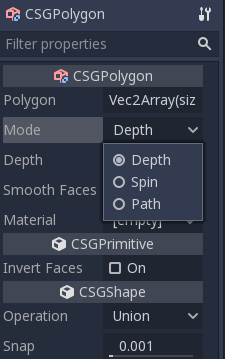
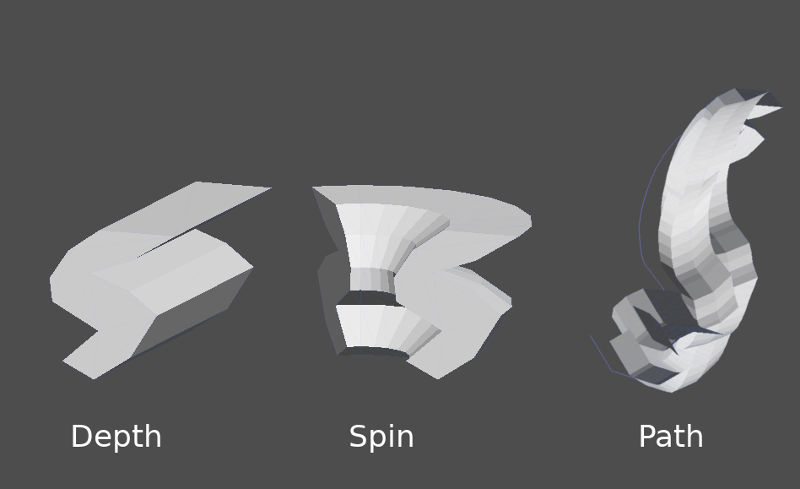
Узел CSGPolygon3D выдавливает Полигон, нарисованный в 2D (в координатах X, Y), следующими способами:
Depth (глубина): Выдавливается назад на заданную величину.
Spin (вращение): Выдавливается, вращаясь вокруг своего источника.
Path (путь): Выдавливается вдоль узла Path. Эта операция обычно называется лофтингом.
Примечание
Режим Path должен быть предоставлен с узлом Path3D для работы. В узле Path нарисуйте путь, и многоугольник в CSGPolygon3D будет выдавлен вдоль указанного пути.
Пользовательские меши
Пользовательские сетки могут использоваться для CSGMesh3D, пока сетка многообразная. Сетку можно моделировать в другом программном обеспечении и импортировать в Godot. Поддерживаются множественные материалы.
Для использования сетки в качестве сетки CSG необходимо:
быть закрытым
пусть каждое ребро соединяется только с двумя гранями
иметь объем
Также рекомендуется избегать:
отрицательный объем
самопересечение
внутренние грани
Godot использует библиотеку manifold lдля реализации сеток CSG. Техническое определение "manifold", используемое Godot, следующее, адаптированное из definition of "manifold":
Каждое ребро каждого треугольника должно содержать те же две вершины (по индексу), что и ровно одно другое ребро треугольника, а начальная и конечная вершины должны меняться местами между этими двумя ребрами. Вершины треугольника должны появляться в порядке по часовой стрелке, если смотреть снаружи сетки-многообразия Godot Engine.
Создание существующего сетчатого коллектора с помощью Blender
Создание существующего сетчатого коллектора с помощью Blender.
В Blender установите и включите addon`3D Print Toolbox <https://extensions.blender.org/add-ons/print3d-toolbox/>`_.
Выберите сетку, которую вы хотите сделать коллекторной. Откройте боковую панель, нажав на стрелку:

На вкладке 3D Print в разделе Clean Up (Очистка) нажмите кнопку Make Manifold (Создать коллектор):

Теперь сетка должна быть многоэлементной и ее можно использовать как пользовательскую сетку.
CSGCombiner3D (CSG-комбинатор 3D)
Узел CSGCombiner3D — это пустая форма, используемая для организации. Он будет объединять только дочерние узлы.
Порядок обработки
Каждый узел CSG сначала обрабатывает свои дочерние узлы и их операции: объединение, пересечение или вычитание, в порядке дерева, и применяет их к себе последовательно.
Примечание
В интересах производительности убедитесь, что геометрия CSG остается относительно простой, поскольку сложные сетки могут потребовать много времени для обработки. Если объекты добавляются вместе (например, стол и комната), создавайте их как отдельные деревья CSG. Слишком большое количество объектов в одном дереве в конечном итоге начнет влиять на производительность. Используйте бинарные операции только там, где они действительно нужны.
Прототипирование уровня
Мы создадим прототип комнаты для практического использования инструментов CSG.
Совет
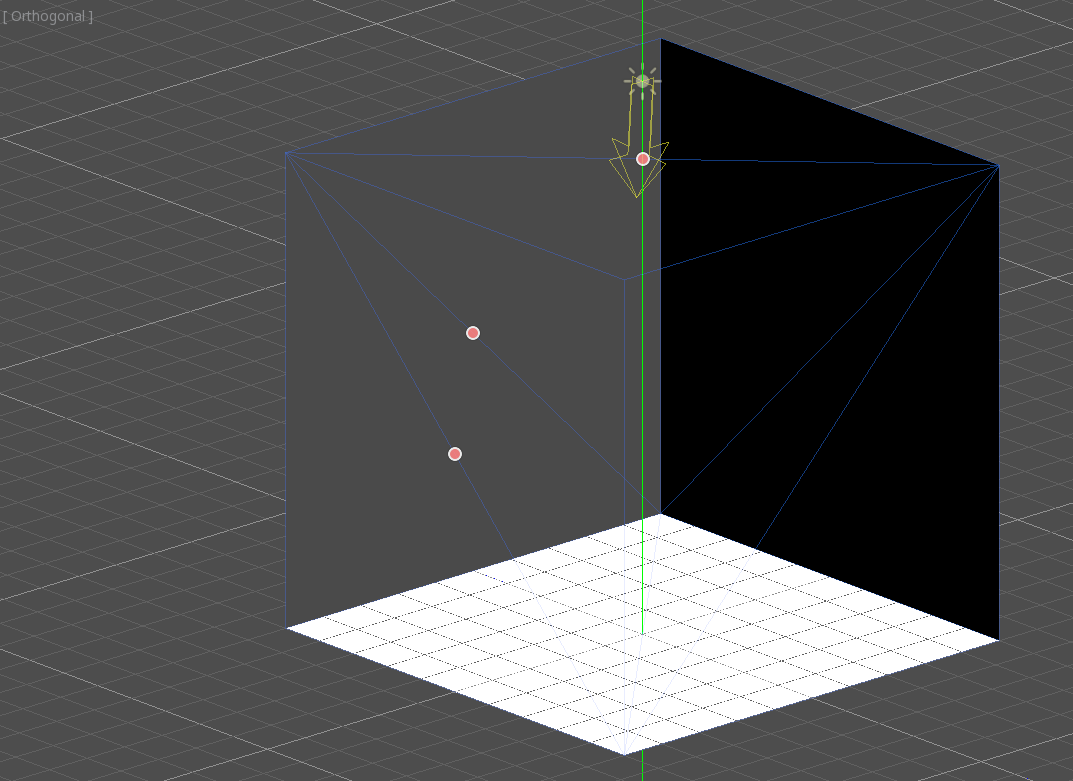
Работа в ортогональной проекции даёт лучший вид при совмещении фигур CSG.
Наш уровень будет содержать эти объекты:
комната,
кровать,
лампу,
стол,
книжную полку.
Создайте сцену с узлом Node3D в качестве корневого узла.
Совет
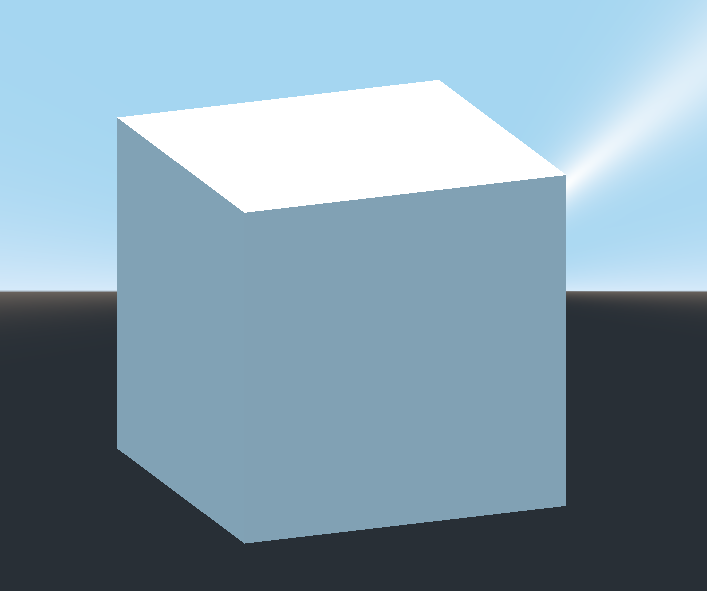
Освещение среды по умолчанию не обеспечивает чёткого затенения под некоторыми углами. Измените режим отображения, используя Display Overdraw в меню 3D экрана, или добавьте узел DirectionalLight, чтобы помочь вам видеть чётко.
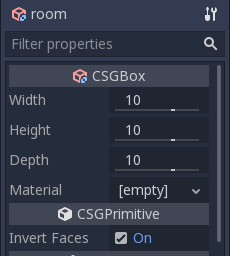
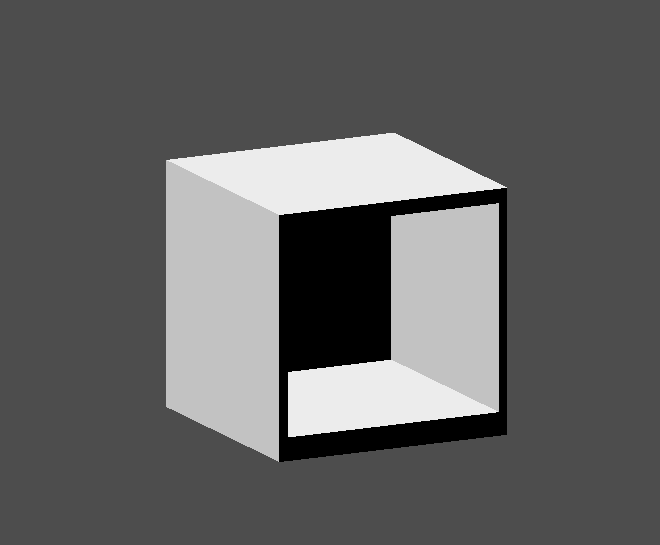
Создайте CSGBox3D и назовите его room, включите Invert Faces и измените размеры вашей комнаты.
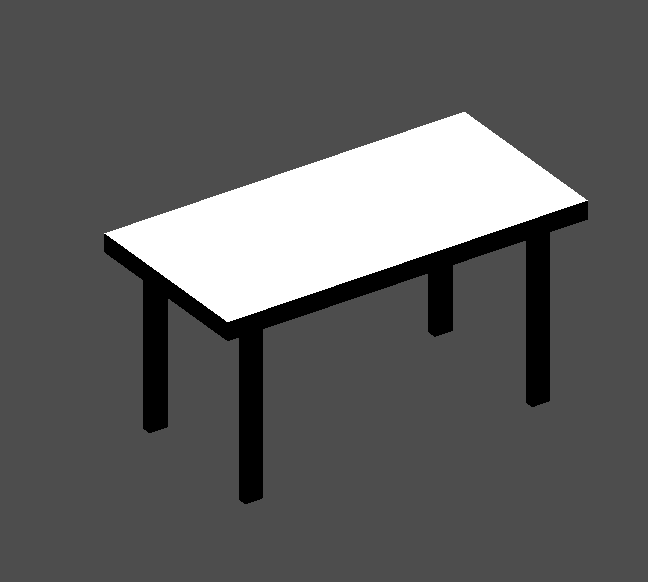
Затем создайте CSGCombiner3D и назовите его desk.
Стол имеет одну поверхность и 4 ножки:
Создайте 1 дочерний узел CSGBox3D в режиме Union для поверхности и настройки размеров.
Создайте 4 дочерних узла CSGBox3D в режиме Union для ног и отрегулируйте размеры.
Отрегулируйте их расположение, чтобы они напоминали стол.
Примечание
Узлы CSG внутри CSGCombiner3D будут обрабатывать свою операцию только внутри объединителя. Поэтому CSGCombiner3D-ы используются для организации узлов CSG.
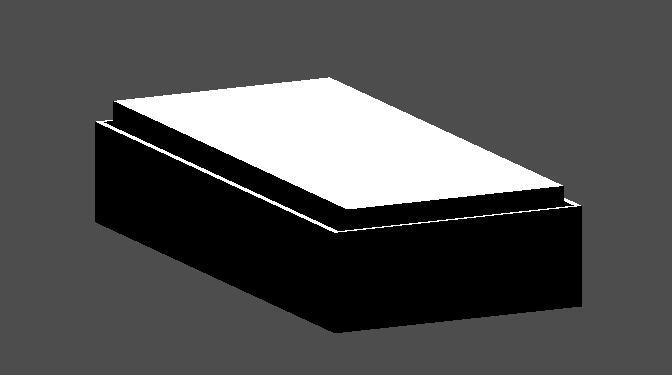
Создайте CSGCombiner3D и назовите его bed.
Наша кровать состоит из 3 частей: кровати, матраса и подушки. Создайте CSGBox3D и настройте его размер для кровати. Создайте еще один CSGBox3D и настройте его размер для матраса.
Мы создадим еще один CSGCombiner3D с именем pillow как дочерний элемент bed. Дерево сцены должно выглядеть так:
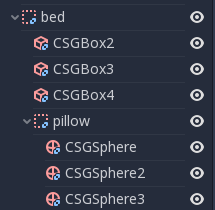
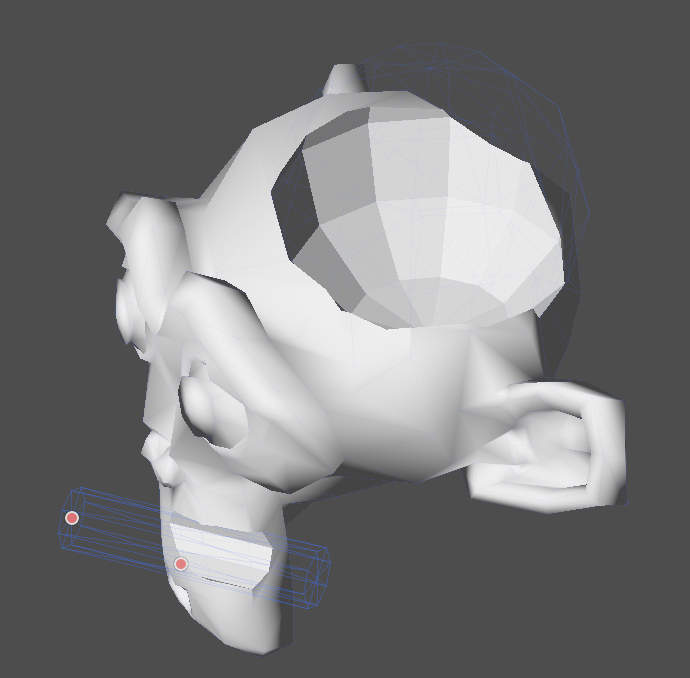
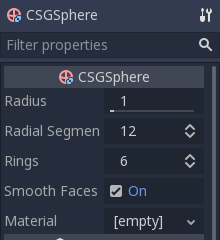
Мы объединим 3 узла CSGSphere3D в режиме Union, чтобы сформировать подушку. Масштабируем ось Y сфер и включаем Smooth Faces.
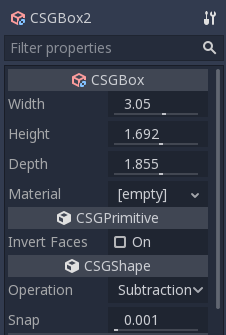
Выберите узел pillow и переключите режим на Subtraction; объединённые сферы прорежут отверстие в матрасе.
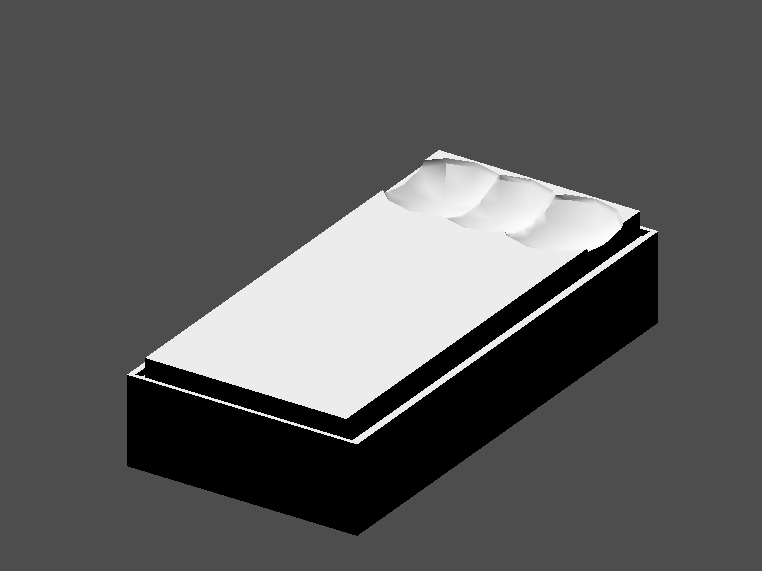
Попробуйте переподчинить узел pillow корневому узлу Node3D; отверстие исчезнет.
Примечание
Это иллюстрирует эффект порядка обработки CSG. Поскольку корневой узел не является узлом CSG, узлы CSGCombiner3D являются конечными точками операций; это показывает использование CSGCombiner3D для организации сцены CSG.
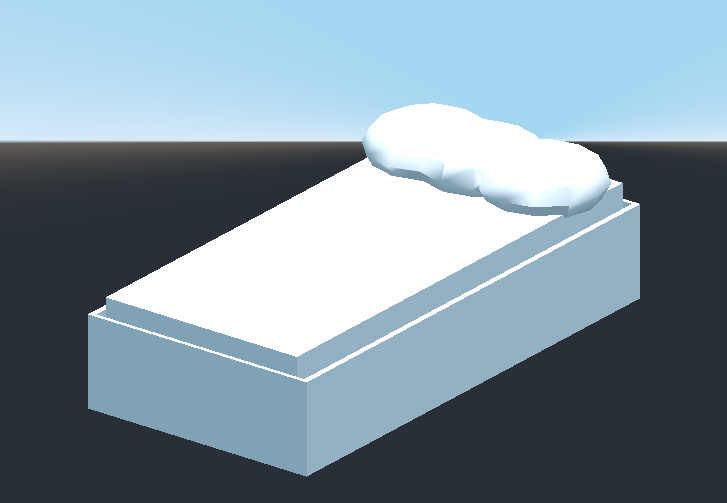
Отмените re-parent после наблюдения за эффектом. Собранная вами кровать должна выглядеть так:
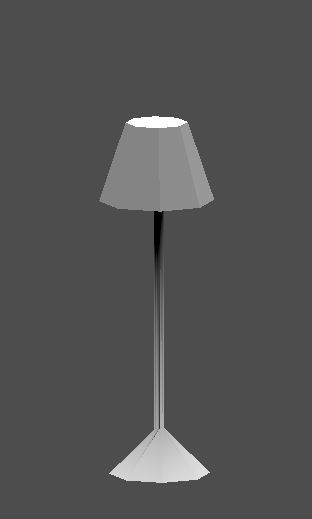
Создайте CSGCombiner3D и назовите его lamp.
Лампа состоит из 3 частей: подставки, столба и абажура. Создайте CSGCylinder3D, включите опцию Cone и сделайте его подставкой. Создайте еще один CSGCylinder3D и отрегулируйте размеры, чтобы использовать его в качестве столба.
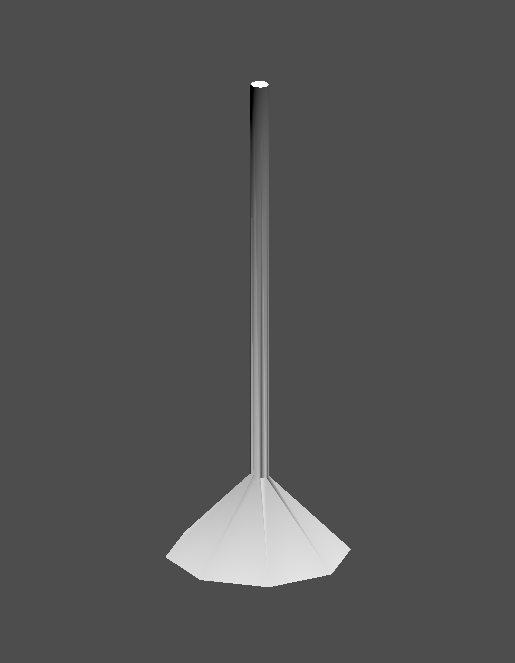
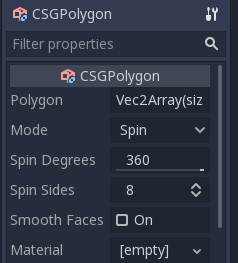
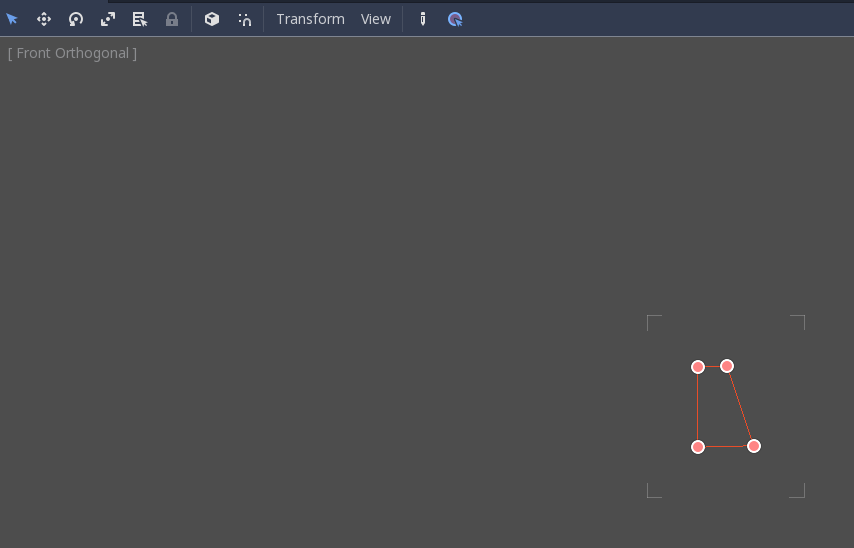
Мы будем использовать CSGPolygon3D для абажура. Используйте режим Spin для CSGPolygon3D и нарисуйте трапецию, находясь в Front View (цифровая клавиатура 1); эта форма будет выдавливаться вокруг начала координат и формировать абажур.
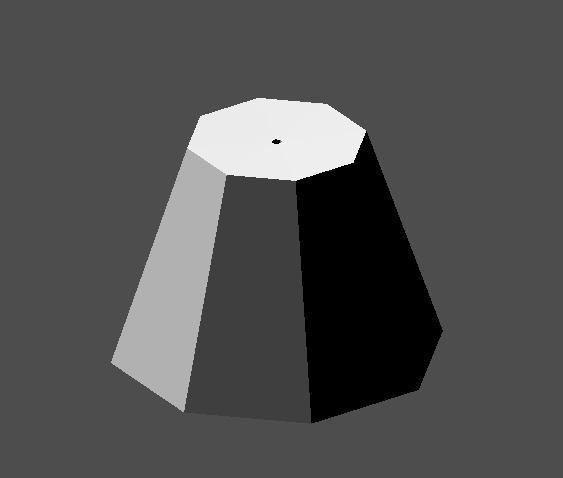
Отрегулируйте расположение 3 частей, чтобы получилась лампа.
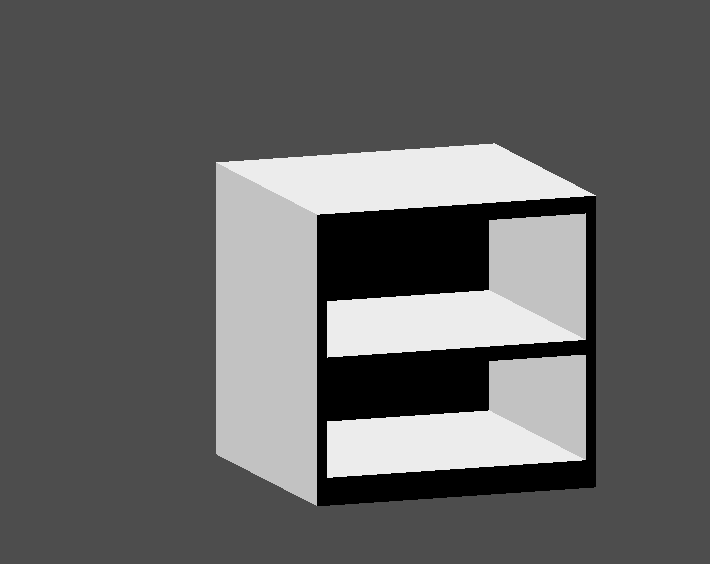
Создайте CSGCombiner3D и назовите его bookshelf.
Мы будем использовать 3 узла CSGBox3D для книжной полки. Создайте CSGBox3D и настройте его размеры; это будет размер книжной полки.
Дублируйте CSGBox3D, сократите размеры каждой оси и измените режим на Subtraction.
Вы почти построили полку. Создайте ещё один CSGBox3D для разделения полки на два уровня.
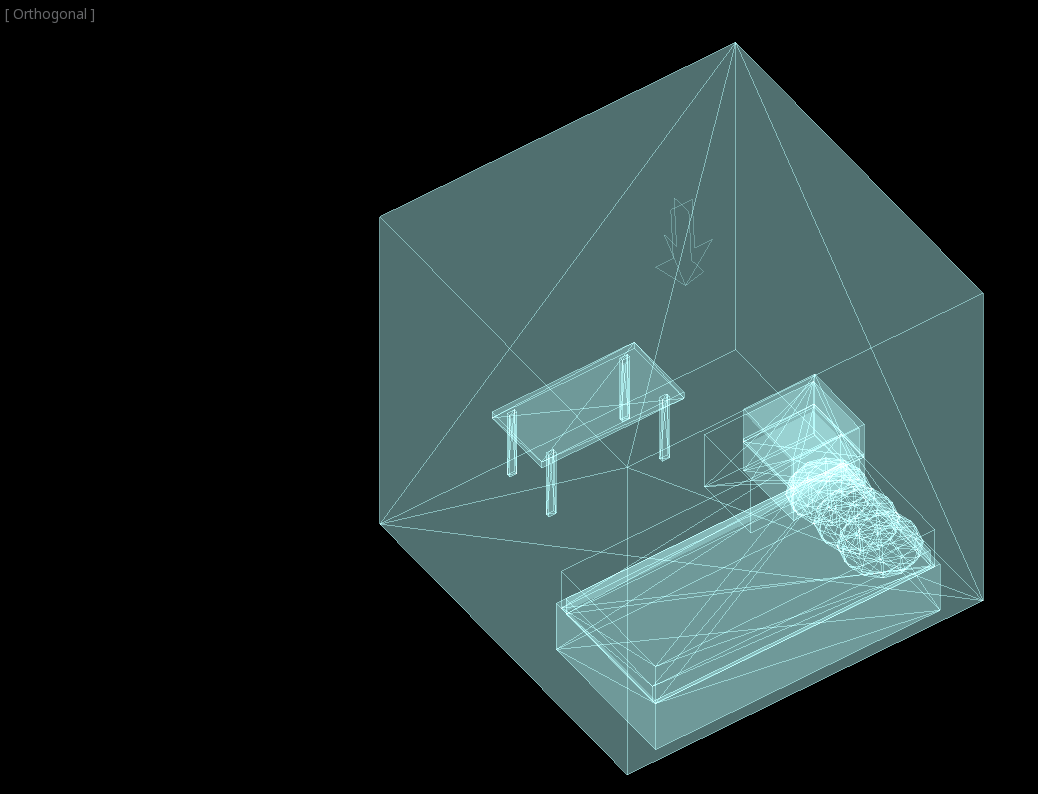
Расставьте мебель в комнате так, как вам нравится, и ваша сцена должна выглядеть следующим образом:
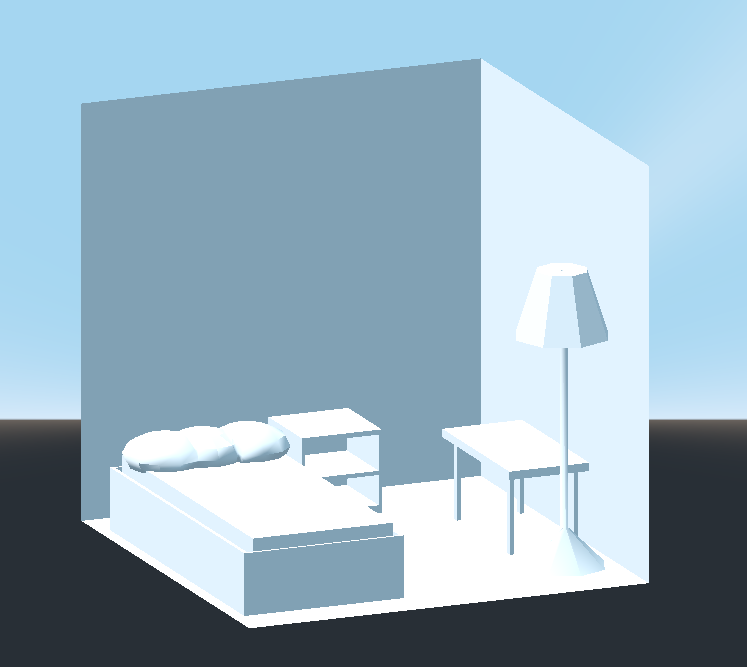
Вы успешно создали прототип уровня комнаты с помощью инструментов CSG в Godot. Инструменты CSG можно использовать для проектирования всех видов уровней, таких как лабиринт или город; изучите их возможности при разработке своей игры.
Использование прототипов текстур
Godot Стандартный материал 3D и материал ORM 3D поддерживает triplanar mapping, которое можно использовать для автоматического применения текстуры к произвольным объектам без искажения. Это удобно при использовании CSG, поскольку Godot пока не поддерживает редактирование UV-карт на узлах CSG. Трипланарное отображение относительно медленное, что обычно ограничивает его использование органическими поверхностями, такими как ландшафт. Тем не менее, при прототипировании его можно использовать для быстрого применения текстур к уровням на основе CSG.
Примечание
Если вам нужны текстуры для создания прототипов, Кенни сделал набор текстур для прототипов с лицензией CC0.
Существует два способа применения материала к узлу CSG:
Применение его к узлу CSGCombiner3D как переопределение материала (Geometry > Material Override в инспекторе). Это автоматически повлияет на его дочерние элементы, но сделает невозможным изменение материала в отдельных дочерних элементах.
Применение материала к отдельным узлам (Material в инспекторе). Таким образом, каждый узел CSG может иметь свой собственный вид. Вычитаемые CSG-узлы будут применять свой материал к узлам, в которых они "копаются".
Чтобы применить трипланарное отображение к узлу CSG, выберите его, перейдите в Инспектор, щелкните текст [empty] рядом с Material Override (или Material для отдельных узлов CSG). Выберите New StandardMaterial3D. Щелкните значок только что созданного материала, чтобы отредактировать его. Разверните раздел Albedo и загрузите текстуру в свойство Texture. Теперь разверните раздел Uv1 и отметьте Triplanar. Вы можете изменить смещение и масштаб текстуры по каждой оси, играя со свойствами Scale и Offset чуть выше. Более высокие значения свойства Scale приведут к более частому повторению текстуры.
Совет
Вы можете скопировать StandardMaterial3D, чтобы повторно использовать его в узлах CSG. Для этого щёлкните выпадающую стрелку рядом со свойством материала в инспекторе и выберите Copy (копировать). Чтобы вставить материал, выберите узел, к которому вы хотите применить его, щёлкните стрелку раскрывающегося списка рядом со свойством материала и выберите Paste (вставить).
Преобразование в MeshInstance3D
Начиная с Godot 4.4, вы можете преобразовать узел CSG и его дочерние элементы в узел MeshInstance3D.
Это имеет несколько преимуществ:
Запекайте карты освещения, поскольку UV2 можно сгенерировать на MeshInstance3D.
Запекание окклюзивного обрезания, поскольку процесс запекания окклюзивного обрезания учитывает только MeshInstance3D.
Более быстрая загрузка, поскольку сетку CSG больше не нужно перестраивать при загрузке сцены.
Более высокая производительность при обновлении преобразования узла при использовании сетки внутри другого узла CSG.
Чтобы преобразовать узел CSG в узел MeshInstance3D, выберите его, затем выберите CSG > Bake Mesh Instance на панели инструментов. Узел MeshInstance3D будет создан как родственный. Обратите внимание, что узел CSG, который использовался для запекания, не скрывается автоматически, поэтому не забудьте скрыть его, чтобы предотвратить наложение его геометрии на недавно созданный MeshInstance3D.
Вы также можете создать форму столкновения trimesh (тройная сетка), используя CSG > Bake Collision Shape. Сгенерированный узел CollisionShape3D должен быть дочерним узлом StaticBody3D или AnimatableBody3D, чтобы быть эффективным.
Совет
Не забудьте оставить оригинальный CSG-узел в дереве сцены, чтобы вы могли вносить изменения в геометрию позже при необходимости. Для внесения изменений в геометрию удалите узел MeshInstance3D и сделайте корневой CSG-узел снова видимым.
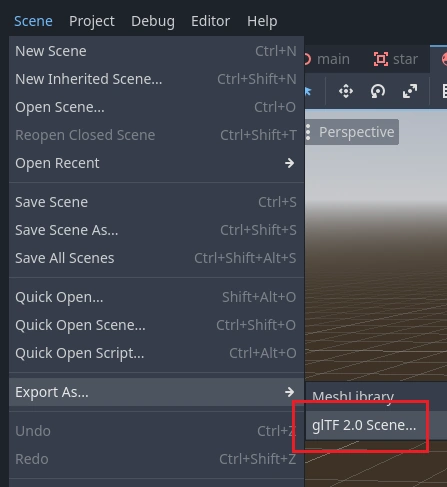
Экспорт в формате glTF
Может быть полезно заблокировать уровень с помощью CSG, а затем экспортировать его как 3D-модель для импорта в программное обеспечение для 3D-моделирования. Вы можете сделать это, выбрав Scene > Export As... > glTF 2.0 Scene.