Attention: Here be dragons
This is the latest
(unstable) version of this documentation, which may document features
not available in or compatible with released stable versions of Godot.
Checking the stable version of the documentation...
2D системи частинок
Вступ
Системи частинок використовуються для імітації складних фізичних ефектів, таких як іскри, вогонь, магічні частинки, дим, туман тощо.
Ідея полягає в тому, що "частинка" випромінюється з фіксованим інтервалом і з фіксованим часом життя. Протягом свого життя кожна частинка матиме однакову базову поведінку. Що відрізняє кожну частинку від решти і забезпечує органічніший вигляд, це "випадковість", пов'язана з кожним параметром. По суті, створення системи частинок означає встановлення базових фізичних параметрів, а потім додавання до них випадковості.
Вузли частинок
Godot надає два різні вузли для 2D частинок, GPUParticles2D і CPUParticles2D. GPUParticles2D є більш просунутим і використовує GPU для обробки ефектів частинок. CPUParticles2D — це опція, керована процесором, яка майже не відрізняється від GPUParticles2D, але має нижчу продуктивність при використанні великої кількості частинок. З іншого боку, CPUParticles2D може працювати краще на системах низького класу або в ситуаціях із вузьким місцем GPU.
У той час як GPUParticles2D налаштовується за допомогою class_ParticleProcessMaterial (і додатково за допомогою спеціального шейдера), параметри відповідності надаються через властивості вузла в CPUParticles2D (за винятком налаштувань сліду).
Надалі додавання нових функцій до CPUParticles2D не планується, хоча пул-реквести для додавання функцій, які вже є в GPUParticles2D, будуть прийматися. З цієї причини ми рекомендуємо використовувати GPUParticles2D, якщо у вас немає чіткої причини не використовувати його.
Ви можете перетворити вузол CPUParticles2D на вузол GPUParticles2D, клацнувши вузол у дереві сцени, вибравши робочу область 2D і вибравши CPUParticles2D > Перетворити на GPUParticles2D на панелі інструментів.
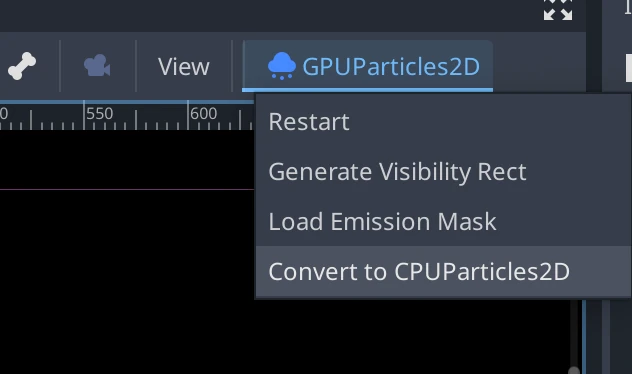
Також можна перетворити вузол GPUParticles2D на вузол CPUParticles2D, однак можуть виникнути проблеми, якщо ви використовуєте функції лише GPU.
Решта цього посібника буде використовувати вузол GPUParticles2D. Спочатку додайте вузол GPUParticles2D до вашої сцени. Після створення цього вузла ви помітите, що було створено лише білу крапку, а поруч із вашим вузлом GPUParticles2D у доку сцени є піктограма попередження. Це пояснюється тим, що вузлу для функціонування потрібен ParticleProcessMaterial.
ParticleProcessMaterial
Щоб додати технологічний матеріал до вузла частинок, перейдіть до Процесний матеріал на панелі інспектора. Клацніть поле поруч із Material і виберіть у спадному меню New ParticleProcessMaterial.

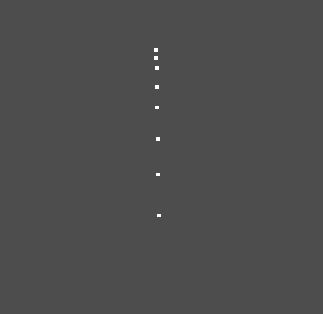
Тепер ваш вузол GPUParticles2D має випромінювати білі точки вниз.
Текстура
Система частинок може використовувати одну текстуру або анімацію flipbook. Фліпбук — це текстура, яка містить кілька кадрів анімації, які можна відтворювати або вибирати випадковим чином під час випромінювання. Це еквівалентно таблиці спрайтів для частинок.
Текстура встановлюється за допомогою властивості Texture:

Використання анімаційного фліпбука
Фліпбуки частинок підходять для відтворення складних ефектів, таких як дим, вогонь, вибухи. Їх також можна використовувати для введення випадкової варіації текстури, змушуючи кожну частинку використовувати різну текстуру. Ви можете знайти існуючі зображення фліпбука частинок в Інтернеті або попередньо відобразити їх за допомогою зовнішніх інструментів, таких як Blender або EmberGen.
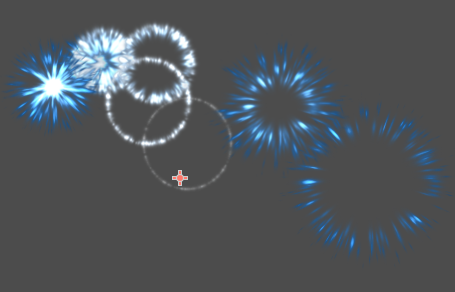
Приклад системи частинок, яка використовує текстуру фліпбука
Використання фліпбука з анімацією вимагає додаткової конфігурації порівняно з використанням однієї текстури. Для демонстрації ми використаємо цю текстуру з 5 стовпцями та 7 рядками (клацніть правою кнопкою миші та виберіть Зберегти як…):
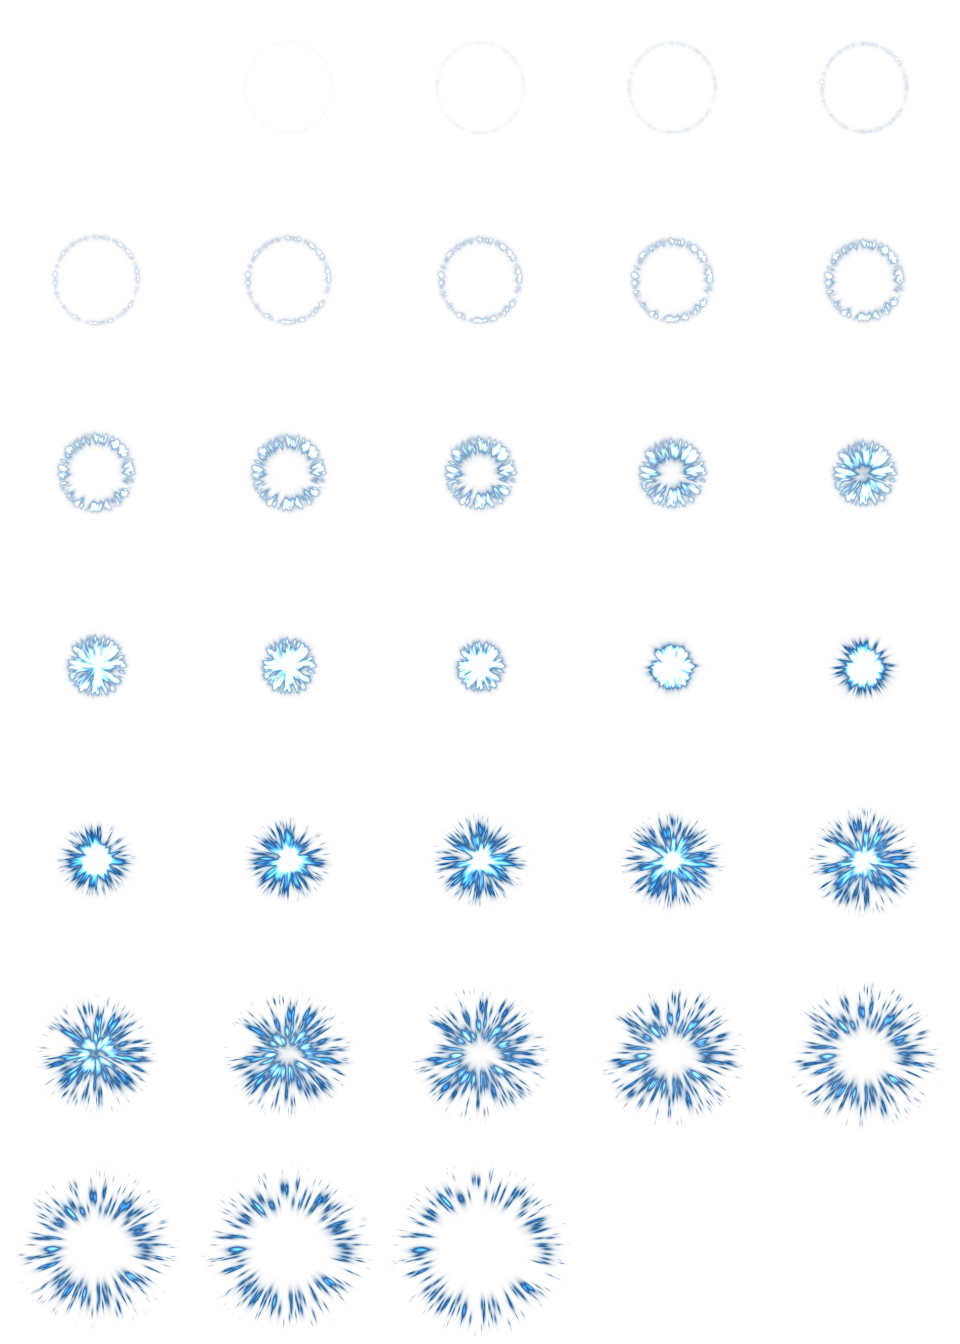
Авторство: JoesAlotofthings (CC BY 4.0)
Щоб використовувати анімаційний фліпбук, ви повинні створити новий CanvasItemMaterial у розділі Material вузла GPUParticles2D (або CPUParticles2D):
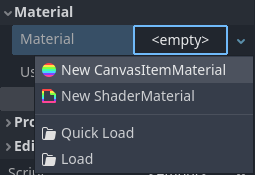
Створення CanvasItemMaterial у нижній частині інспектора вузлів частинок
У цьому CanvasItemMaterial увімкніть Particle Animation і встановіть H Frames і V Frames відповідно до кількості стовпців і рядків у вашій текстурі фліпбука:
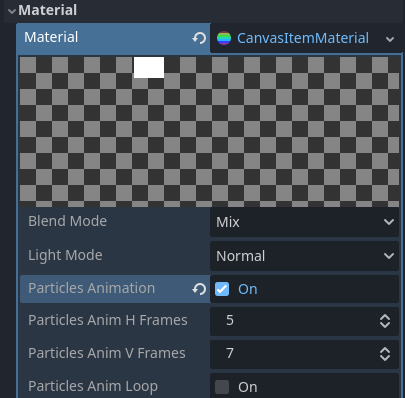
Налаштування CanvasItemMaterial для прикладу текстури фліпбука
Коли це буде зроблено, розділ анімації в ParticleProcessMaterial (для GPUParticles2D) або в інспекторі CPUParticles2D стане ефективним.
Порада
Якщо текстура вашого фліпбука має чорний фон замість прозорого фону, вам також потрібно встановити режим змішування на Додати замість Змішати для правильного відображення. Крім того, ви можете змінити текстуру, щоб отримати прозорий фон у редакторі зображень. У GIMP це можна зробити за допомогою меню Колір > Колір до альфа.
Параметри часу
Строк служби
Час існування кожної частики у секундах. Коли закінчується термін життя, створюється нова частинка, яка замінює її.
Час життя: 0.5
Час життя: 4.0
Один знімок
Якщо ввімкнено, вузол GPUParticles2D випромінює всі свої частинки один раз і ніколи знову.
preprocess()
Системи частинок починаються з нуля випромінюваних частинок, потім починають випромінювати. Це може бути незручністю, при завантаженні сцени та систем, таких як факел, імла тощо, коли вони починають випромінювати частинки в момент входу. Попередня обробка використовується для того, щоб система могла обробити задану кількість секунд до того, як вона фактично буде намальована вперше.
Масштаб
Шкала швидкості за замовчуванням має значення 1 і використовується для регулювання швидкості системи частинок. Зменшення значення призводить до того, що частинки будуть повільнішими, а збільшення значення - до їх прискорення.
Вибуховість
Якщо час життя становить 1 і є 10 частинок, це означає, що одна частинка буде випромінюватися кожні 0,1 секунди. Параметр вибуховості змінює це і змушує частинки випромінюватися одночасно. Діапазони:
0: Випускати частинки через рівні проміжки часу (значення за замовчуванням).
1: Випускати всі частинки одночасно.
Також допускаються значення в середині. Ця функція корисна для створення вибухів або раптових викидів частинок:
Випадковість
Всі фізичні параметри можуть бути випадковими. Випадкові значення варіюються від 0 до 1. Формула для параметра випадковості:
initial_value = param_value + param_value * randomness
Фіксована частота кадрів
Цей параметр можна використовувати для налаштування рендерингу системи частинок із фіксованим FPS. Наприклад, зміна значення на 2 змусить частинки відтворюватися зі швидкістю 2 кадри в секунду. Зауважте, це не уповільнює саму систему частинок.
Примітка
Godot 4.3 наразі не підтримує фізичну інтерполяцію для 2D частинок. Як обхідний шлях, вимкніть фізичну інтерполяцію для вузла частинок, встановивши Вузол > Фізична інтерполяція > Режим у нижній частині інспектора.
Фракт Дельта
Встановлення параметра Fract Delta у значення true призводить до обчислення дробової дельти, що має більш плавний ефект відображення частинок. Ця підвищена плавність пояснюється вищою точністю. Різниця більш помітна в системах з високою випадковістю або швидко рухомими частинками. Це допомагає підтримувати візуальну узгодженість системи частинок, гарантуючи, що рух кожної частинки узгоджується з її фактичним терміном життя. Без цього може здатися, що частинки стрибають або рухаються більше, ніж вони повинні в одному кадрі, якщо вони випромінюються в точці всередині кадру. Більша точність впливає на продуктивність, особливо в системах з більшою кількістю частинок.
Параметри малювання
Прямокутник видимості
Прямокутник видимості контролює видимість частинок на екрані. Якщо цей прямокутник знаходиться за межами області перегляду, движок не відображатиме частинки на екрані.
Властивості прямокутника, W та H відповідно, контролюють його ширину та висоту. Властивості X і Y контролюють положення лівого верхнього кута прямокутника відносно випромінювача частинок.
Ви можете наказати Godot автоматично генерувати Visibility Rect за допомогою панелі інструментів над двовимірним видом. Для цього виберіть вузол GPUParticles2D і натисніть Particles > Generate Visibility Rect. Godot буде моделювати вузол Particles2D, що випромінює частинки протягом кількох секунд, і встановлюватиме прямокутник відповідно до поверхні, яку займають частинки.
Ви можете контролювати тривалість випромінювання за допомогою опції Generation Time (sec). Максимальне значення становить 25 секунд. Якщо вам потрібно більше часу для руху частинок, ви можете тимчасово змінити тривалість preprocess на вузлі Particles2D.
Локальні координати
За замовчуванням ця опція вимкнена. Це означає, що простір, у який випромінюються частинки, є глобальним і не відносним до вузла. Якщо вузол переміщується, існуючі частинки не переміщуються разом з ним:
Якщо увімкнено, частинки випромінюватимуть у локальний простір, тобто якщо вузол переміщується, це також впливає на вже випромінені частинки:
Порядок малювання
Це контролює порядок малювання окремих частинок. Index означає, що частинки малюються відповідно до їх порядку викидання (за замовчуванням). Lifetime означає, що вони малюються в порядку часу, що залишився до кінця життя.
Параметри процесу обробки частинок
Щоб отримати інформацію про налаштування в ParticleProcessMaterial, перегляньте this page.