Attention: Here be dragons
This is the latest
(unstable) version of this documentation, which may document features
not available in or compatible with released stable versions of Godot.
Checking the stable version of the documentation...
Impostazioni avanzate del progetto
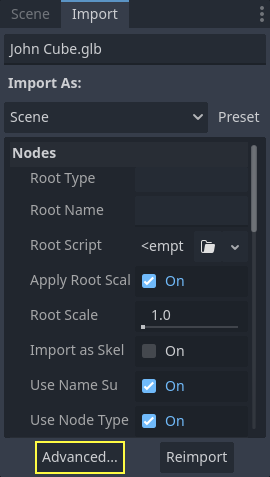
Mentre il tipico pannello di importazione offre molte opzioni essenziali per i modelli 3D importati, le impostazioni di importazione avanzate forniscono opzioni per singoli oggetti, anteprime per i modelli e per le animazioni. Per aprirle, premi il pulsante in fondo al pannello Importazione.
È disponibile per i modelli 3D importati come scene, così come per le librerie di animazione.
Nota
Questa pagina non tratta le opzioni disponibili anche nel pannello di importazione, né nulla fuori dalle impostazioni di importazione avanzate. Per informazioni su queste ultime, consulta la pagina Configurazione di importazione.
Utilizzare la finestra Impostazioni di importazione avanzate
La prima scheda che vedrai è la scheda Scena. Le opzioni disponibili nel pannello a destra sono identiche a quelle del pannello Importazioni, ma hai accesso a un'anteprima 3D. L'anteprima 3D si può ruotare tenendo premuto il pulsante sinistro del mouse e trascinandolo. Lo zoom si può regolare tramite la rotellina del mouse.
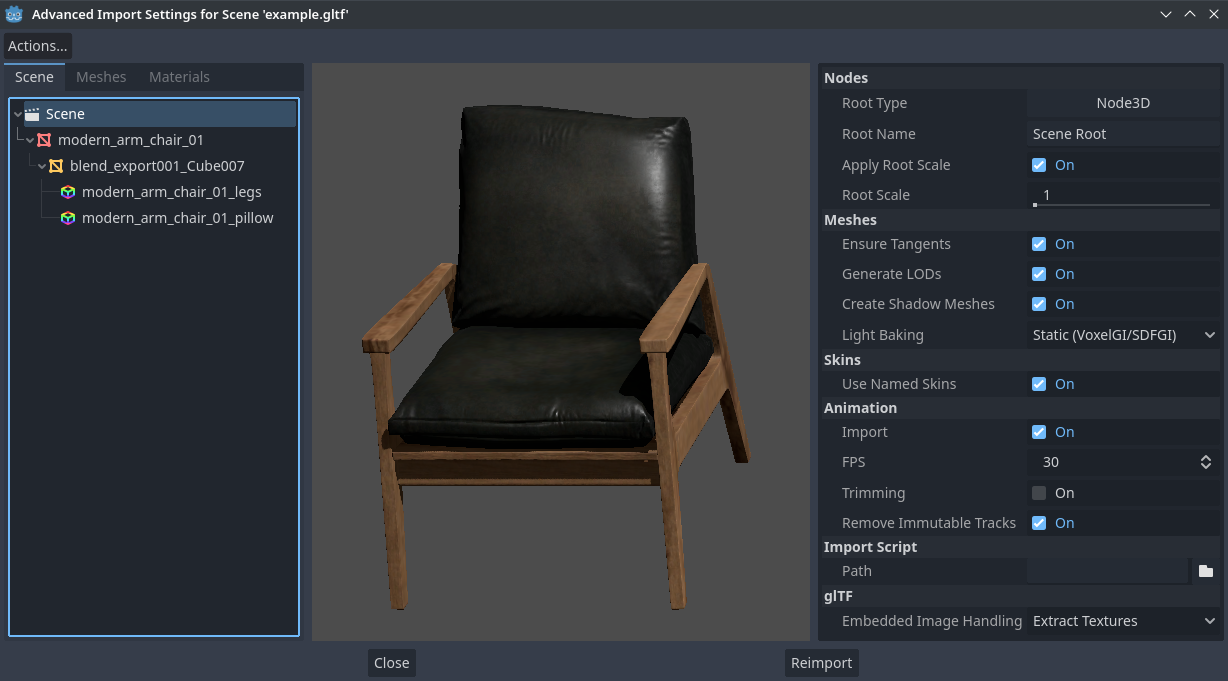
Finestra Impostazioni di importazione avanzate (scheda Scena). Crediti: Modern Arm Chair 01 - Poly Haven
Configurare le opzioni di importazione dei nodi
È possibile selezionare i singoli nodi che compongono la scena nella scheda Scena attraverso la vista ad albero a sinistra:
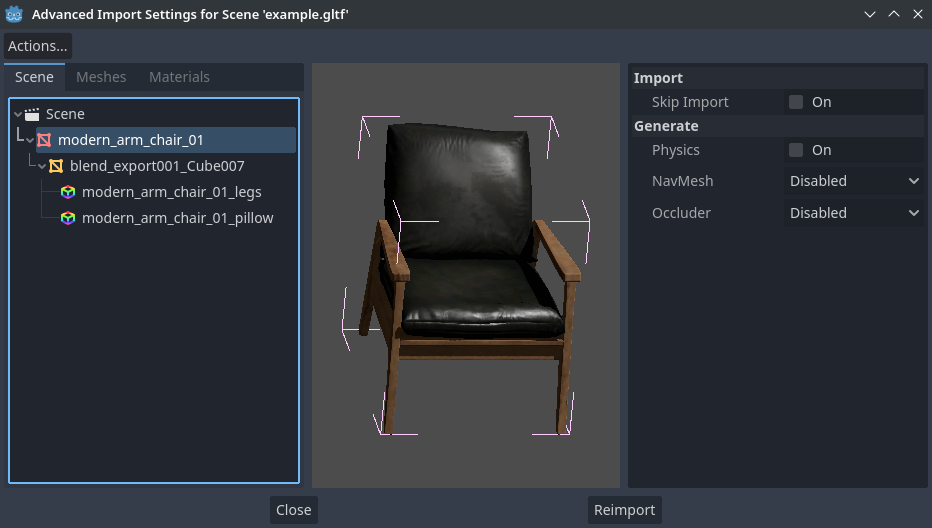
Selezione di un nodo nella finestra Impostazioni di importazione avanzate (scheda Materiali)
Ciò espone diverse opzioni di importazione per nodo:
Salta importazione: se selezionata, il nodo non sarà presente nella scena importata finale. Abilitarla questa impostazione disabilita tutte le altre.
Genera > Fisica: se selezionata, genera un nodo genitore PhysicsBody3D con forme di collisione che sono fratelli del nodo MeshInstance3D.
Genera > NavMesh: se selezionata, genera un nodo figlio NavigationRegion3D per la navigazione. Mesh + NavMesh manterrà visibile la mesh originale, mentre NavMesh Only importerà solo la mesh di navigazione (senza una rappresentazione visiva). NavMesh Only è pensato per quando viene creata manualmente una mesh semplificata per la navigazione.
Genera > Occlusore: se selezionata, genera un nodo fratello OccluderInstance3D per l'occlusion culling utilizzando la geometria della mesh come base per la forma dell'occlusore. Mesh + Occluder manterrà visibile la mesh originale, mentre Occluder Only importerà solo l'occlusore (senza una rappresentazione visiva). Occluder Only è pensato per quando viene creata manualmente una mesh semplificata per l'occlusion culling.
Queste opzioni sono visibili solo se è abilitata una delle opzioni sopra elencate:
Fisica > Tipo di corpo: visibile solo se Genera > Fisica è abilitato. Controlla il PhysicsBody3D da creare. Static crea uno StaticBody3D, Dynamic crea un RigidBody3D, Area crea un'Area3D.
Fisica > Tipo di forma: visibile solo se Genera > Fisica è abilitato. Trimesh consente collisioni precise per ogni triangolo, ma si può utilizzare solo con un tipo di corpo Static. Altri tipi sono meno precisi e potrebbero richiedere una configurazione manuale, ma si possono utilizzare con qualsiasi tipo di corpo. Per la geometria statica, utilizza Trimesh. Per la geometria dinamica, utilizza forme primitive se possibile per prestazioni migliori, oppure utilizza una delle modalità di decomposizione convessa se la forma è grande e complessa.
Decomposizione > Avanzato: visibile solo se Fisica > Tipo di forma è Decompose Convex. Se selezionata, consente di regolare le opzioni di decomposizione avanzate. Se disabilitata, è possibile regolare solo una Precisione preimpostata (che di solito è sufficiente).
Decomposizione > Precisione: visibile solo se Fisica > Tipo di forma è Decompose Convex. Controlla la precisione da utilizzare per la decomposizione convessa. Valori più alti generano collisioni più dettagliate, a scapito di generazione più lenta e di maggiore utilizzo della CPU durante la simulazione della fisica. Per migliorare le prestazioni, si consiglia di mantenere questo valore il più basso possibile, a seconda della situazione.
Occluder > Distanza di semplificazione: visibile solo se Genera > Occlusore è impostato su Mesh + Occluder o Occluder Only. Valori più alti generano una mesh di occlusione con meno vertici (portando a ridurre l'utilizzo della CPU), a scapito di più problemi di occlusion culling (come falsi positivi o falsi negativi). Se noti gli oggetti scomparire, quando non dovrebbero, quando la telecamera è vicina a una determinata mesh, provare a diminuire questo valore.
Configurare le opzioni di importazione di mesh e materiali
Nella finestra Impostazioni di importazione avanzate, esistono due modi per selezionare le single mesh o materiali:
Passa alla scheda Mesh o Materiali nell'angolo in alto a sinistra della finestra di dialogo.
Rimani nella scheda Scena, ma espandi le opzioni nella vista ad albero a sinistra. Dopo aver scelto una mesh o un materiale, appariranno le stesse informazioni delle schede Mesh e Materiali, ma in una vista ad albero anziché in un elenco.
Selezionando una mesh, nel pannello a destra appariranno diverse opzioni:
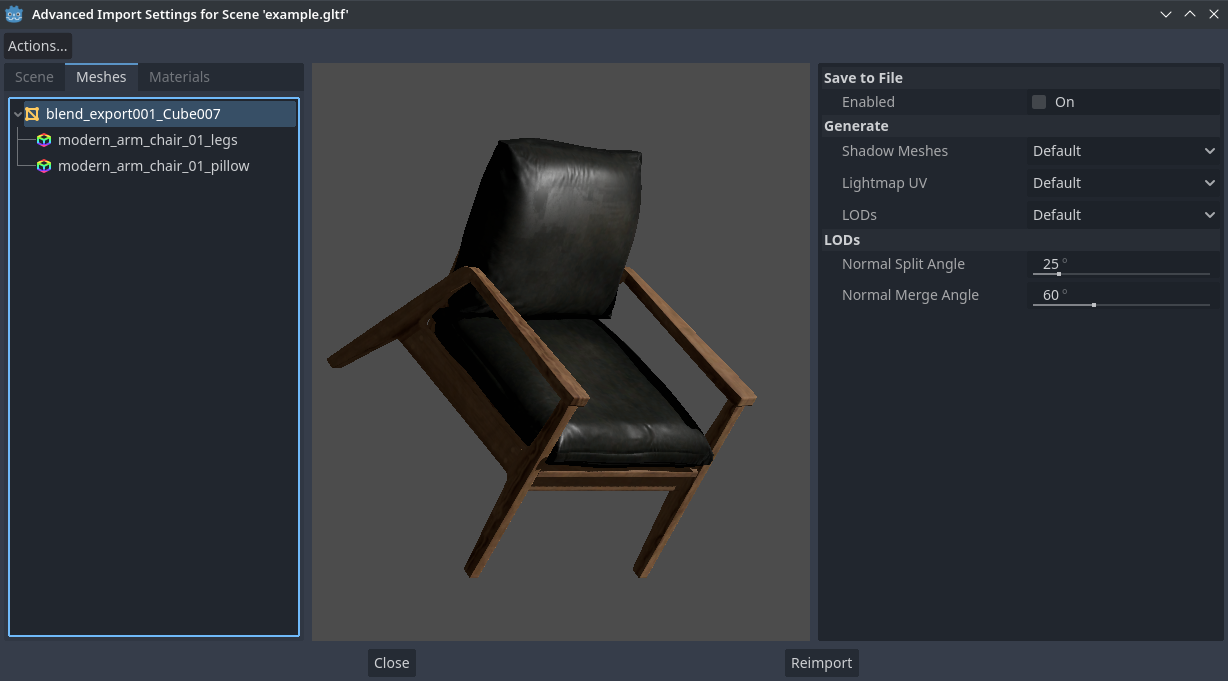
Finestra Impostazioni di importazione avanzate (scheda Mesh)
Le opzioni sono le seguenti:
Salva su file: salva la risorsa Mesh in un file esterno (non è un file di scena). Generalmente non ce n'è bisogno per posizionare la mesh in una scena 3D; in tal caso, è consigliabile istanziare direttamente la scena 3D. Tuttavia, l'accesso diretto alla risorsa Mesh è utile per nodi specifici, come MeshInstance3D, MultiMeshInstance3D, GPUParticles3D o CPUParticles3D. - Sarà inoltre necessario specificare un percorso per il file risultante tramite l'opzione che appare dopo aver abilitato Salva su file. Si consiglia di usare l'estensione
.resper ottenere file di piccole dimensioni e velocità di caricamento più alte, poiché.tresè inefficiente per la scrittura di grandi quantità di dati.Genera > Mesh d'ombra: sovrascrittura per mesh per l'opzione di importazione per tutta la scena Mesh > Crea mesh d'ombra descritta in Utilizzo del pannello di Importazione. Default utilizzerà l'opzione di importazione per tutta la scena, mentre Enable o Disable possono abilitare o disabilitare forzatamente questo comportamento su una mesh specifica.
Genera > UV per lightmap: sovrascrittura per mesh per l'opzione di importazione per tutta la scena Mesh > Precalcolo della luce descritta in Utilizzo del pannello di Importazione. Default utilizzerà l'opzione di importazione per tutta la scena, mentre Enable o Disable possono abilitare o disabilitare forzatamente questo comportamento su una mesh specifica. Impostarla su Enable su una scena con la modalità di precalcolo Static equivale a configurare questa mesh per utilizzare Lightmap statiche. Impostare questo su Disable su una scena con la modalità di precalcolo Lightmap statiche equivale a configurare questa mesh per utilizzare Static invece.
Genera > LOD: sovrascrittura per mesh per l'opzione di importazione per tutta la scena Mesh > LOD descritta in Utilizzo del pannello di Importazione. Default utilizzerà l'opzione di importazione per tutta la scena, mentre Enable o Disable possono abilitare o disabilitare forzatamente questo comportamento su una mesh specifica.
LOD > Angolo di unione delle normali: la differenza angolare minima tra due vertici necessaria per preservare un bordo geometrico nella generazione degli LOD di mesh. In caso di problemi visivi con la generazione degli LOD, ridurre questo valore potrebbe aiutare (a scapito di una generazione meno efficiente).
Selezionando un materiale, nel pannello a destra comparirà una sola opzione:
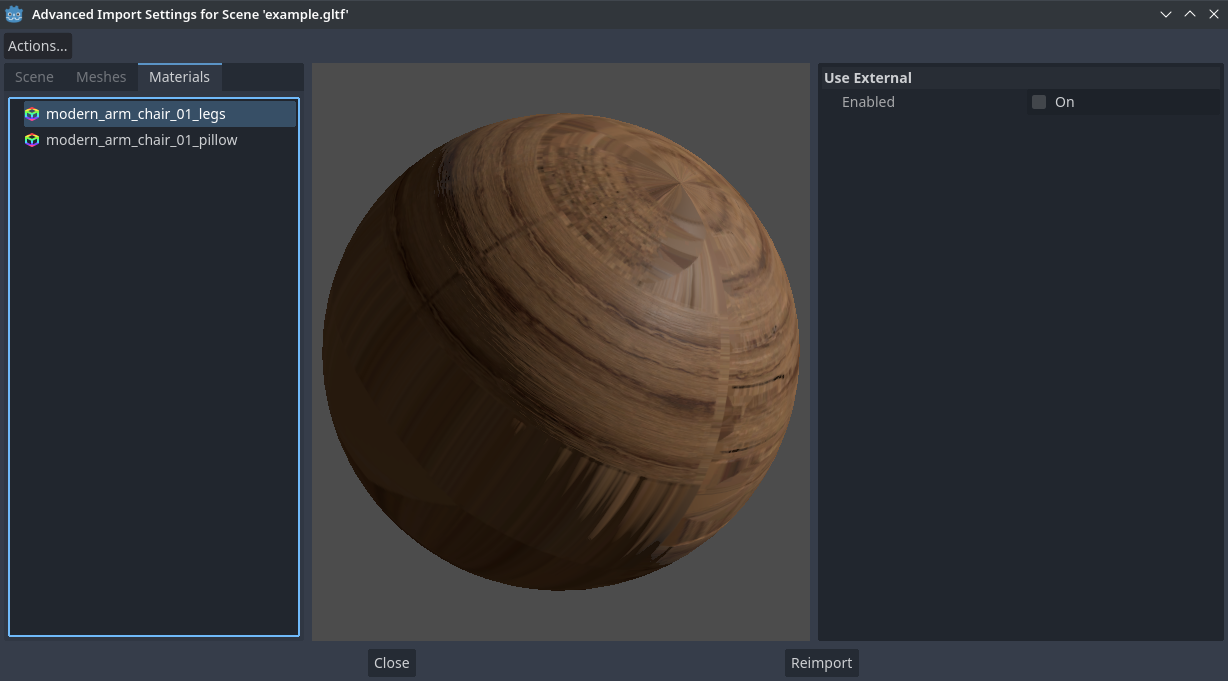
Finestra Impostazioni di importazione avanzate (scheda Materiali)
Quando l'opzione Usa esterno è selezionata e viene specificato un percorso di output, è possibile utilizzare un materiale esterno anziché quello incluso nel file di scena 3D originale; vedi la sezione seguente.
Esportare i materiali su file separatati
Sebbene Godot sia in grado di importare materiali creati con software di modellazione 3D, la configurazione predefinita potrebbe non essere adatta alle tue esigenze. Ad esempio:
Vuoi configurare funzionalità dei materiali non supportate dall'applicazione 3D in uso.
Bisogna utilizzare una modalità di filtro delle texture diversa, poiché questa opzione è configurata nel materiale (e non nell'immagine).
Vuoi sostituire uno dei materiali con un materiale completamente diverso, ad esempio uno shader personalizzato.
Per poter modificare i materiali della scena 3D nell'editor Godot, bisogna utilizzare risorse di materiali esterne.
Nell'angolo superiore sinistro della finestra Impostazioni di importazione avanzate, seleziona Azioni… > Estrai i materiali:

Estrazione di tutti i materiali integrati in risorse esterne nella finestra Impostazioni di importazione avanzate
Dopo aver scelto questa opzione, seleziona una cartella in cui estrarre i file .tres dei materiali, poi conferma l'estrazione:
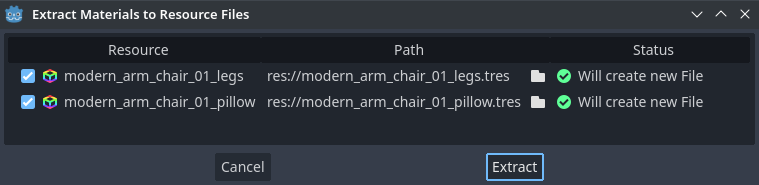
Conferma dell'estrazione dei materiali nella sottofinestra Impostazioni di importazione avanzate
Nota
Dopo aver estratto i materiali, la scena 3D verrà configurata automaticamente per utilizzare riferimenti ai materiali esterni. Pertanto, non c'è bisogno di abilitare manualmente Usa esterno su ogni materiale per rendere effettivo il materiale .tres esterno.
Quando l'opzione Usa esterno è abilitata, ricorda che la finestra Impostazioni di importazione avanzate continuerà a visualizzare i materiali originali della mesh (quelli progettati nel software di modellazione 3D). Ciò significa che le personalizzazioni apportate ai materiali non saranno visibili in questa finestra. Per vedere in anteprima i materiali modificati, bisogna inserire la scena 3D importata in un'altra scena attraverso l'editor.
Godot non sovrascriverà le modifiche apportate ai materiali estratti quando la scena 3D originale viene reimportata. Tuttavia, se il nome del materiale cambia nel file 3D di origine, il collegamento tra il materiale originale e quello estratto andrà perso. Pertanto, sarà necessario utilizzare la finestra Impostazioni di importazione avanzate per associare il materiale rinominato al materiale estratto esistente.
Lo si può fare nella scheda Materiali della finestra, selezionando il materiale, abilitando Salva su file e poi specificando il percorso di salvataggio utilizzando l'opzione Percorso che appare dopo aver abilitato Salva su file.
Opzioni di animazione
Sono disponibili diverse opzioni in più per i nodi AnimationPlayer generati, così come per le loro singole animazioni quando sono selezionati nella scheda Scena.
Ottimizzatore
Quando si importano animazioni, viene eseguito un ottimizzatore che ne riduce considerevolmente le dimensioni. In generale, dovrebbe rimanere sempre attivo, a meno che non sospetti che un'animazione possa essere rovinata a causa dell'ottimizzatore.
Salva su file
Come predefinito, le animazioni vengono salvate integrate. È possibile, tuttavia, salvarle in un file separato. Questo permette di aggiungere tracce personalizzate alle animazioni e di mantenerle anche dopo una nuova importazione.
Suddivisioni
È possibile specificare più animazioni da una singola timeline come suddivisioni. Affinché ciò funzioni, il modello deve avere una sola animazione con il nome default. Per creare suddivisioni, modifica il numero di suddivisioni impostandolo su un valore maggiore di zero. È poi possibile assegnare un nome a una suddivisione, specificare i fotogrammi di inizio e fine, e scegliere se l'animazione deve ripertersi o no.