Attention: Here be dragons
This is the latest
(unstable) version of this documentation, which may document features
not available in or compatible with released stable versions of Godot.
Checking the stable version of the documentation...
Post-elaborazione personalizzata
Introduzione
Godot provides many post-processing effects out of the box, including Bloom, DOF, and SSAO, which are described in Environment and post-processing. However, advanced use cases may require custom effects. This article explains how to write your own custom effects.
The easiest way to implement a custom post-processing shader is to use Godot's built-in ability to read from the screen texture. If you're not familiar with this, you should read the Screen Reading Shaders Tutorial first.
Single pass post-processing
Post-processing effects are shaders applied to a frame after Godot has rendered
it. To apply a shader to a frame, create a CanvasLayer, and give it a ColorRect. Assign a
new ShaderMaterial to the newly created
ColorRect, and set the ColorRect's anchor preset to Full Rect:
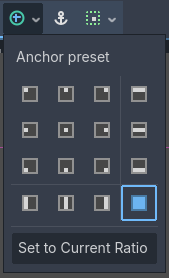
Setting the anchor preset to Full Rect on the ColorRect node
Your scene tree will look something like this:

Nota
Another more efficient method is to use a BackBufferCopy to copy a region of the screen to a buffer and to
access it in a shader script through a sampler2D using
hint_screen_texture.
Nota
As of the time of writing, Godot does not support rendering to multiple buffers at the same time. Your post-processing shader will not have access to other render passes and buffers not exposed by Godot (such as depth or normal/roughness). You only have access to the rendered frame and buffers exposed by Godot as samplers.
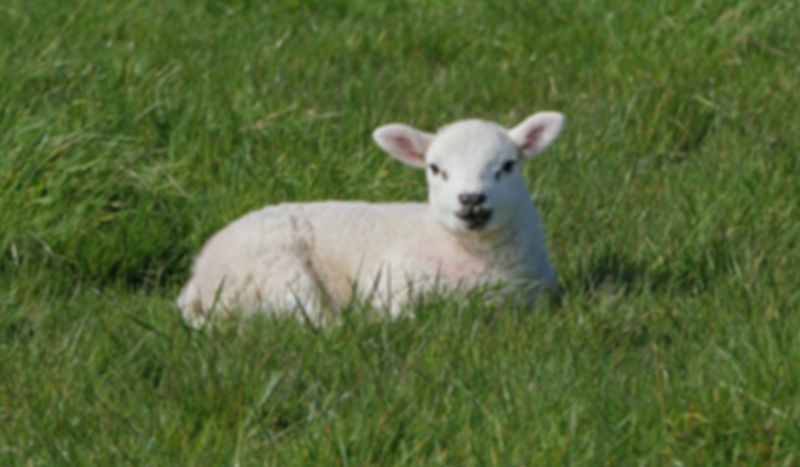
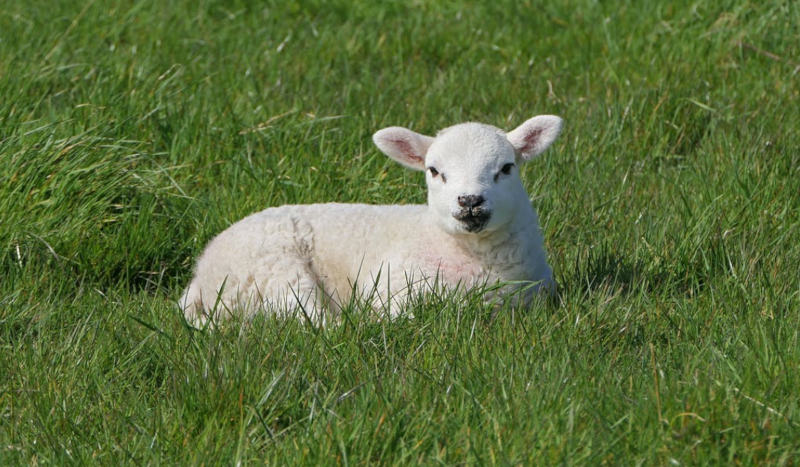
For this demo, we will use this Sprite of a sheep.
Assign a new Shader to the ColorRect's
ShaderMaterial. You can access the frame's texture and UV with a
sampler2D using hint_screen_texture and the built-in SCREEN_UV
uniforms.
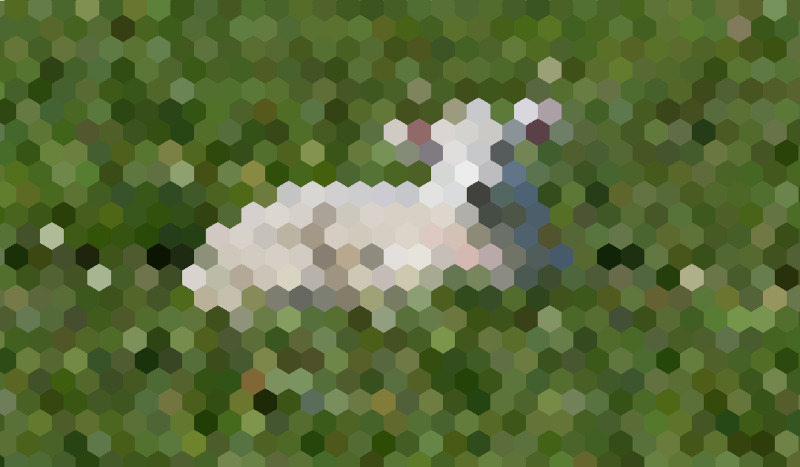
Copy the following code to your shader. The code below is a hex pixelization shader by arlez80,
shader_type canvas_item;

uniform vec2 size = vec2(32.0, 28.0);
// If you intend to read from mipmaps with `textureLod()` LOD values greater than `0.0`,
// use `filter_nearest_mipmap` instead. This shader doesn't require it.
uniform sampler2D screen_texture : hint_screen_texture, repeat_disable, filter_nearest;

void fragment() {
        vec2 norm_size = size * SCREEN_PIXEL_SIZE;
        bool less_than_half = mod(SCREEN_UV.y / 2.0, norm_size.y) / norm_size.y < 0.5;
        vec2 uv = SCREEN_UV + vec2(norm_size.x * 0.5 * float(less_than_half), 0.0);
        vec2 center_uv = floor(uv / norm_size) * norm_size;
        vec2 norm_uv = mod(uv, norm_size) / norm_size;
        center_uv += mix(vec2(0.0, 0.0),
                         mix(mix(vec2(norm_size.x, -norm_size.y),
                                 vec2(0.0, -norm_size.y),
                                 float(norm_uv.x < 0.5)),
                             mix(vec2(0.0, -norm_size.y),
                                 vec2(-norm_size.x, -norm_size.y),
                                 float(norm_uv.x < 0.5)),
                             float(less_than_half)),
                         float(norm_uv.y < 0.3333333) * float(norm_uv.y / 0.3333333 < (abs(norm_uv.x - 0.5) * 2.0)));

        COLOR = textureLod(screen_texture, center_uv, 0.0);
}
La pecora avrà un aspetto simile a questo:
Multi-pass post-processing
Alcuni effetti di post-elaborazione, come le sfocature, richiedono molte risorse. È possibile velocizzarli notevolmente suddividendoli in più passaggi. In un materiale multi-passaggio, ogni passaggio prende come input il risultato del passaggio precedente e lo elabora.
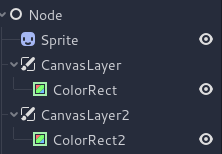
To produce a multi-pass post-processing shader, you stack CanvasLayer and
ColorRect nodes. In the example above, you use a CanvasLayer object to
render a shader using the frame on the layer below. Apart from the node
structure, the steps are the same as with the single-pass post-processing
shader.
Your scene tree will look something like this:
Ad esempio, potresti scrivere un effetto di sfocatura gaussiana a schermo intero attaccando i seguenti pezzi di codice a ciascuno dei nodi ColorRect. L'ordine in cui applichi gli shader dipende dalla posizione del CanvasLayer nell'albero di scene: più è alto, prima è. Per questo shader di sfocatura, l'ordine non ha importanza.
shader_type canvas_item;

uniform sampler2D screen_texture : hint_screen_texture, repeat_disable, filter_nearest;

// Blurs the screen in the X-direction.
void fragment() {
    vec3 col = texture(screen_texture, SCREEN_UV).xyz * 0.16;
    col += texture(screen_texture, SCREEN_UV + vec2(SCREEN_PIXEL_SIZE.x, 0.0)).xyz * 0.15;
    col += texture(screen_texture, SCREEN_UV + vec2(-SCREEN_PIXEL_SIZE.x, 0.0)).xyz * 0.15;
    col += texture(screen_texture, SCREEN_UV + vec2(2.0 * SCREEN_PIXEL_SIZE.x, 0.0)).xyz * 0.12;
    col += texture(screen_texture, SCREEN_UV + vec2(2.0 * -SCREEN_PIXEL_SIZE.x, 0.0)).xyz * 0.12;
    col += texture(screen_texture, SCREEN_UV + vec2(3.0 * SCREEN_PIXEL_SIZE.x, 0.0)).xyz * 0.09;
    col += texture(screen_texture, SCREEN_UV + vec2(3.0 * -SCREEN_PIXEL_SIZE.x, 0.0)).xyz * 0.09;
    col += texture(screen_texture, SCREEN_UV + vec2(4.0 * SCREEN_PIXEL_SIZE.x, 0.0)).xyz * 0.05;
    col += texture(screen_texture, SCREEN_UV + vec2(4.0 * -SCREEN_PIXEL_SIZE.x, 0.0)).xyz * 0.05;
    COLOR.xyz = col;
}
shader_type canvas_item;

uniform sampler2D screen_texture : hint_screen_texture, repeat_disable, filter_nearest;

// Blurs the screen in the Y-direction.
void fragment() {
    vec3 col = texture(screen_texture, SCREEN_UV).xyz * 0.16;
    col += texture(screen_texture, SCREEN_UV + vec2(0.0, SCREEN_PIXEL_SIZE.y)).xyz * 0.15;
    col += texture(screen_texture, SCREEN_UV + vec2(0.0, -SCREEN_PIXEL_SIZE.y)).xyz * 0.15;
    col += texture(screen_texture, SCREEN_UV + vec2(0.0, 2.0 * SCREEN_PIXEL_SIZE.y)).xyz * 0.12;
    col += texture(screen_texture, SCREEN_UV + vec2(0.0, 2.0 * -SCREEN_PIXEL_SIZE.y)).xyz * 0.12;
    col += texture(screen_texture, SCREEN_UV + vec2(0.0, 3.0 * SCREEN_PIXEL_SIZE.y)).xyz * 0.09;
    col += texture(screen_texture, SCREEN_UV + vec2(0.0, 3.0 * -SCREEN_PIXEL_SIZE.y)).xyz * 0.09;
    col += texture(screen_texture, SCREEN_UV + vec2(0.0, 4.0 * SCREEN_PIXEL_SIZE.y)).xyz * 0.05;
    col += texture(screen_texture, SCREEN_UV + vec2(0.0, 4.0 * -SCREEN_PIXEL_SIZE.y)).xyz * 0.05;
    COLOR.xyz = col;
}
Utilizzando il codice soprastante, dovresti ottenere un effetto di sfocatura a schermo intero come quello mostrato di seguito.