Attention: Here be dragons
This is the latest
(unstable) version of this documentation, which may document features
not available in or compatible with released stable versions of Godot.
Checking the stable version of the documentation...
Nodi e Scene
Su Panoramica dei concetti chiave di Godot, abbiamo visto che un gioco su Godot è un albero di scene e che ogni scena è un albero di nodi. In questa lezione, approfondiamo su di loro. Inoltre creerete la vostra prima scena.
Nodi
I nodi sono i blocchi fondamentali del tuo gioco. Sono come ingredienti in una ricetta. Ci sono dozzine di tipi che possono mostrare un’immagine, riprodurre un suono, rappresentare una camera, e molto altro.
Tutti i nodi hanno le seguenti caratteristiche:
Un nome.
Proprietà modificabili.
Ricevono callback (chiamate alla funzione) per aggiornarsi a ogni frame.
È possibile estenderle con nuove proprietà e funzioni.
Puoi aggiungerli a un altro nodo come figlio.
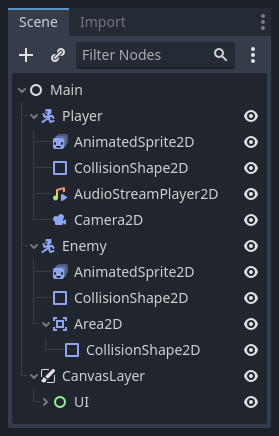
L’ultima caratteristica è importante. Insieme, i nodi formano un albero, che è una potente funzionalità per organizzare i progetti. Siccome diversi nodi hanno diverse funzioni, combinarli produce comportamenti più complessi. Come abbiamo visto prima, puoi costruire un personaggio giocabile seguito dalla camera usando un nodo CharacterBody2D, un nodo Sprite2D, un nodo Camera2D e un nodo CollisionShape2D.

Scene
Quando organizzi nodi in un albero, come il nostro personaggio, possiamo chiamare questa formazione una scena. Una volta salvata, la scena si presenta come un nuovo nodo nell’editor, dove possiamo aggiungerlo come figlio di un nodo esistente. In questo caso, l’istanza della scena appare come nodo singolo con interni nascosti.
Le scene di consentono di strutturare il codice del gioco in qualunque modo tu voglia. Puoi comporre nodi per creare nodi personalizzati e complessi, come un personaggio di gioco che si muove e salta, una barra della vita, una cesta con cui puoi interagire, e molto altro.

Fondamentalmente, l'editor di Godot è un editor di scene. Contiene molti strumenti per modificare scene 2D e 3D, così come interfacce utente. Un progetto Godot può contenere tutte le scene di cui hai bisogno. Il motore ne necessita solo di una come scena principale della tua applicazione. Questa è la scena che Godot caricherà per prima quando tu o un giocatore avviate il gioco.
Oltre a comportarsi come nodi, le scene hanno i seguenti attributi:
Hanno sempre un nodo radice, come il "Player" nel nostro esempio.
Puoi salvarle sul tuo disco locale e caricarli in seguito.
Puoi creare tutte le istanze di una scena che desideri. Potresti avere cinque o dieci personaggi nel tuo gioco, creati dalla tua scena Character.
Creare la tua prima scena
Creiamo la nostra prima scena con un singolo nodo. Per fare ciò, avrai bisogno di creare un nuovo progetto. Dopo aver aperto il progetto, dovresti vedere un editor vuoto.
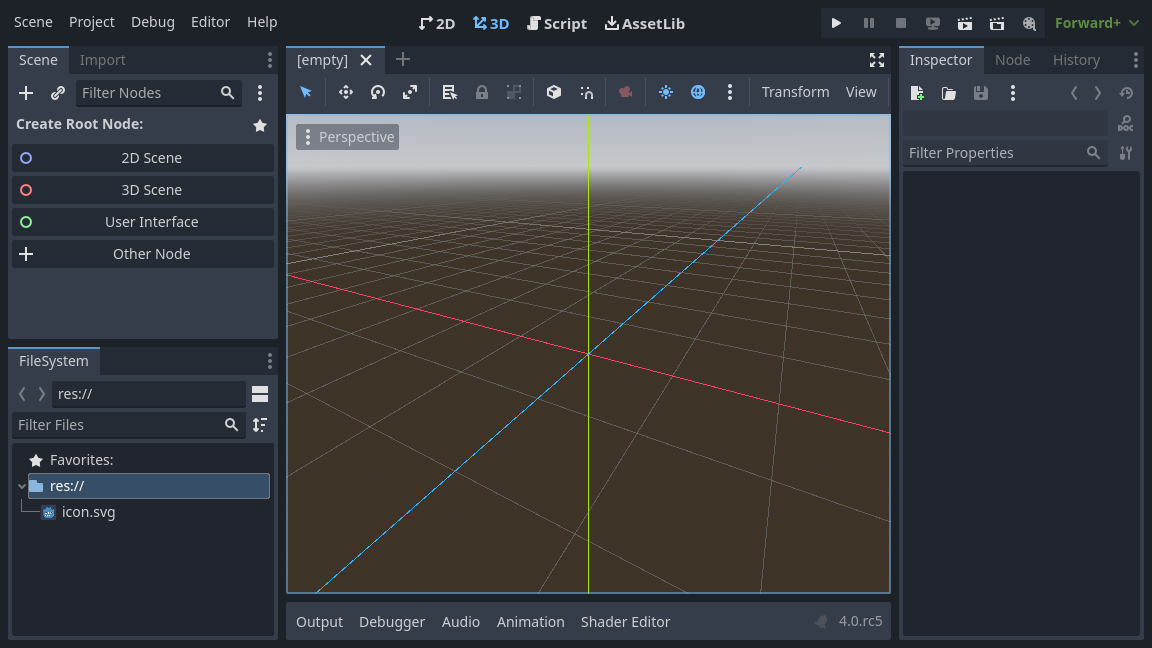
In una scena vuota, il pannello Scene a sinistra mostra diverse opzioni per aggiungere rapidamente un nodo radice. aggiunge un nodo Node2D, aggiunge un nodo Node3D, aggiunge un nodo Control. Questi scelte esistono per comodità; non sono obbligatorie. ti consente di scegliere qualsiasi nodo come nodo radice. In una scena vuota, equivale al pulsante in alto a sinistra del pannello Scena, che di solito aggiunge un nuovo nodo come figlio del nodo attualmente selezionato.
Aggiungeremo un singolo nodo Label alla nostra scena. La sua funzione è quella di disegnare testo sullo schermo.
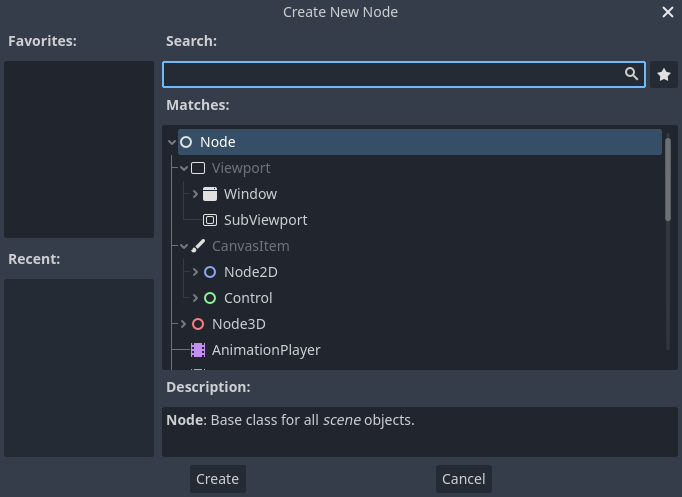
Premi il pulsante o per creare un nodo radice.

Si apre la finestra di dialogo Create New Node, che mostra il lungo elenco dei nodi disponibili.
Seleziona il nodo Label. Puoi scrivere il suo nome per filtrarlo sulla lista.
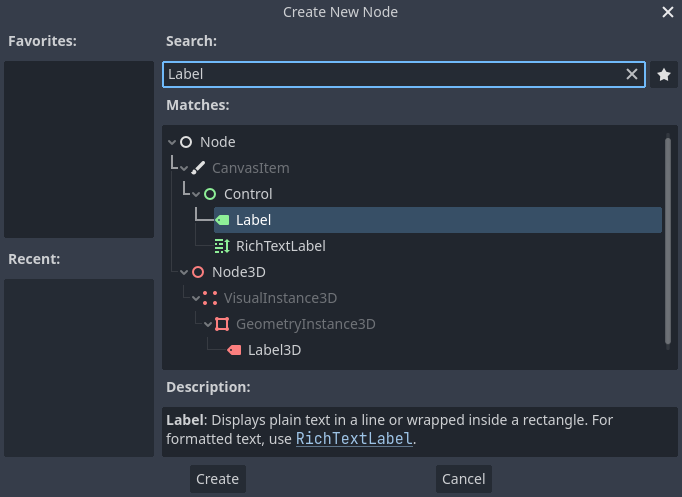
Clicca sul nodo Label per selezionarlo e clicca il pulsante nella parte inferiore della finestra.
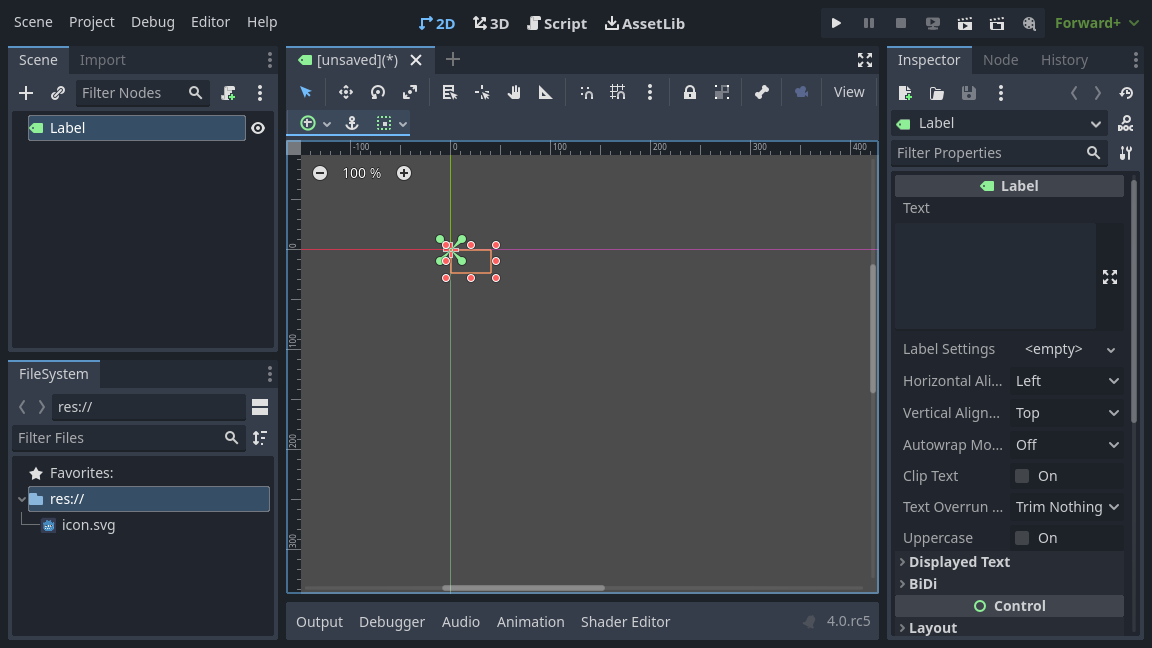
Molto accade quando aggiungi il primo nodo di una scena. La scena cambia dallo spazio di lavoro 2D perché Label è un nodo di tipo 2D. La Label appare, selezionata, nell'angolo in alto a sinistra della Viewport. Il nodo appare nel pannello Scene sulla sinistra, e le proprietà del nodo appaiono nel pannello Ispettore sulla destra.
Modifica delle proprietà di un nodo
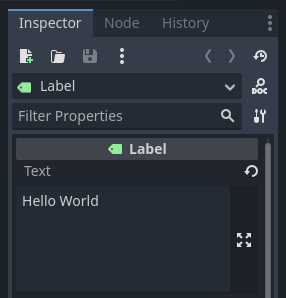
Il prossimo passaggio consiste nel modificare la proprietà Text del Label. Cambiamola in "Hello World".
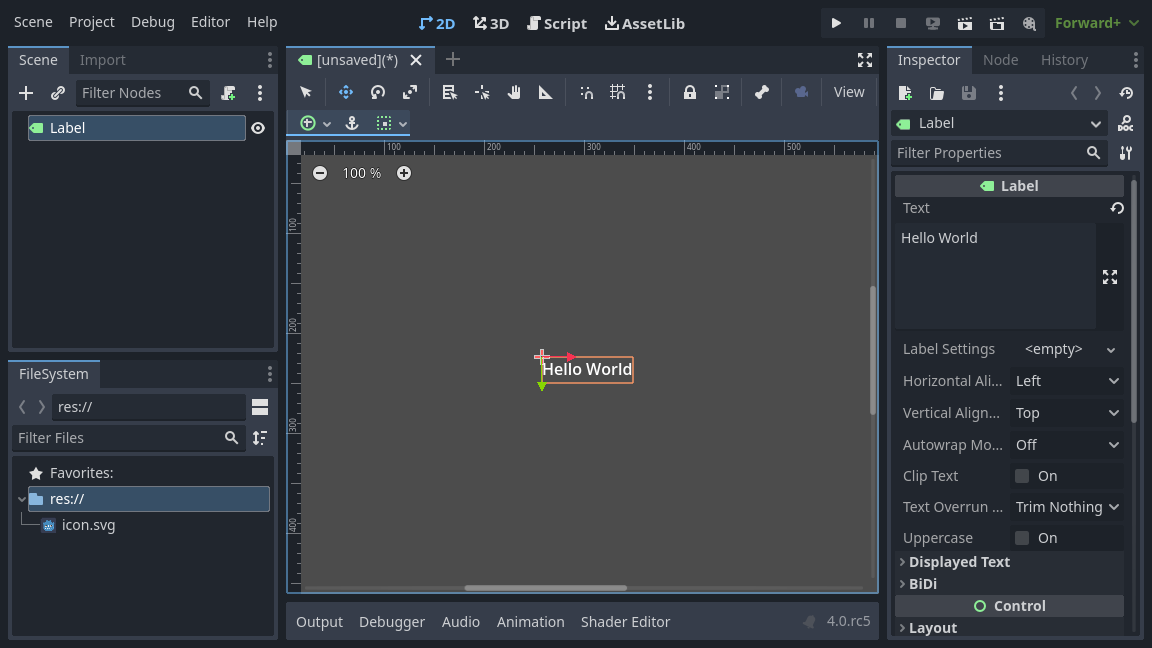
Muoviti sul pannello Ispettore sulla destra della viewport. Clicca dentro il campo sotto la proprietà Text e scrivi "Hello World".
Mentre digiti, vedrai il testo che si disegna nella viewport.
Vedi anche
Puoi modificare qualsiasi proprietà elencata nell'Ispettore come abbiamo fatto con Text. Per un riferimento completo del pannello Ispettore, vedi Il pannello Ispettore.
Puoi muovere il tuo nodo Label nella Viewport selezionando lo strumento muovi nella barra degli strumenti.

Con la Label selezionata, premi e trascina ovunque nella Viewport per muoverla al centro della vista delimitata dal rettangolo.
Esecuzione della scena
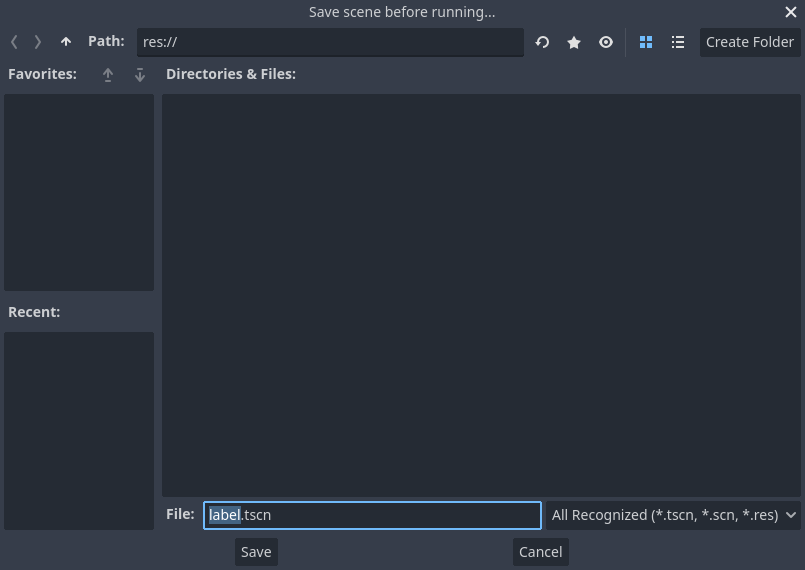
Tutto è pronto per eseguire la scena! Premi il pulsante in alto a destra dello schermo o premi F6 (Cmd + R su macOS).

Un popup ti invita a salvare la scena, il che è necessario per avviarla. Clicca il pulsante nel browser di file per salvarla con il nome label.tscn.
Nota
La finestra di dialogo Save Scene As, come le altre finestre di dialogo dei file nell'editor, consente di salvare i file solo all'interno del progetto. Il percorso res:// in cima alla finestra rappresenta la cartella principale del progetto e sta per "resource path" (percorso delle risorse). Per ulteriori informazioni sui percorsi dei file in Godot, consulta File system.
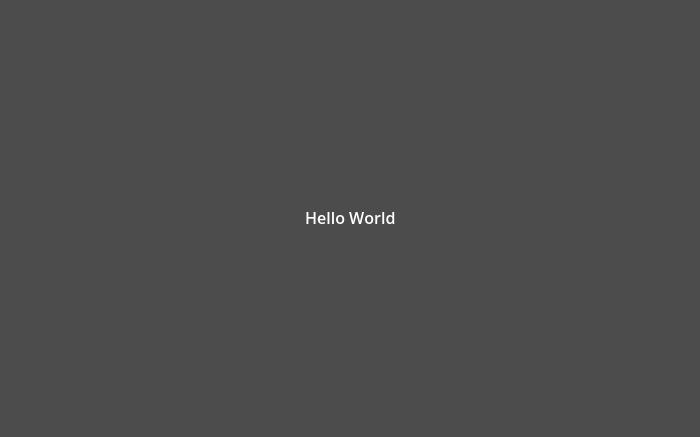
L'applicazione si dovrebbe aprire in una nuova finestra e visualizzare il testo "Hello World".
Chiudi la finestra o premi F8 (Cmd + . su macOS) per uscire dalla scena in esecuzione.
Vedi anche
Consulta Incorporamento del gioco per maggiori informazioni sulla finestra di gioco che appare quando esegui il progetto.
Impostare la scena principale
Per eseguire la nostra scena di prova, abbiamo premuto il pulsante . Un altro pulsante accanto, , ti consente di impostare ed eseguire la scena principale del progetto. Per fare ciò puoi anche premere F5 (Cmd + B su macOS).

Nota
Eseguire la scena principale del progetto è diverso dall'eseguire la scena attuale. Se incontri errori inaspettati, verifica che tu stia eseguendo la scena corretta.
Apparirà una finestra popup che ti inviterà a selezionare la scena principale.
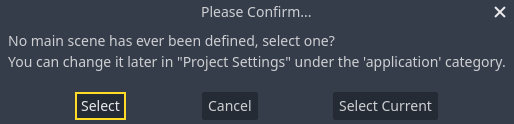
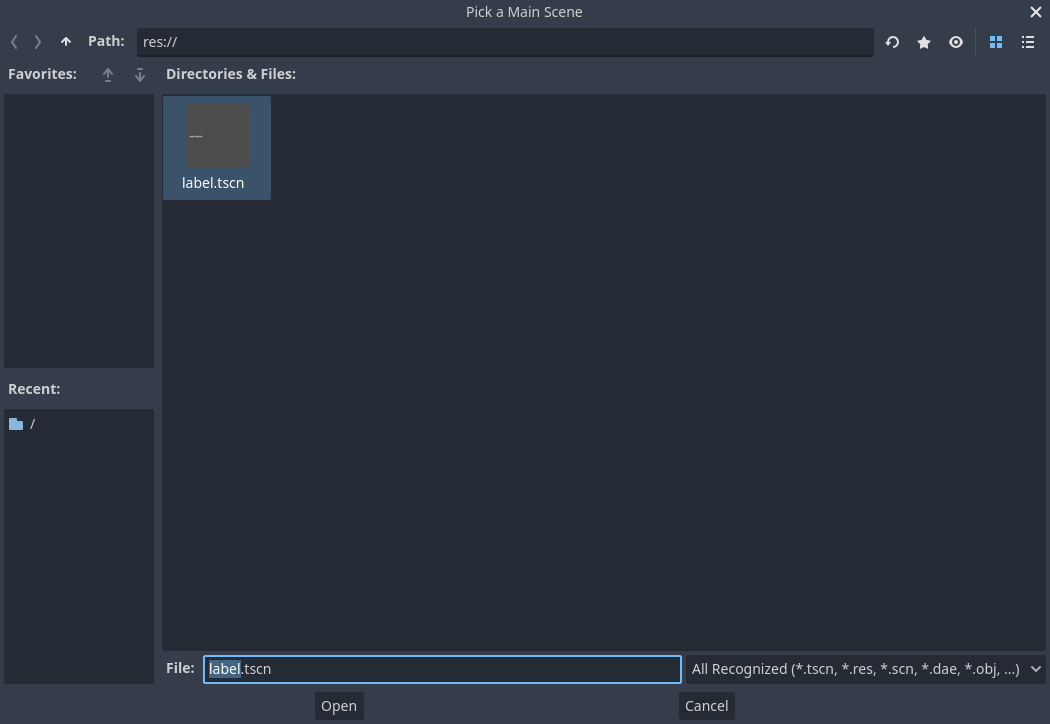
Clicca sul pulsante e, nella finestra di dialogo di file che appare, fai doppio clic su label.tscn.
La dimostrazione si dovrebbe eseguita di nuovo. Andando avanti, ogni volta che eseguirai il progetto, Godot utilizzerà questa scena come punto di partenza.
Nota
L'editor salva il percorso della scena principale in un file project.godot nella cartella del progetto. Sebbene sia possibile modificare direttamente questo file di testo per cambiare le impostazioni del progetto, si può anche fare ciò dalla finestra . Per maggiori informazioni, consulta Impostazioni del progetto.
Nella prossima parte, discuteremo un altro concetto chiave nei giochi e in Godot: la creazione di istanze di una scena.