Attention: Here be dragons
This is the latest
(unstable) version of this documentation, which may document features
not available in or compatible with released stable versions of Godot.
Checking the stable version of the documentation...
Счет и повтор
В этой части мы добавим счёт, воспроизведение музыки и возможность перезапуска игры.
Нам нужно отслеживать текущий счёт в переменной и выводить его на экран с помощью минимального интерфейса. Для этого мы будем использовать текстовый ярлык.
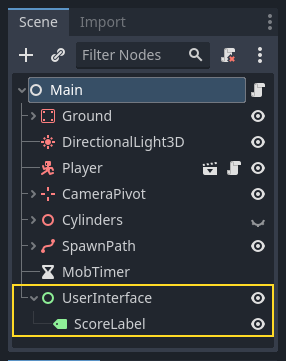
В основной сцене добавьте новый дочерний узел Control в качестве дочернего узла Main и назовите его UserInterface. Вы автоматически попадете на экран 2D, где можно редактировать пользовательский интерфейс (UI).
Добавьте узел Label и назовите его ScoreLabel
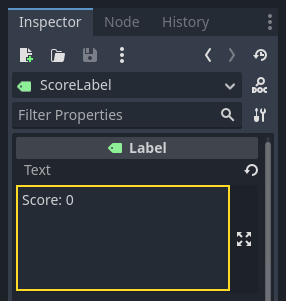
В инспекторе установите для параметра Text узла Label значение "Score: 0".
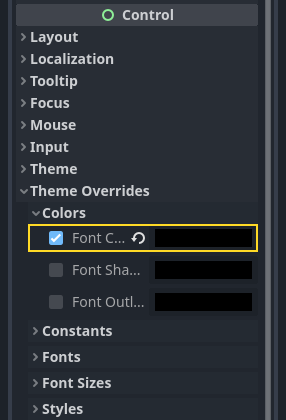
Кроме того, по умолчанию текст белый, как и фон нашей игры. Нам нужно изменить его цвет, чтобы увидеть его во время выполнения.
Прокрутите вниз до Theme Overrides, разверните Colors и включите Font Color, чтобы оттенить текст (который хорошо контрастирует с 3D сценой)
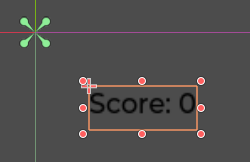
Наконец, нажмите и перетащите текст в области просмотра, чтобы переместить его от левого верхнего угла.
Узел UserInterface позволяет нам сгруппировать наш пользовательский интерфейс в ветку дерева сцены и использовать ресурс темы, который будет распространяться на все его дочерние элементы. Мы будем использовать его для установки шрифта нашей игры.
Создание темы интерфейса
Снова выберите узел *UserInterface. В инспекторе создайте новый ресурс темы в Theme -> Theme.
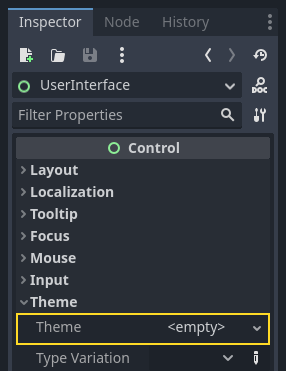
Нажмите на него, чтобы открыть редактор темы в нижней панели. Он даёт вам предварительный просмотр того, как все встроенные виджеты пользовательского интерфейса будут выглядеть с вашим ресурсом темы.
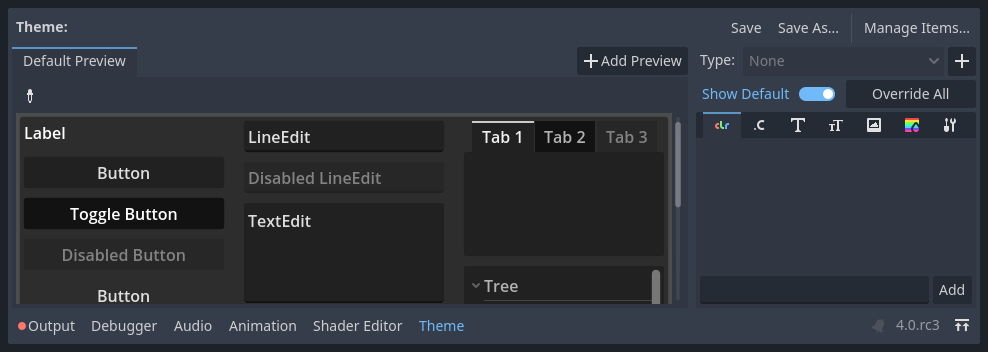
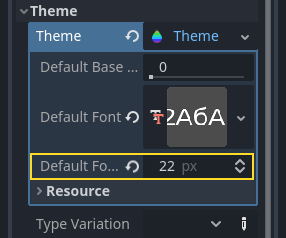
По умолчанию тема имеет только несколько свойств: Default Base Scale, Default Font и Default Font Size.
См. также
Вы можете добавить больше свойств к ресурсу темы для разработки сложных пользовательских интерфейсов, но это выходит за рамки данной серии статей. Чтобы узнать больше о создании и редактировании тем, смотрите Введение в skinning графического интерфейса.
Default Font требует файла шрифтов подобных тем, что есть у вас на вашем компьютере. Двумя распространенными форматами файлов шрифтов являются TrueType Font (TTF) и OpenType Font (OTF).
В панели Файловая система разверните каталог fonts, щёлкните и перетащите файл Montserrat-Medium.ttf, который мы включили в проект, на Default Font. Текст снова появится в предварительном просмотре темы.
Текст немного мелковат. Установите Default Font Size на 22 пикселя, чтобы увеличить размер текста.
Отслеживание счета
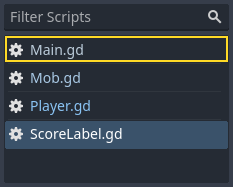
Далее поработаем со счётом игры. Прикрепите новый скрипт к ScoreLabel и определите переменную score.
extends Label

var score = 0
using Godot;

public partial class ScoreLabel : Label
{
    private int _score = 0;
}
Счёт должен увеличиваться на 1 каждый раз, когда мы раздавливаем монстра. Мы можем использовать их сигнал squashed, чтобы узнать, когда это произойдет. Однако, поскольку мы создаём экземпляры монстров из кода, мы не можем соединить сигнал моба к ScoreLabel в редакторе.
Вместо этого нам придётся создавать связь из кода каждый раз, когда мы порождаем монстра.
Откройте скрипт main.gd. Если он всё ещё открыт, вы можете щёлкнуть по его названию в левой колонке редактора скриптов.
Также можно дважды щёлкнуть файл main.gd в панели Файловая система.
В нижней части функции _on_mob_timer_timeout() добавьте следующую строку:
func _on_mob_timer_timeout():
    #...
    # We connect the mob to the score label to update the score upon squashing one.
    mob.squashed.connect($UserInterface/ScoreLabel._on_mob_squashed.bind())
private void OnMobTimerTimeout()
{
    // ...
    // We connect the mob to the score label to update the score upon squashing one.
    mob.Squashed += GetNode<ScoreLabel>("UserInterface/ScoreLabel").OnMobSquashed;
}
Эта строка означает, что когда моб отправит сигнал squashed, узел ScoreLabel примет его и вызовет функцию _on_mob_squashed().
Вернитесь к скрипту score_label.gd, чтобы определить функцию обратного вызова _on_mob_squashed().
Там мы увеличиваем счёт и обновляем отображаемый текст.
func _on_mob_squashed():
    score += 1
    text = "Score: %s" % score
public void OnMobSquashed()
{
    _score += 1;
    Text = $"Score: {_score}";
}
Вторая строка использует значение переменной score для замены заполнителя %s. При использовании этой функции Godot автоматически преобразует значения в текст, что удобно для вывода текста в ярлыках или с помощью функции print().
См. также
Подробнее о форматировании строк можно узнать здесь: Форматирование строки GDScript. В C# можно использовать интерполяцию строк с помощью "$".
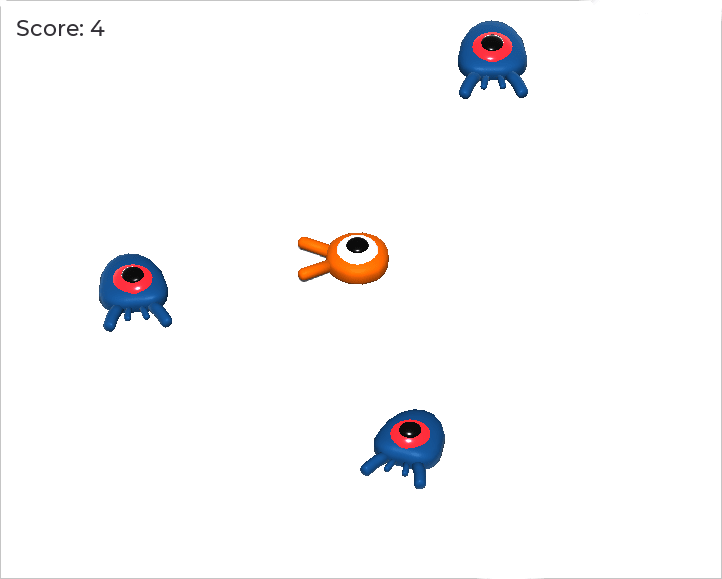
Теперь вы можете играть в игру и раздавить несколько врагов, чтобы увидеть, как увеличивается счёт.
Примечание
В сложной игре вы можете захотеть полностью отделить пользовательский интерфейс от игрового мира. В этом случае вы не будете отслеживать счёт на метке. Вместо этого вы, возможно, захотите хранить его в отдельном, выделенном объекте. Но когда вы создаёте прототип или ваш проект прост, вполне можно ограничиться простым кодом. Программирование - это всегда баланс.
Повторная попытка в игре
Теперь мы добавим возможность играть снова после смерти. Когда игрок умирает, мы выводим сообщение на экран и ждём ввода.
Вернитесь к сцене main.tscn, выберите узел UserInterface, добавьте дочерний узел ColorRect и назовите его Retry. Этот узел заполняет прямоугольник однородным цветом и будет служить в качестве наложения для затемнения экрана.
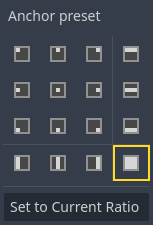
Чтобы сделать его охватывающим весь экран просмотра, можно воспользоваться меню Предустановки значений для якорей и отступов узла Control на панели инструментов.

Откройте его и примените команду Полный прямоугольник.
Ничего не происходит. Точнее, почти ничего: только четыре зеленых штырька перемещаются в углы поля выбора.

Это связано с тем, что узлы пользовательского интерфейса (все узлы с зелёным значком) работают с якорями и полями относительно ограничивающей рамки их родителя. Здесь узел UserInterface имеет небольшой размер, а узел Retry ограничен им.
Выберите UserInterface и примените к нему Предустановка значений для якорей и отступов узла Control -> Полный прямоугольник. Узел *Retry теперь должен занимать всю область просмотра.
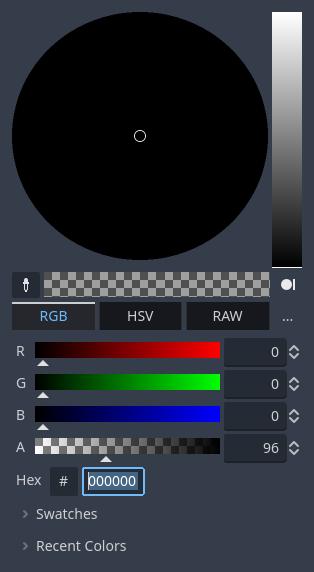
Давайте изменим его цвет, чтобы он затемнял игровую область. Выберите Retry и в инспекторе установите его Color на что-то одновременно тёмное и прозрачное. Для этого в окне выбора цвета перетащите ползунок A влево. Он управляет альфа-каналом цвета, то есть его непрозрачностью.
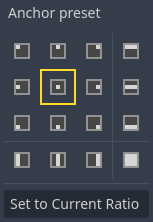
Затем добавьте Label в качестве дочернего элемента Retry и задайте ему Text "Нажмите Enter, чтобы повторить попытку". Чтобы переместить ее и закрепить в центре экрана, примените к ней Предустановка значений для якорей и отступов узла Control -> По центру.
Кодирование опции повторной попытки
Теперь мы можем перейти к коду, показывающему и скрывающему узел Retry, при смерти и повторной попытке поиграть игрока.
Откройте скрипт main.gd. Во-первых, мы хотим скрыть наложение в начале игры. Добавьте эту строку в функцию _ready().
func _ready():
    $UserInterface/Retry.hide()
public override void _Ready()
{
    GetNode<Control>("UserInterface/Retry").Hide();
}
Затем, когда игрок получит удар, мы покажем наложение.
func _on_player_hit():
    #...
    $UserInterface/Retry.show()
private void OnPlayerHit()
{
    //...
    GetNode<Control>("UserInterface/Retry").Show();
}
Наконец, когда узел Retry стал видимым, нам нужно прослушать ввод игрока и перезапустить игру, если он нажмёт клавишу Enter. Для этого мы используем встроенный обратный вызов _unhandled_input(), который запускается при любом вводе.
Если игрок нажал предопределённое входное действие ui_accept и Retry является видимым, то мы перезагружаем текущую сцену.
func _unhandled_input(event):
    if event.is_action_pressed("ui_accept") and $UserInterface/Retry.visible:
        # This restarts the current scene.
        get_tree().reload_current_scene()
public override void _UnhandledInput(InputEvent @event)
{
    if (@event.IsActionPressed("ui_accept") && GetNode<Control>("UserInterface/Retry").Visible)
    {
        // This restarts the current scene.
        GetTree().ReloadCurrentScene();
    }
}
Функция get_tree() предоставляет нам доступ к глобальному объекту SceneTree, который позволяет нам перезагрузить и перезапустить текущую сцену.
Добавление музыки
Чтобы добавить музыку, которая непрерывно играет на заднем плане, мы воспользуемся другой функцией в Godot: автозагрузка.
Для воспроизведения звука достаточно добавить в сцену узел AudioStreamPlayer и прикрепить к нему аудиофайл. При запуске сцены, он может воспроизводиться автоматически. Однако, когда вы перезагрузите сцену, как мы это делаем для повторного воспроизведения, узлы аудио также сбросятся, и музыка начинается с самого начала.
Вы можете использовать функцию автозагрузки, чтобы Godot автоматически загружал узел или сцену в начале игры, вне текущей сцены. Вы также можете использовать её для создания глобально доступных объектов.
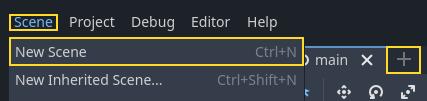
Создайте новую сцену, перейдя в меню Сцена и нажав Новая сцена или используя иконку +.
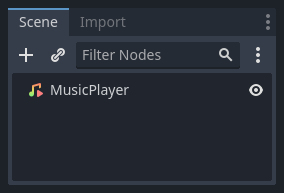
Нажмите кнопку Другой узел, чтобы создать AudioStreamPlayer, и переименуйте его в MusicPlayer.
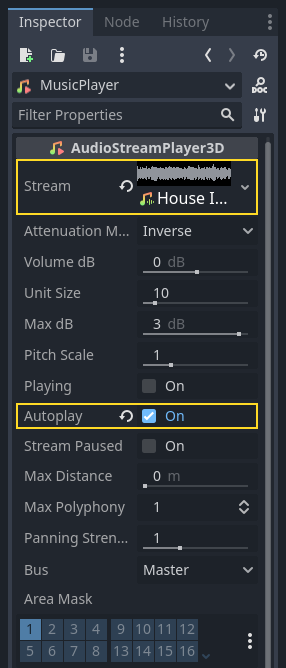
Мы включили музыкальный файл House In a Forest Loop.ogg в каталоге art/. Щёлкните и перетащите его на свойство Stream в инспекторе. Также включите Autoplay, чтобы музыка автоматически проигрывалась в начале игры.
Сохраните сцену как music_player.tscn.
Мы должны зарегистрировать его как автозагрузку. Перейдите в меню Проект -> Настройки проекта… и нажмите на вкладку Глобальные -> Автозагрузка.
В поле Path введите путь к вашей сцене. Щёлкните на иконку папки, чтобы открыть браузер файлов, и дважды щёлкните на music_player.tscn. Затем нажмите кнопку Добавить справа, чтобы зарегистрировать узел.

music_player.tscn теперь загружается в любую сцену, которую вы открываете или играете. Так что если вы запустите игру сейчас, музыка будет играть автоматически в любой сцене.
Прежде чем мы завершим этот урок, вот краткий обзор того, как это работает под капотом. Когда вы запускаете игру, ваша вкладка Сцена изменяется, чтобы показать вам две вкладки: Удалённый и Локальный.

Вкладка Удалённый позволяет визуализировать дерево узлов запущенной игры. Здесь вы увидите узел Main и всё, что содержит сцена, а также экземпляры мобов в нижней части.
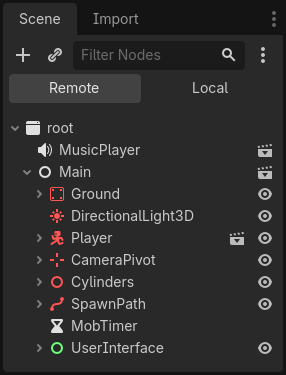
В верхней части находятся автозагружаемый MusicPlayer и корневой узел root, который является экраном вашей игры.
На этом мы закончим этот урок. В следующей части мы добавим анимацию, чтобы игра выглядела и ощущалась гораздо приятнее.
Это полный скрипт main.gd для справки.
extends Node

@export var mob_scene: PackedScene

func _ready():
    $UserInterface/Retry.hide()


func _on_mob_timer_timeout():
    # Create a new instance of the Mob scene.
    var mob = mob_scene.instantiate()

    # Choose a random location on the SpawnPath.
    # We store the reference to the SpawnLocation node.
    var mob_spawn_location = get_node("SpawnPath/SpawnLocation")
    # And give it a random offset.
    mob_spawn_location.progress_ratio = randf()

    var player_position = $Player.position
    mob.initialize(mob_spawn_location.position, player_position)

    # Spawn the mob by adding it to the Main scene.
    add_child(mob)

    # We connect the mob to the score label to update the score upon squashing one.
    mob.squashed.connect($UserInterface/ScoreLabel._on_mob_squashed.bind())

func _on_player_hit():
    $MobTimer.stop()
    $UserInterface/Retry.show()

func _unhandled_input(event):
    if event.is_action_pressed("ui_accept") and $UserInterface/Retry.visible:
        # This restarts the current scene.
        get_tree().reload_current_scene()
using Godot;

public partial class Main : Node
{
    [Export]
    public PackedScene MobScene { get; set; }

    public override void _Ready()
    {
        GetNode<Control>("UserInterface/Retry").Hide();
    }

    public override void _UnhandledInput(InputEvent @event)
    {
        if (@event.IsActionPressed("ui_accept") && GetNode<Control>("UserInterface/Retry").Visible)
        {
            // This restarts the current scene.
            GetTree().ReloadCurrentScene();
        }
    }

    private void OnMobTimerTimeout()
    {
        // Create a new instance of the Mob scene.
        Mob mob = MobScene.Instantiate<Mob>();

        // Choose a random location on the SpawnPath.
        // We store the reference to the SpawnLocation node.
        var mobSpawnLocation = GetNode<PathFollow3D>("SpawnPath/SpawnLocation");
        // And give it a random offset.
        mobSpawnLocation.ProgressRatio = GD.Randf();

        Vector3 playerPosition = GetNode<Player>("Player").position;
        mob.Initialize(mobSpawnLocation.Position, playerPosition);

        // Spawn the mob by adding it to the Main scene.
        AddChild(mob);

        // We connect the mob to the score label to update the score upon squashing one.
        mob.Squashed += GetNode<ScoreLabel>("UserInterface/ScoreLabel").OnMobSquashed;
    }

    private void OnPlayerHit()
    {
        GetNode<Timer>("MobTimer").Stop();
        GetNode<Control>("UserInterface/Retry").Show();
    }
}